| CARDIOHELP System | 6 Repair | 107 |
Service Manual | 3.3 | EN | 05
Copyright Maquet Cardiopulmonary GmbH
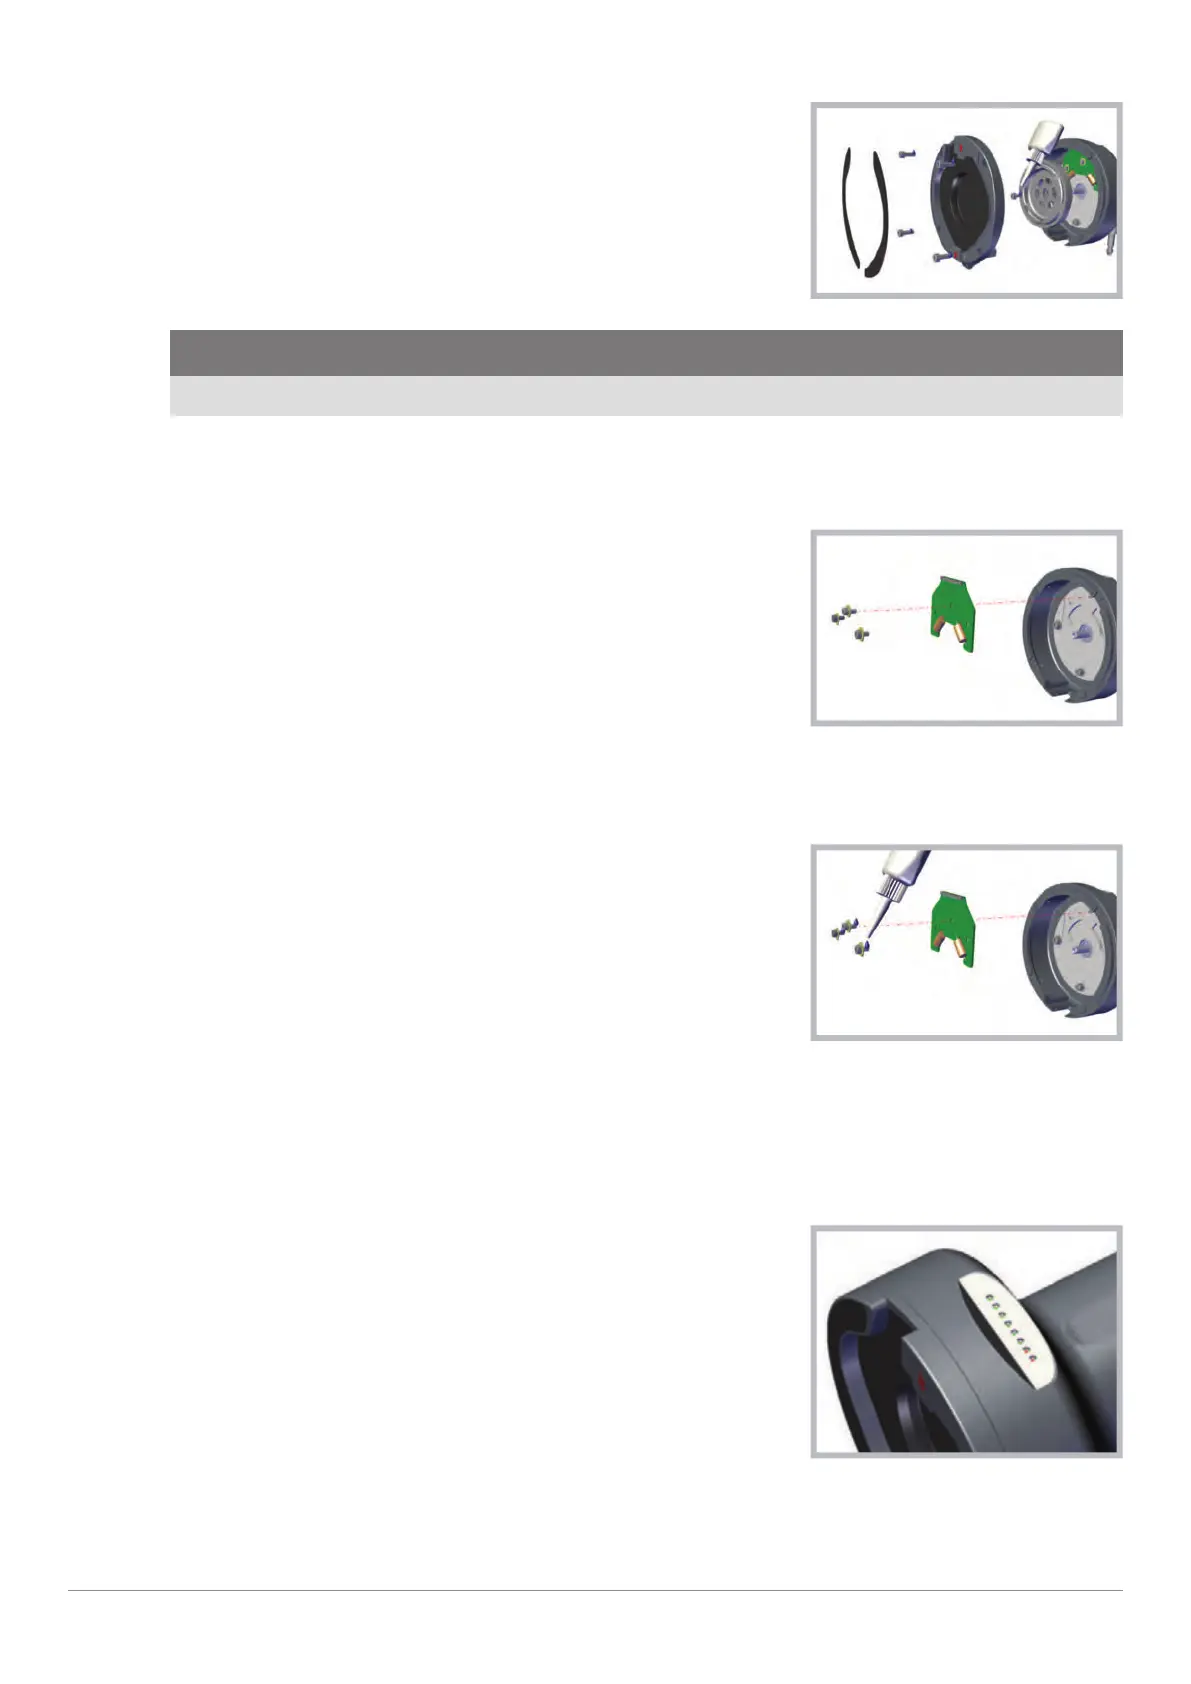
▶ Attach the emergency drive and screw in the M3 screws with
the plastic washer, with a torque of 0.75 Nm and Loctite 270.
Reassemble
CAUTION!
Secure all screws with Loctite 270.
7 Carry out a complete inspection (⇨ "Inspection", page 33).
u Inspection after repair has been carried out.
6.4.2 Replacing the Emergency Drive PCB
1 Dismantling the emergency drive (⇨ "Dismantling the Emergency
Drive", page 106).
Emergency drive PCB
2 Replace the emergency drive PCB.
3 Remove the faulty emergency drive PCB and place it on the the ESD workstation.
4 Remove the new emergency drive PCB from its original packaging.
5 Attach the emergency drive with a force of 0.75 Nm and Loctite
270 and using an M3 screw, screw in the metal screws with plastic
washer.
Emergency drive PCB
6 Mount the emergency drive (⇨ "Dismantling the Emergency Drive", page 106).
7 Carry out a complete inspection (⇨ "Inspection", page 33).
u Emergency drive PCB replaced.
u Inspection after repair has been carried out.
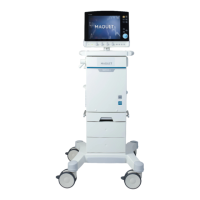
6.4.3 Replacing the Emergency Drive LED Foil
1 Remove the LED foil.
LED foil
2 Clean the the adhesive surface on the housing. It must be free of adhesive residue and grease.
3 Stick the new LED foil onto the housing.