SECTION 4—SEAT
Part No. 1125038 43 Pronto
®
M91™and M94™
ASBA Seat Service Procedures
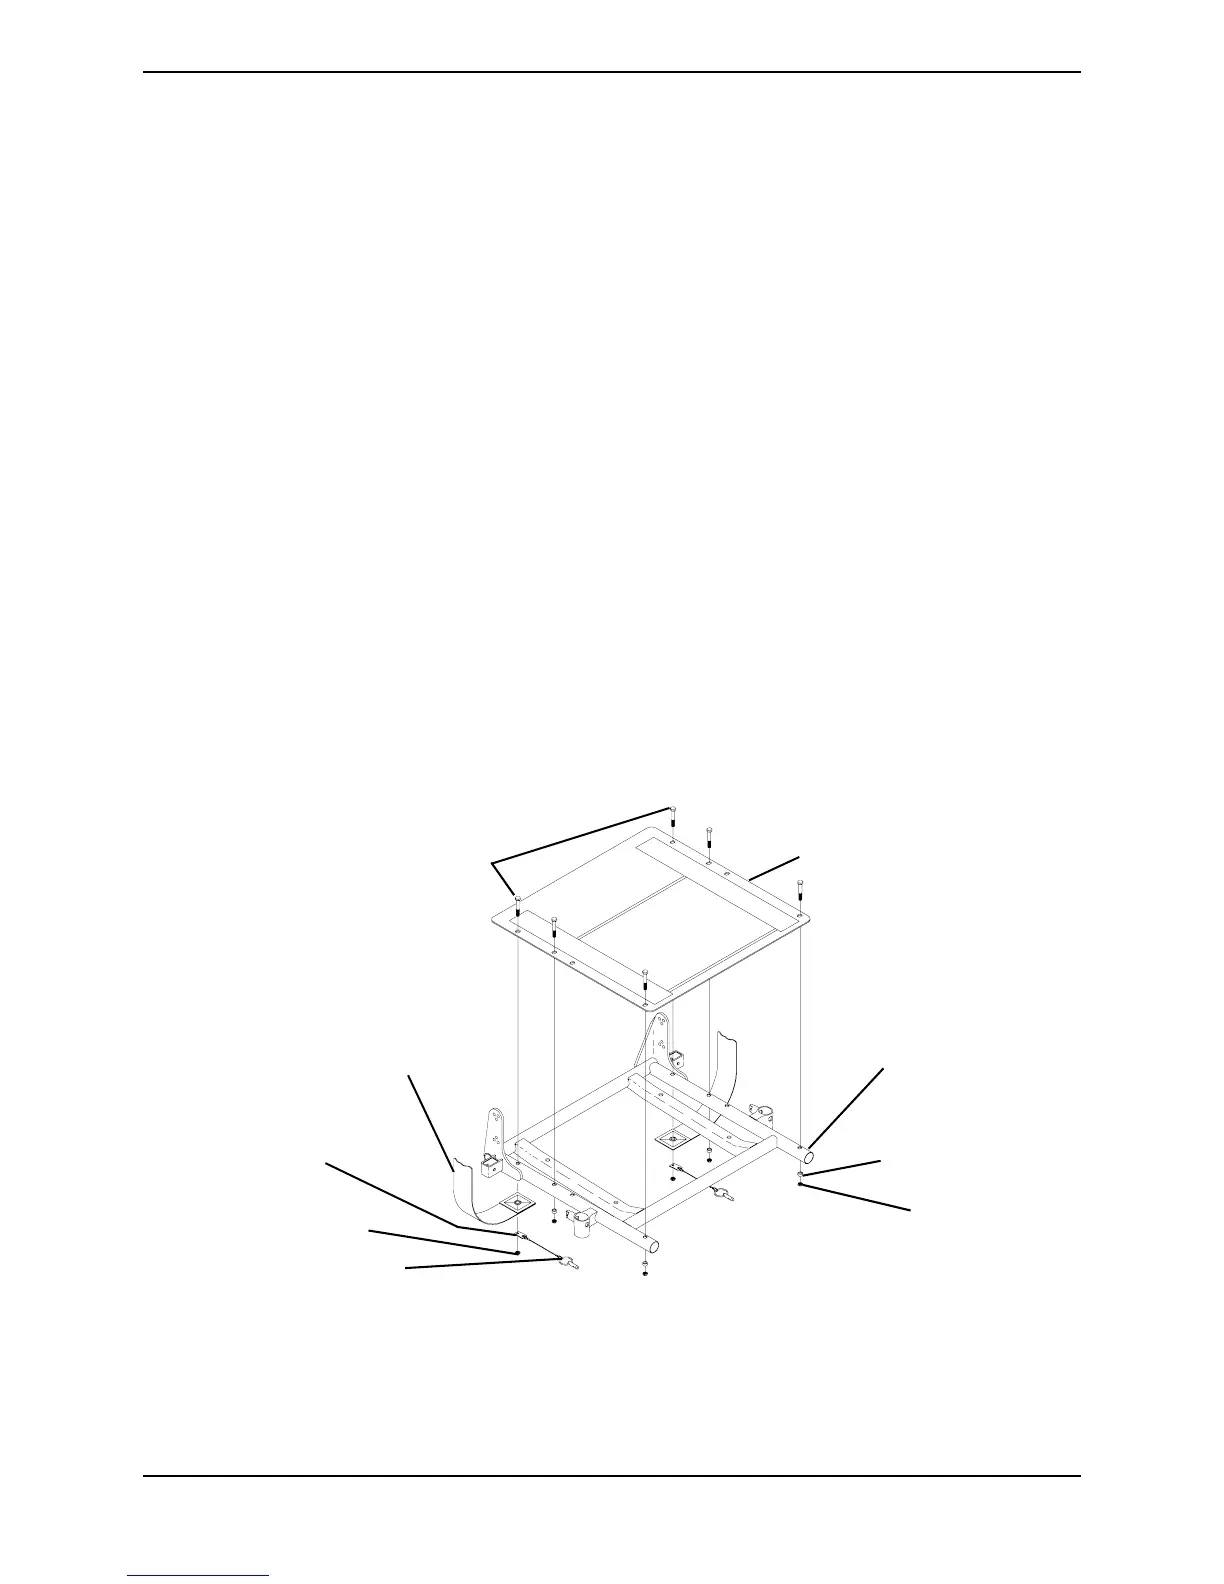
Removing/Installing the Seat Pan
NOTE:Forthisprocedure,refertoFIGURE 4.6.
NOTE:Takenoteofthepositionandorientationofthemountinghardware,seatpositioningstraps
andquickreleasepintabsforinstallationoftheseatpan.
NOTE:Reversethisproceduretoinstalltheseatpan.Torquelocknutsto75‐inch‐lbs.
1. Performoneofthefollowing:
•Removeseatingsystem.Refertomanufacturer’sseatingsysteminstallation
instructions.
•RemovecushionbypullingUPtoreleasehookandloopstrips.Removecushion
fromseatpan.
2. Removethetworearmountingscrews,quickreleasepintabs,spacersandlocknuts
thatsecuretheseatpanandseatpositioningstrapstotheseatframe.
NOTE:Thetwofrontmountingscrews,spacersandlocknutsalsosecurethefrontriggingsupport
tubestotheseatframe.
3. Removethefourmountingscrews,locknutsandfourspacerssecuringtheseatpanto
theseatframe(FIGURE 4.6).
4. Removetheseatpanfromtheseatframe.
FIGURE 4.6 Removing/Installing the Seat Pan
Seat Pan
Seat Frame
Seat
Positioning
Strap
Locknut
Quick Release Pin
Mounting Screws
Tab
Locknut
Spacer

 Loading...