SECTION 6—FRONT RIGGINGS
Part No. 1125038 71 Pronto
®
M91™and M94™
SECTION 6—FRONT RIGGINGS
WARNING
After ANY adjustments, repair or service and BEFORE use, make sure that all
attaching hardware is tightened securely - otherwise injury or damage may result.
DO NOT stand on the front riggings, otherwise damage may occur. When getting
in or out of the wheelchair, make sure that the footplates on the front riggings are
in the upward position or moved out of the way.
Before performing any maintenance, adjustment or service verify that On/Off
switch on the joystick is in the OFF position.
WARNING
While the wheelchair is moving, minimum ground clearance for the front rigging is
three inches. If the wheelchair is not moving, the front rigging MUST maintain a mini-
mum of one inch ground clearance - otherwise personal injury and damage may result.
Installing/Removing Front Riggings
NOTE:Forthisprocedure,refertoFIGURE 6.1.
Installing
1. Ifnecessary,removethefootboard.
RefertoRemoving/Installingthe
FootboardAssemblyonpage 78.
2. Turnfrontriggingtotheside(open
footplateisperpendiculartowheelchair)
andpositionmountingholesinthefront
rigginghingeplateswithhingepinson
thewheelchairfr ame.
3. Installthefrontrigginghingeplatesonto
thehingepinsonthewheelchairframe.
4. Pushthefrontriggingtowardsthe
insideofthewheelchairuntilitlocks
intoplace.
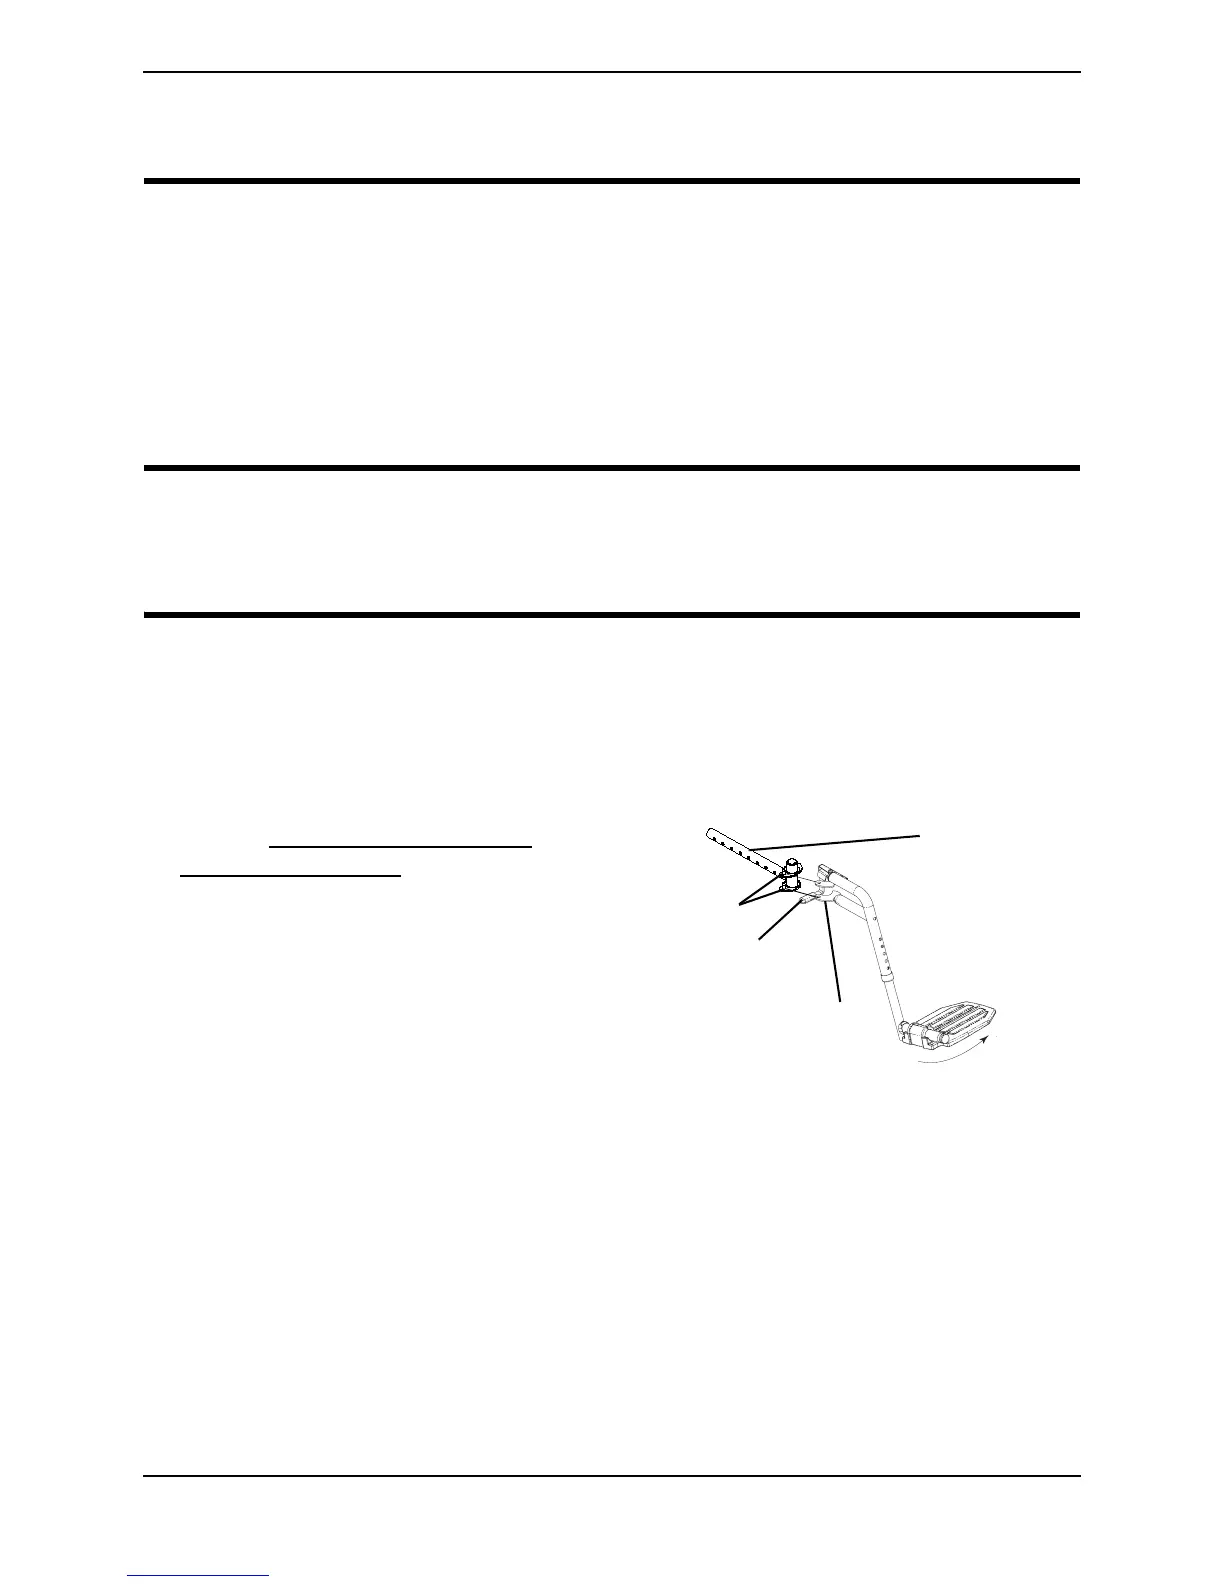
FIGURE 6.1 Installing/Removing Front
Riggings
NOTE:Thefootplatewillbeontheinsideofthewheelchairwhenlockedinplace.
5. RepeatSTEPS2‐4foroppositesideofwheelchair.
Removing
1. Pushthefrontriggingreleaseleverinwardandrotatethefootrestout.
2. Liftuponfrontriggingandremovefromthewheelchair.
3. RepeatSTEPS1‐2foroppositesideofwheelchair.
Telescoping
Front Rigging
Support
Front Rigging
Release Lever
Front Rigging
Hinge Plate
Hinge
Pins

 Loading...