FUEL SYSTEM
CARBURETOR
Cleaning
Wash filter element with clean solvent and a
brush.
Do
not dry parts with a cloth
as
lint might
stick to the parts
and
clog the passages. Dissolve
any gummy deposits with
Cleaning Solvent.
Assembly
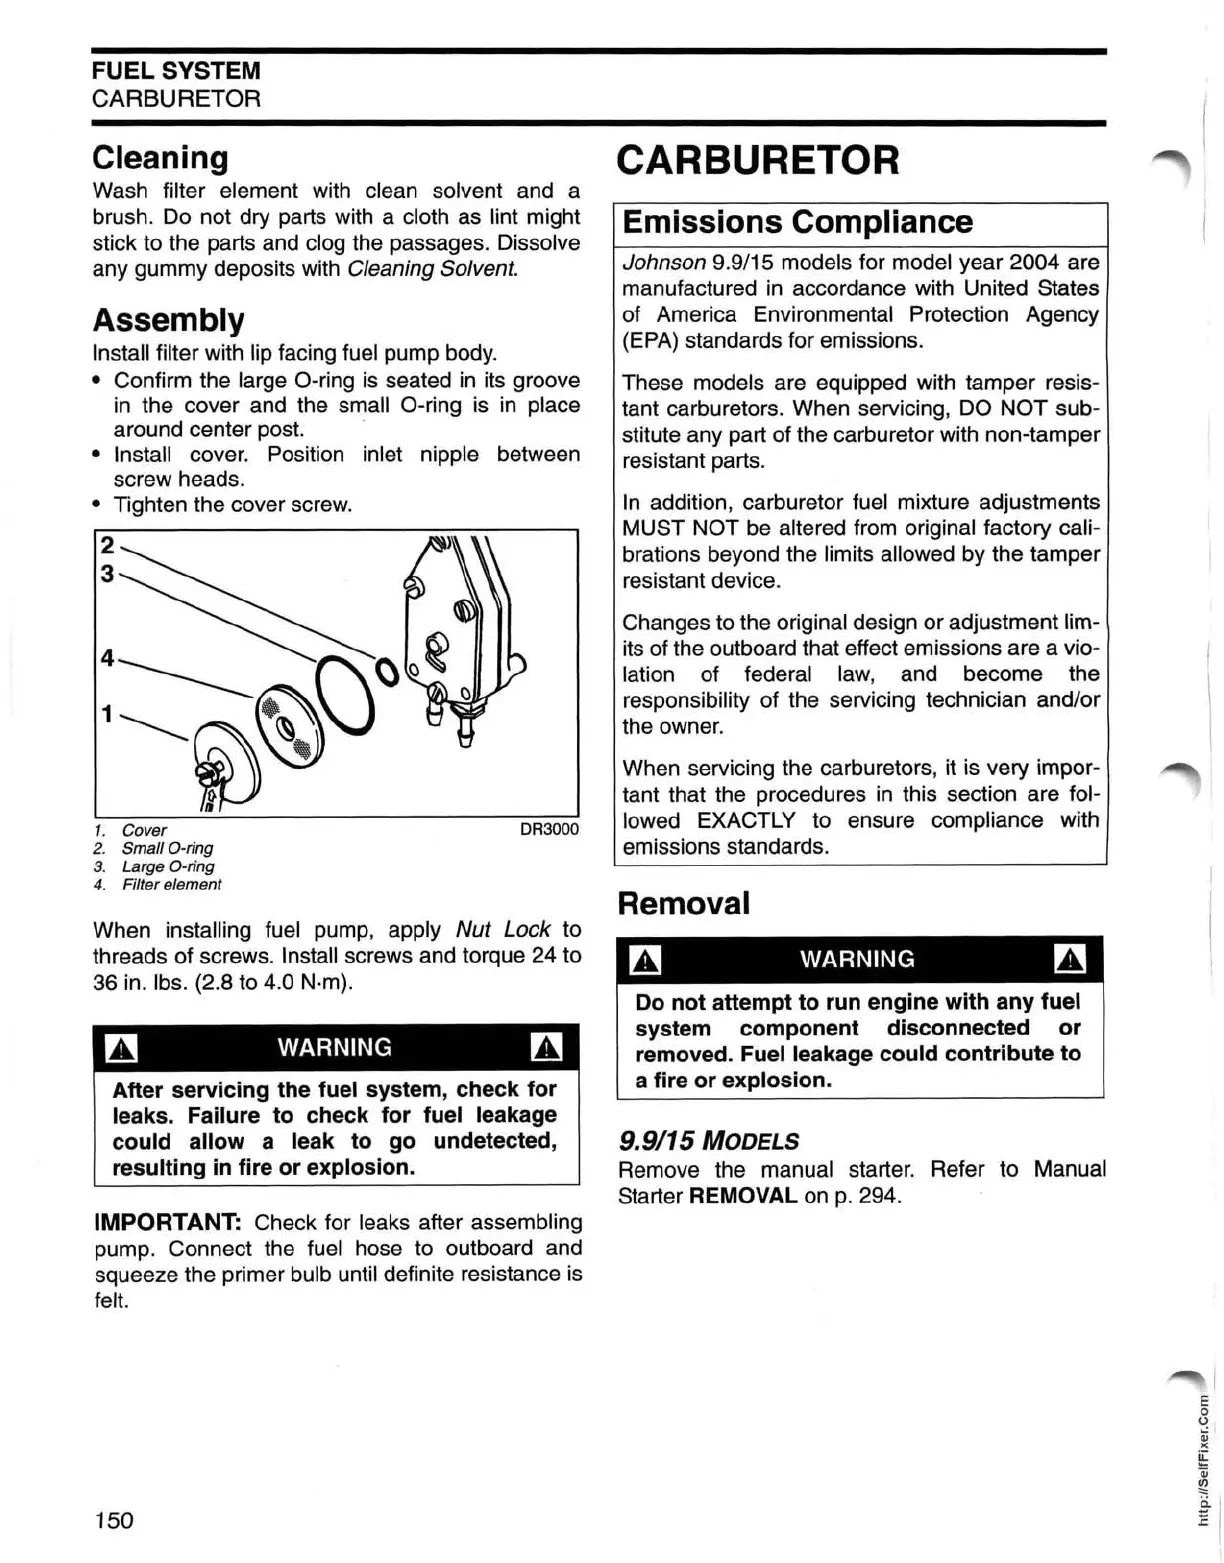
Install filter with lip facing fuel pump
body.
• Confirm the large O-ring
is
seated
in
its groove
in
the cover and the small O-ring
is
in
place
around center post.
• Install cover. Position inlet nipple between
screw heads.
• Tighten the cover
screw.
2
3
1.
Cover
2.
Small O-ring
3. Large O-ring
4. Filter element
DR3000
When installing fuel pump, apply Nut Lock to
threads of screws.
Install screws and torque 24 to
36
in.
Ibs. (2.8 to 4.0 N·m).
~
WARNING
~
After
servicing
the fuel system,
check
for
leaks. Failure
to
check
for
fuel leakage
could
allow
a leak
to
go
undetected,
resulting
in fire
or
explosion.
IMPORTANT: Check for leaks after assembling
pump. Connect the fuel hose to outboard
and
squeeze the primer bulb until definite resistance
is
felt.
150
CARBURETOR
Emissions Compliance
Johnson 9.9/15 models for model year 2004 are
manufactured
in
accordance with United States
of America Environmental Protection Agency
(EPA)
standards for emissions.
These models are equipped with tamper resis-
tant carburetors. When servicing,
DO
NOT sub-
stitute any part of the carburetor with non-tamper
resistant parts.
In
addition, carburetor fuel mixture adjustments
MUST NOT be altered
from
original factory cali-
brations beyond the limits allowed by the tamper
resistant device.
Changes to the original design or adjustment lim-
its of the outboard that effect emissions are a vio-
lation of federal
law,
and become the
responsibility of the servicing technician and/or
the owner.
When servicing the carburetors, it is very impor-
tant that the procedures
in
this section are fol-
lowed EXACTLY to ensure compliance with
emissions standards.
Removal
~
WARNING
~
Do
not
attempt
to
run engine
with
any fuel
system
component
disconnected
or
removed. Fuel leakage could
contribute
to
a fire
or
explosion.
9.9/15
MODELS
Remove the manual starter. Refer to Manual
Starter REMOVAL
on
p.
294.
E
o
o
..:
,
'"
><
~
OJ
~
~
I
 Loading...