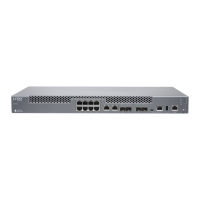
Connecting an MX5, MX10, MX40, and MX80 DC Power Supply Cable
WARNING: Before performing DC power procedures, ensure that power is
removed from the DC circuit. To ensure that all power is off, locate the circuit
breaker on the panel board that services the DC circuit, switch the circuit
breaker to the off position, and tape the switch handle of the circuit breaker
in the off position.
To connect a power cable for a DC power supply:
1. Locate a replacement power cable that meets the specifications.
2. Verify that a licensed electrician has attached a cable lug to the replacement power
cable.
3. Verify that the status LED is off.
4. Secure each power cable lug to the terminal with the screw (see Figure 56 on page 125).
Apply between 5 lb-in. (0.6 Nm) and 6 lb-in. (0.7 Nm) of torque to screw. Do not
overtighten the nut. (Use a number 2 Phillips screwdriver.)
a. Secure the positive (+) DC source power cable lug to the RTN (return) terminal.
b. Secure the negative (–) DC source power cable lug to the –48V (input) terminal.
CAUTION: Ensurethat each power cablelug seats flush againstthe surface
of the terminal block as you are tightening the screws. Ensure that each
screw is properly threaded into the terminal. Applying installation torque
to the screw when improperly threaded may result in damage to the
terminal.
CAUTION: The maximum torque rating of the terminal screws on the DC
power supply is 6 lb-in. (0.7 Nm). The terminal screws may be damaged
if excessivetorque is applied. Use only a torque-controlled driver to tighten
screws on the DC power supply terminals. Use an appropriately-sized
driver, with a maximum torque capacity of 6 lb-in. or less. Ensure that the
driver is undamaged and properly calibrated and that you have been
trained in its use. You may wish to use a driver that is designed to prevent
overtorque when the preset torque level is achieved.
Copyright © 2019, Juniper Networks, Inc.124
MX5, MX10, MX40, and MX80 Universal Routing Platforms Hardware Guide

 Loading...