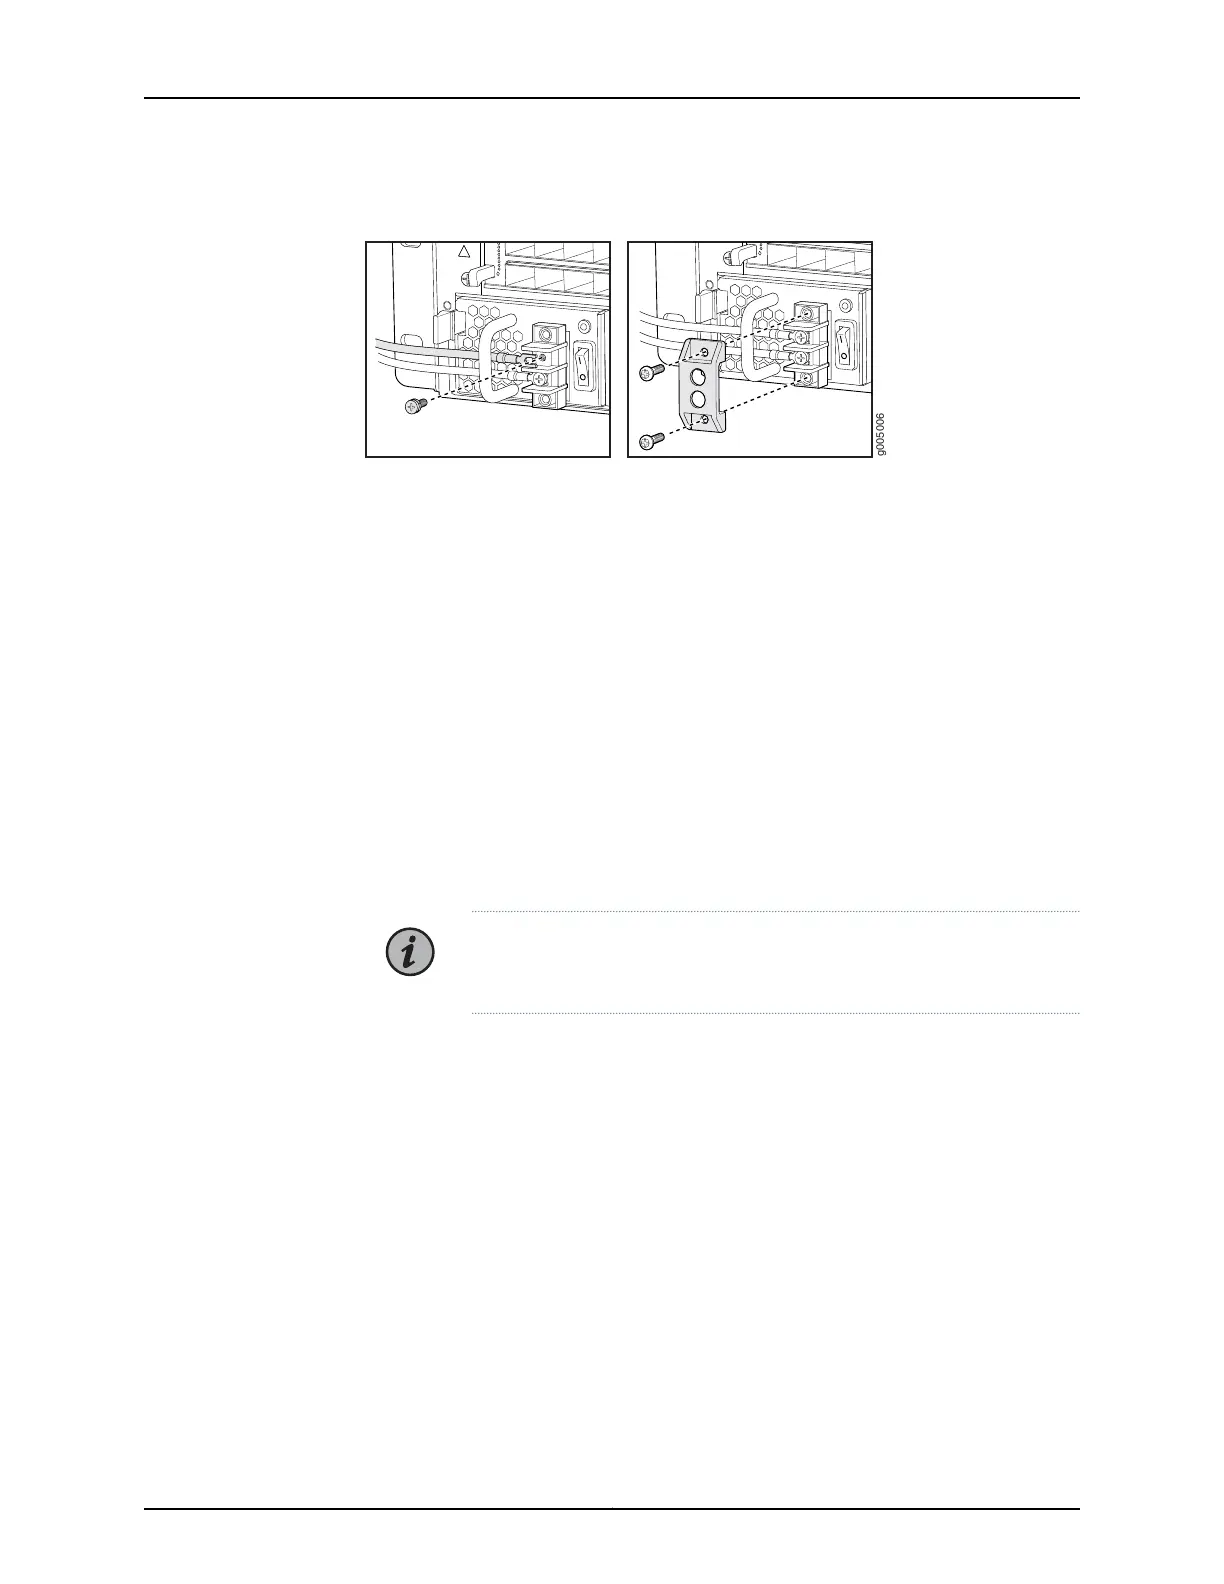
Figure 56: Connecting Power Cables to the DC Power Supply
5. Verify that the DC power cable is connected correctly, that it does not touch or block
access to router components, and that it does not drape where people could trip on
it.
6. Replace the clear plastic cover over the terminals on the faceplate.
7. Attach the power cable to the DC power source.
8. Turn on the dedicated customer site circuit breaker to the power supply.
9. Verify that the status LED on the power supply is lit green steadily.
10. On each of the DC power supplies, switch the DC circuit breaker to the center position
before moving it to the on ( | ) position.
NOTE: The circuit breaker may bounce back to the off (O) position if you
move the breaker too quickly.
Observe the status LED on the power supply faceplate. If the power supply is correctly
installed and functioning normally, the status LED lights green steadily.
See Also • MX5, MX10, MX40, and MX80 Power System Description on page 32
• Installing an MX5, MX10, MX40, and MX80 DC Power Supply on page 120
• Disconnecting an MX5, MX10, MX40, and MX80 DC Power Supply Cable on page 123
• Preventing Electrostatic Discharge Damage to an MX5, MX10, MX40, and MX80 Router
on page 146
• MX5, MX10, MX40, and MX80 Routers DC Power Specifications on page 39
• DC Power Circuit Breaker Requirements for the MX5, MX10, MX40, and MX80 Routers
on page 41
• DC Power Source Cabling for MX5, MX10, MX40, and MX80 Routers on page 41
125Copyright © 2019, Juniper Networks, Inc.
Chapter 4: Maintaining Components

 Loading...