•
See “Connecting MX5, MX10, MX40, and MX80 Routers to Management Devices”
on page 91.
•
See Connecting Interface Cables to MX5, MX10, MX40, and MX80 Routers.
7. Connect the grounding cable.
See “Grounding MX5, MX10, MX40, and MX80 Routers” on page 83.
8. Connect the AC power cord or DC power cables:
•
See “Connecting Power to an AC-Powered MX5, MX10, MX40, and MX80 Router”
on page 84.
•
See “Connecting Power to a DC-Powered MX5, MX10, MX40, and MX80 Router”
on page 86.
9. Power on the router:
•
See “Powering On an AC-Powered MX5, MX10, MX40, and MX80 Router” on page 85.
•
See “Powering On a DC-Powered MX5, MX10, MX40, and MX80 Router” on page 88.
10. Perform the initial system configuration.
See “Initially Configuring MX5, MX10, MX40, and MX80 Routers” on page 93.
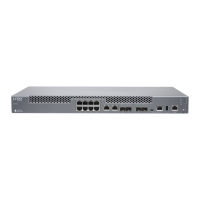
Unpacking and Mounting the MX5, MX10, MX40, and MX80
•
Tools and Parts Required to Unpack MX5, MX10, MX40, and MX80 Routers on page 76
•
Unpacking MX5, MX10, MX40, and MX80 Routers on page 76
•
Verifying the MX5, MX10, MX40, and MX80 Routers Parts Received on page 77
•
Installing the MX5, MX10, MX40, and MX80 Cable Management Bracket on page 79
•
Moving the Mounting Brackets for Center-Mounting MX5, MX10, MX40, and MX80
Routers on page 79
•
Tools Required to Install MX5, MX10, MX40, and MX80 Chassis in the Rack on page 80
•
Installing MX5, MX10, MX40, and MX80 Chassis in the Rack on page 81
Tools and Parts Required to Unpack MX5, MX10, MX40, and MX80 Routers
To unpack the router and prepare for installation, you need the following tools:
•
Blank panels to cover any slots not occupied by a component
Unpacking MX5, MX10, MX40, and MX80 Routers
The router is shipped in a cardboard carton and secured with foam packing material. The
carton also contains an accessory box and quick start instructions.
NOTE: The router is maximally protected inside the shipping carton. Do not
unpack it until you are ready to begin installation.
Copyright © 2019, Juniper Networks, Inc.76
MX5, MX10, MX40, and MX80 Universal Routing Platforms Hardware Guide

 Loading...