14.1 Time Setting and Display
14 - 3
CLOCK SETTINGS AND BATTERY STATUS DISPLAY (TIME SETTING AND DISPLAY)
14
When change a part of the setting, change the setting by the GOT display setting after
downloading the project data.
➠ GT Designer3 (GOT2000) Help
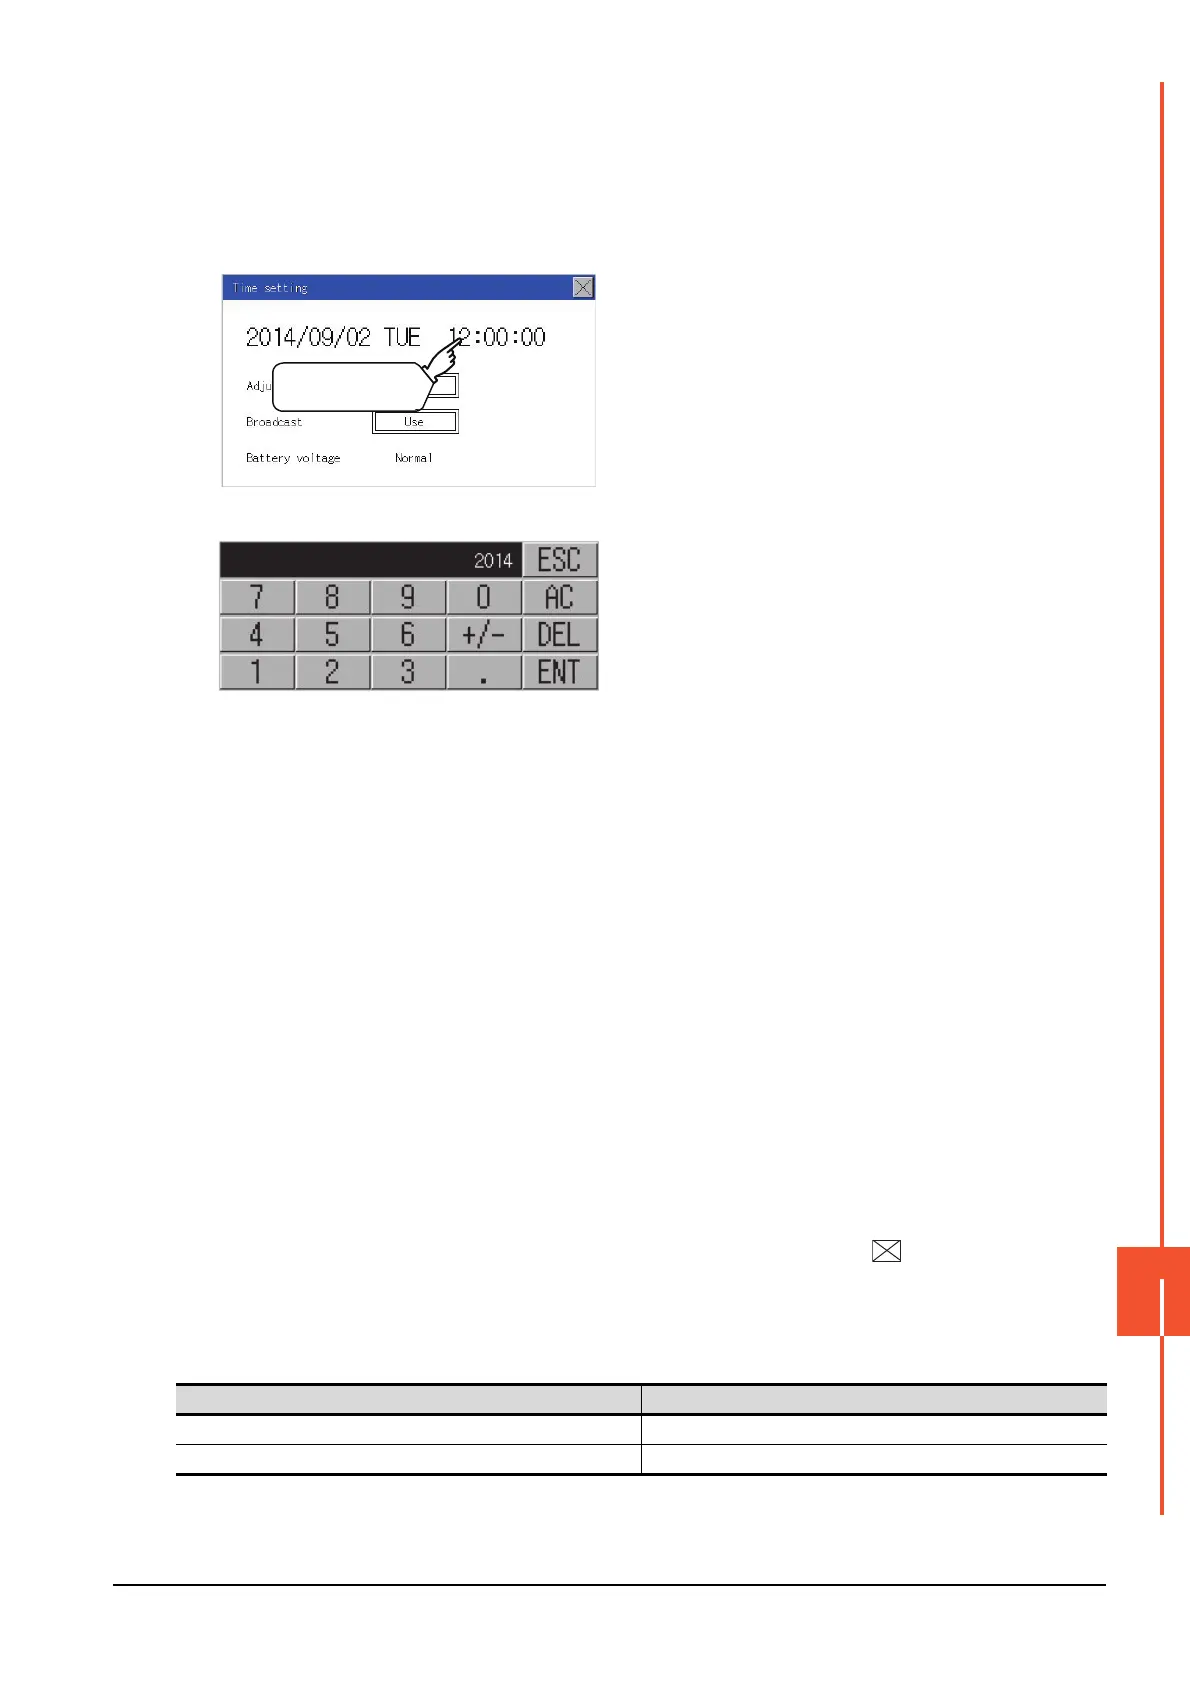
(2) Clock display
Carry out the display and setting of GOT clock data. The setup methods of clock data are shown below.
(3) GOT internal battery voltage status (GT2104-R only)
Displays battery voltage status.
When the battery voltage is low, replace the battery immediately.
Refer to the following for battery replacement procedure.
➠ GOT2000 Series User's Manual (Hardware)
Step 1. Touch either the date or time to be
changed.
Step 2. Enter date or time on the ten-key pad.
The day of the week is displayed
automatically according to the input
date.
"0" to "9":
Use these keys to enter numerical
values
"ESC":
Closes the ten-key window without
saving any value entered for the date
or time
"AC":
Deletes the entire string of numerical
characters that are being entered
"DEL":
Deletes a digit from a string of
numerical characters that are being
entered
"ENT":
Enters the value for the date or clock
that has been entered and closes the
ten-key pad window
"+/-":
Switches between positive and
negative values. (Only positive values
are valid for the date or clock setting.)
".":
Invalid key (not used)
Step 3. After setting either the date or time,
touch the button to save the
changes and close the setting window.
Display Status
Normal Normal
Low/None Low voltage
Touch the item
to be changed.
 Loading...