17
GB
7.2.2) Level 1 programming (ON-OFF functions)
By default level 1 functions are set as shown in tables 15 and 15a, but can be modified at any time as shown in tables 16 and 16a. Take
care during modification procedures, as there is a maximum time interval of 10 seconds between pressing one key and another; otherwise
the system exits the procedure automatically memorising the changes made up to that time.
1. Switch off SPIN (for example by removing fuse F1)
2. Press and hold [Set]
3. Switch on SPIN (for example by inserting fuse F1)
4. Wait for the flashing signal indicating control unit start-up and keep [Set] pressed until L1 starts to
flash (approx. 6s) L1 6s
5. Release the key [Set] when led L1 starts to flash
L1
6. Press key []to move the flashing led to the led associated with the function to be modified
7. Press [Set] to change the status of the function (short flash = OFF; long flash = ON)
8. Wait 10s to exit the programming mode automatically after the maximum time interval.
10s
Note: points 6 and 7 can be repeated during the same programming phase to set other functions to ON or OFF.
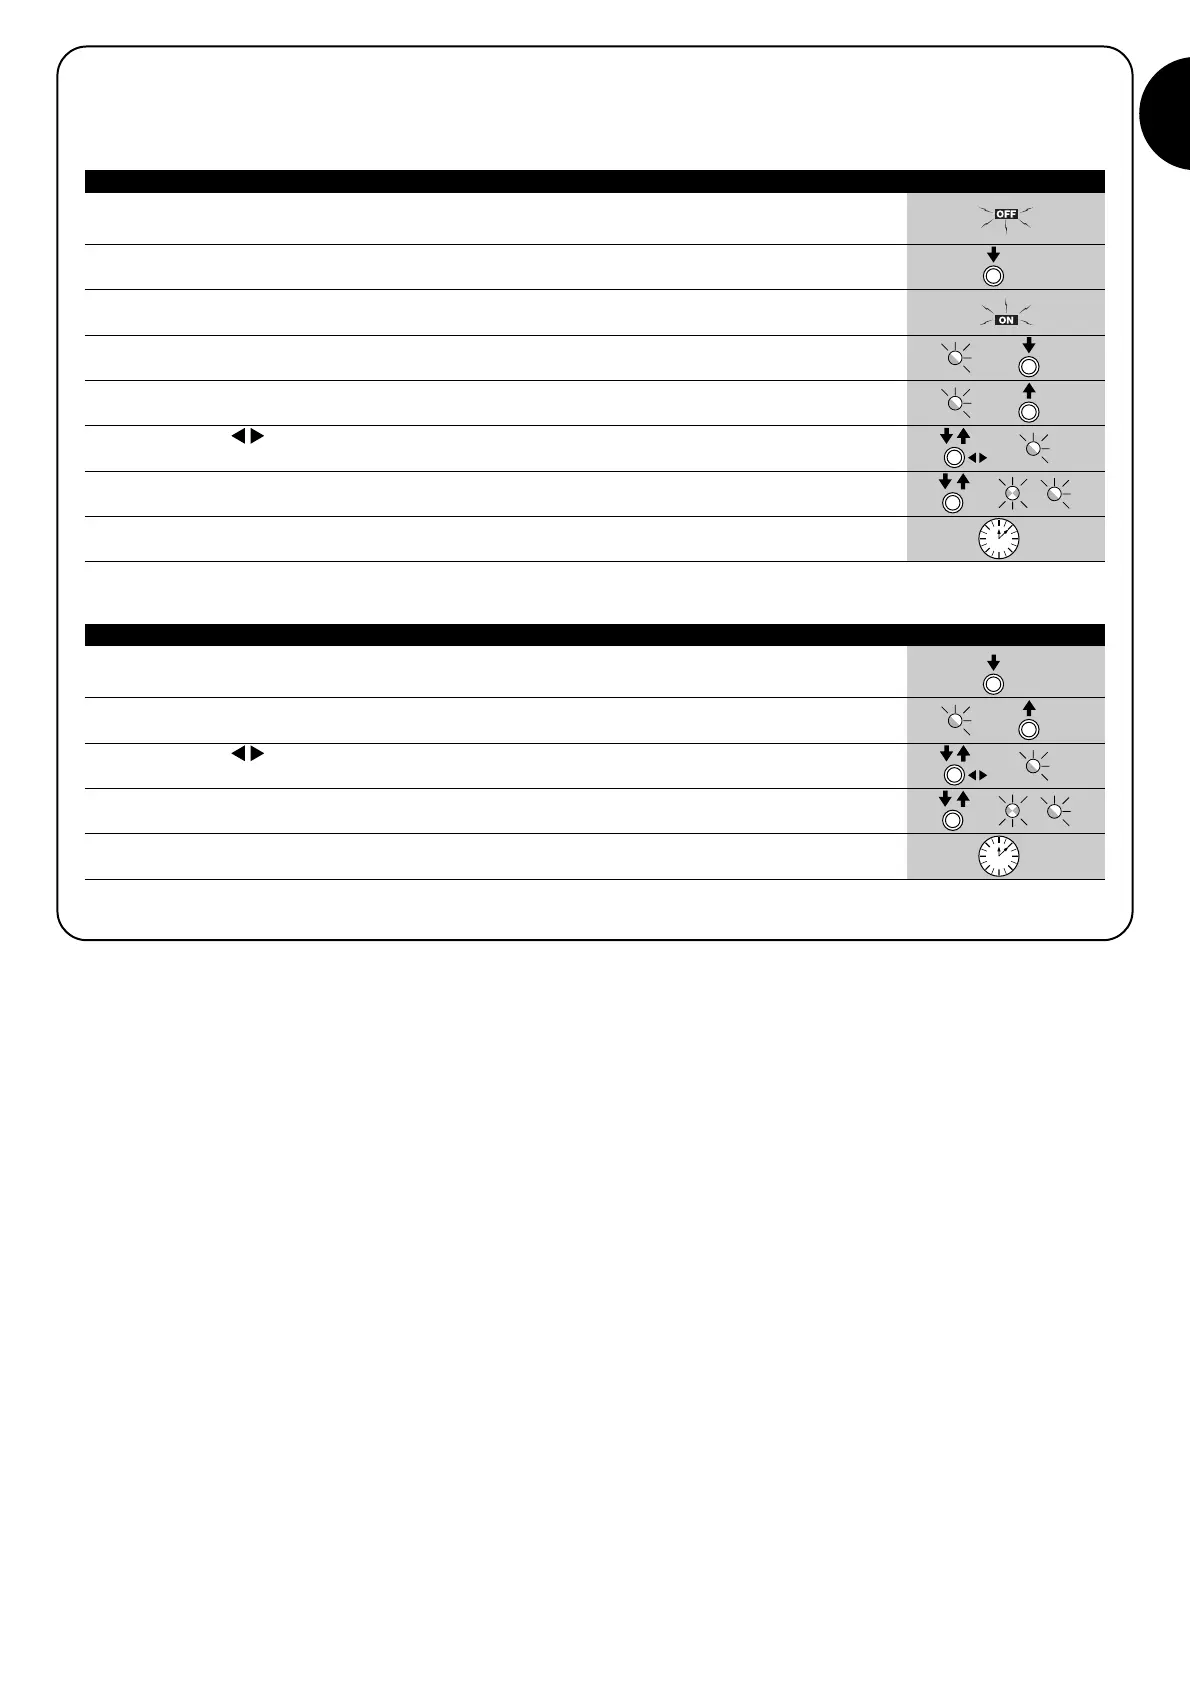
Table 16: To modify the ON-OFF functions in “programming on power-up” mode Example
1. Press and hold [Set] for approx. 3s
3s
2. Release the key [Set] when led L1 starts to flash
L1
3. Press key []to move the flashing led to the led associated with the function to be modified
4. Press [Set] to change the status of the function (short flash = OFF; long flash = ON)
5. Wait 10s to exit the programming mode automatically after the maximum time interval.
10s
Note: points 3 and 4 can be repeated during the same programming phase to set other functions to ON or OFF
Table 16a: To modify the ON-OFF functions in “standard programming” mode Example

 Loading...