19
GB
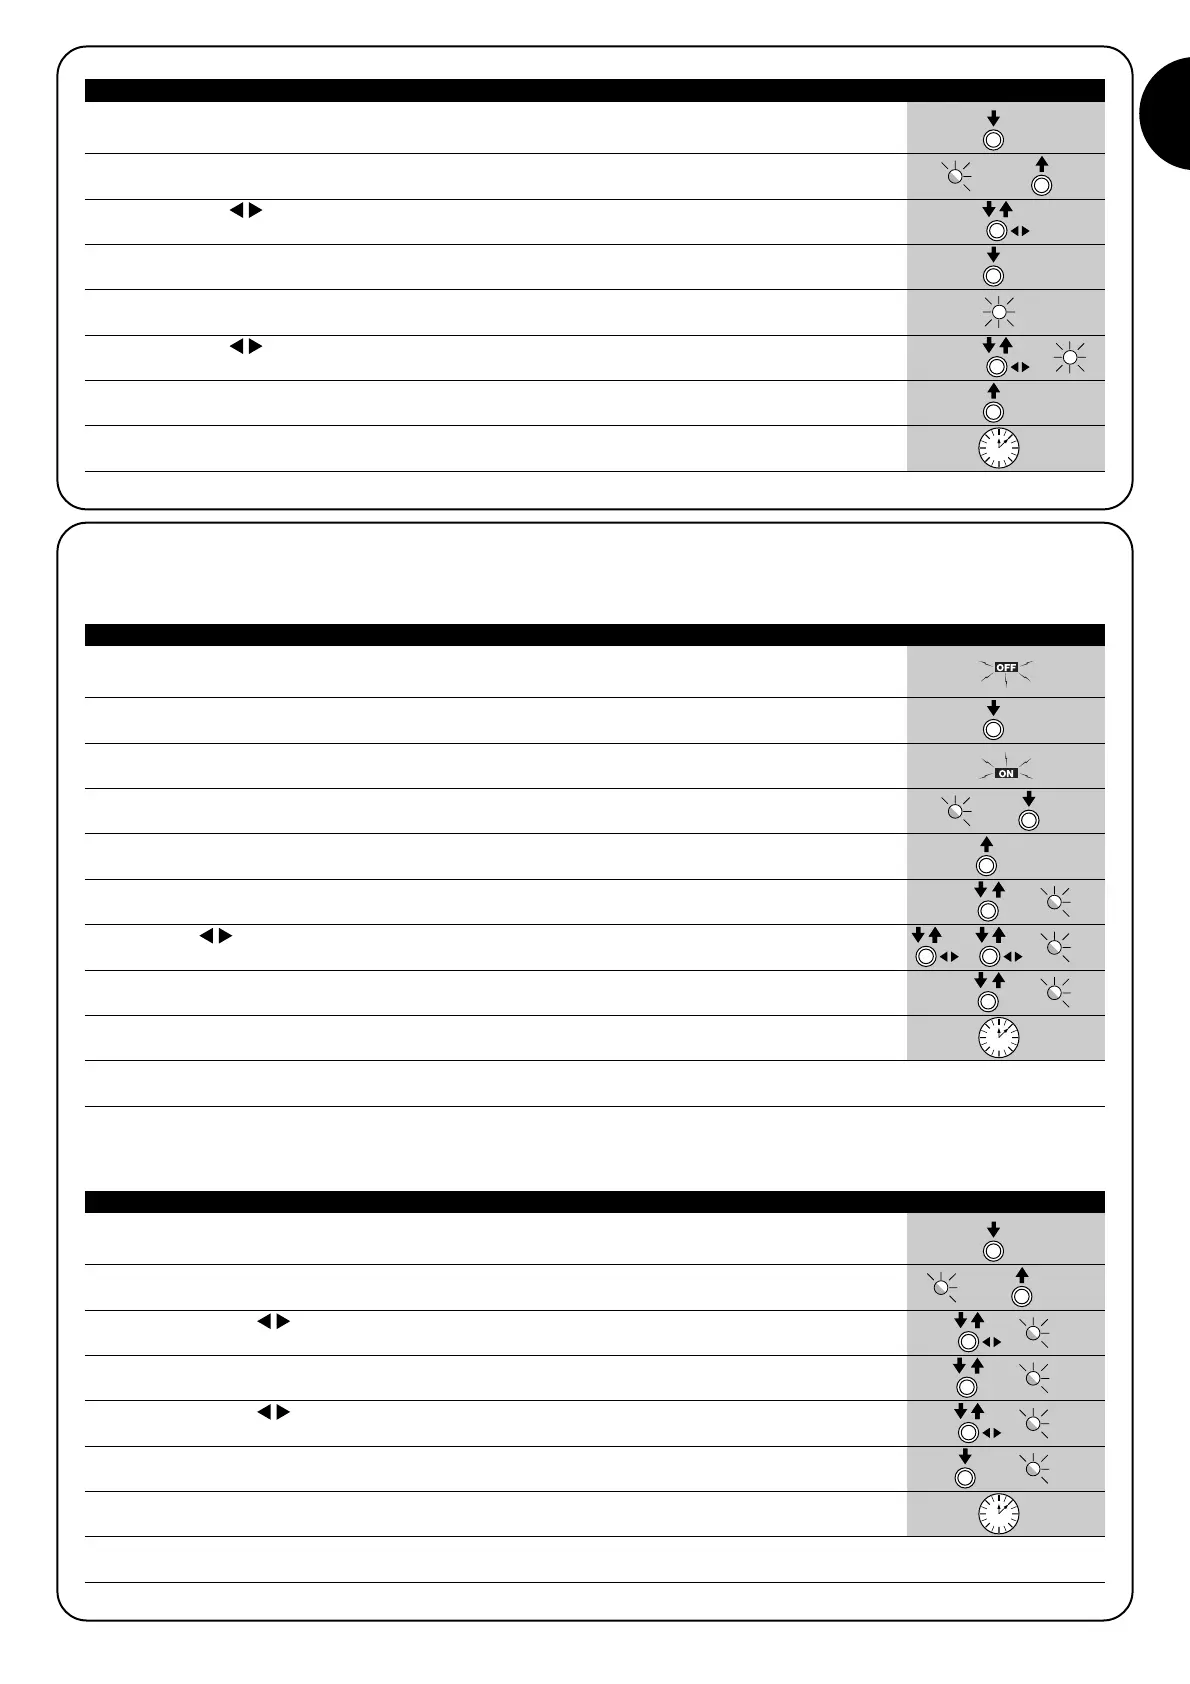
1. Press and hold [Set] for approx. 3s
3s
2. Release the key [Set] when led L1 starts to flash
L1
3. Press key []to move the flashing led to the “input led” associated with the parameter to be
modified
4. Press and hold [Set] during steps 5 and 6
5. Wait approx. 3s after which the led associated with the current level of the parameter to be modified
will light up
6. Press key []to move the led associated with the parameter value.
7. Release [Set]
8. Wait 10s to exit the programming mode automatically after the maximum time interval.
10s
Note: Points 3 to 7 can be repeated during the same programming phase to modify other parameters
Table 18a: To modify the adjustable parameters in “standard programming” mode Example
7.2.5) LEVEL 1 programming examples (ON-OFF functions)
This example shows the sequence of operations required to change the factory setting of the functions to deactivate the function of “Vari-
able Sensitivity” (L1) and activate “Short Partial Open” (L3).
1. Switch off SPIN (for example by removing fuse F1)
2. Press and hold [Set]
L1
3. Switch on SPIN (for example by inserting fuse F1)
4. Wait for the flashing signal indicating control unit start-up and keep [Set] pressed until L1 starts to flash
(approx. 6s) L1 6s
5. Release [Set]
6. Press [Set] once to change the status of the function associated with L1 (Variable Sensitivity) led L1
now emits long flashes L1
7. Press []twice to move the flashing led onto led L3
L3
8. Press [Set] once to change the status of the function associated with L3 (Partial open) led L3 now
emits long flashes L3
9. Wait 10s to exit the programming mode automatically after the maximum time interval
10s
On standby to exit programming mode, leds L1 and L3 must remain lit to indicate that the functions “Variable Sensitivity disabled” and “Short
Partial Open” are active.
Table 19: Example of LEVEL 1 programming in “Programming on power-up” mode Example
This example shows the sequence of operations required to change the factory setting of the functions to activate the functions of “High
opening speed” (L2) and “Automatic Closure” (L3).
1. Press and hold [Set] for approx. 3s
3s
2. Release the key [Set] when led L1 starts to flash
L1
3. Press the key [] once to move the flashing led onto led L2
L2
4. Press [Set] once to change the status of the function associated with L2 (Opening speed) led L2 now
emits long flashes L2
5. Press the key []once to move the flashing led onto led L3
L3
6. Press [Set] once to change the status of the function associated with L3 (Automatic closure) led L3
now emits long flashes L3
7. Wait 10s to exit the programming mode automatically after the maximum time interval
10s
At the end of these operations leds L2 and L3 must remain lit to indicate that the functions “High opening speed” and “Automatic closure” are
enabled.
Table 19a: Example of LEVEL 1 programming in “Standard programming” mode Example
 Loading...


