3.56
ENGINE / COOLING
9924096 - 2013 RANGER RZR XP 900 / RZR XP 4 900 Service Manual
© Copyright 2012 Polaris Sales Inc.
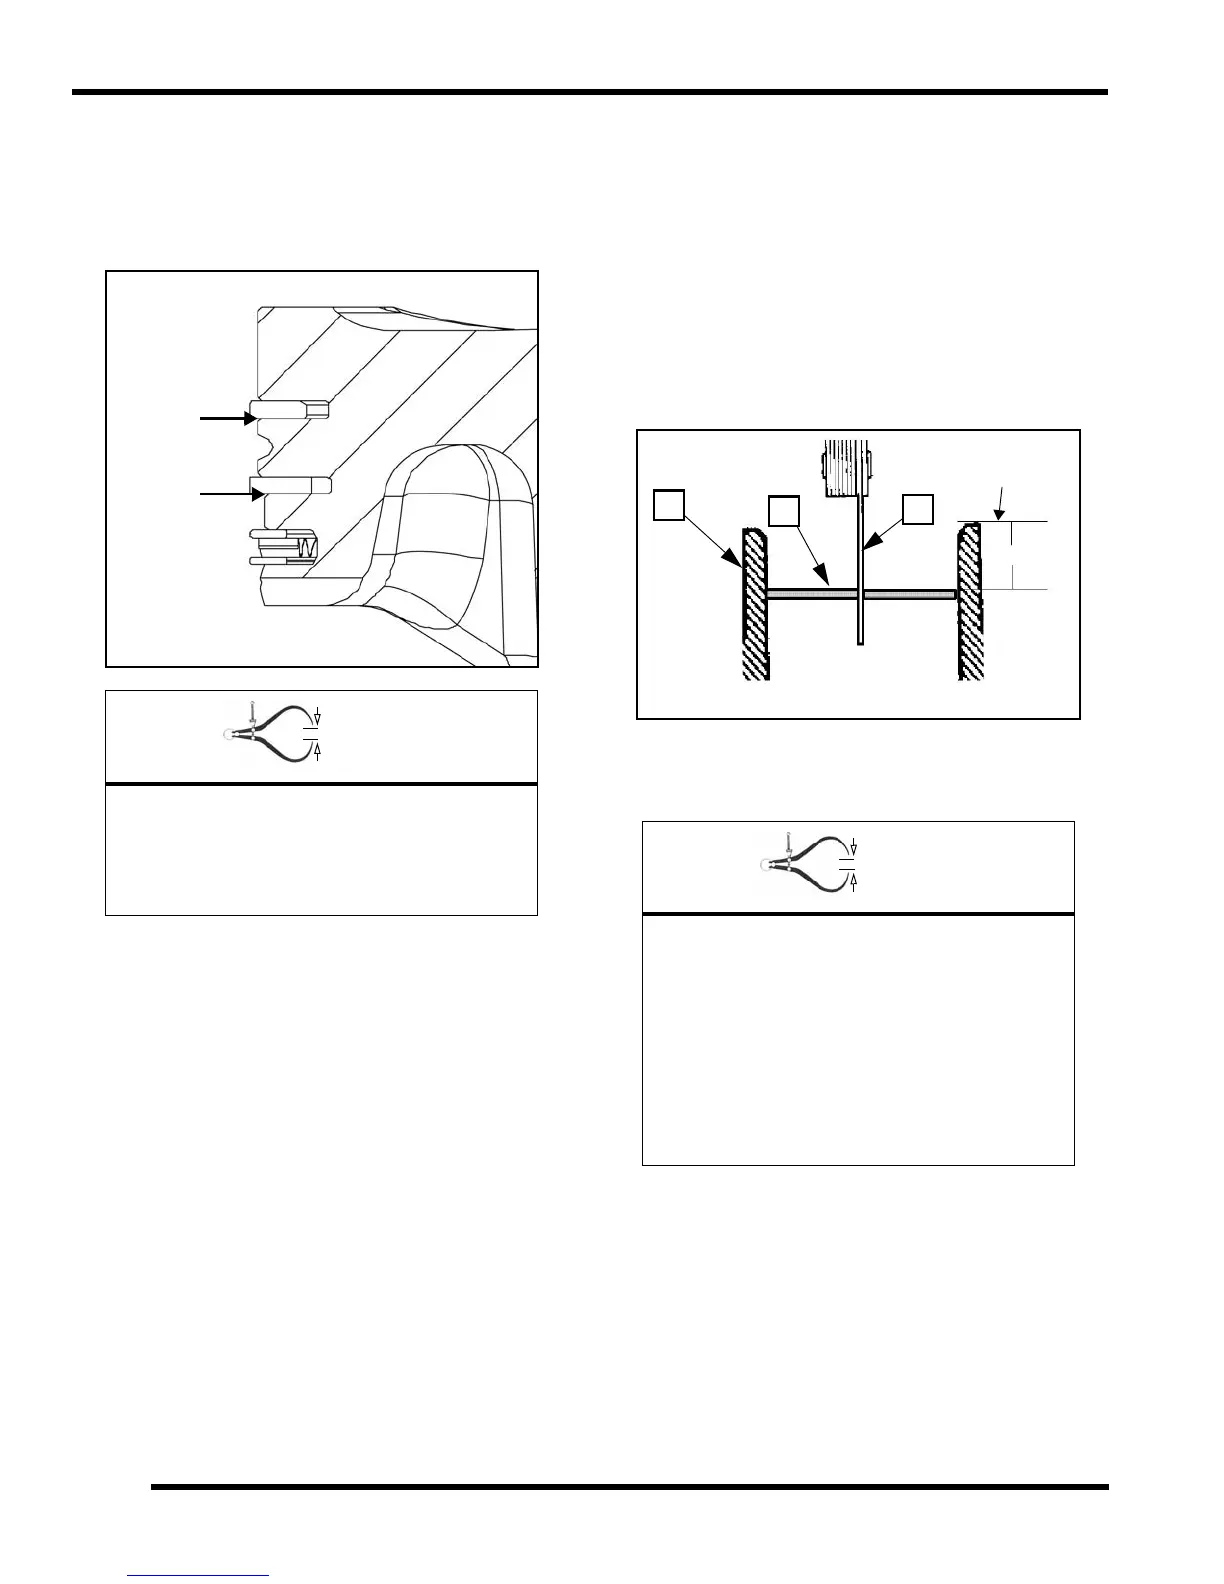
Piston Ring to Groove Clearance Inspection
1. Measure piston ring to groove clearance by placing
the ring in the ring land and measuring with a
thickness (feeler) gauge. Replace piston and rings if
ring-to-groove clearance exceeds service limits.
Piston Ring Installed Gap
1. Place each piston ring (A) inside the cylinder (B). Use
the piston to push the ring squarely into cylinder, as
shown below.
2. Measure installed gap with a feeler gauge (C) at both
the top and bottom of the cylinder.
IMPORTANT: A difference between top and bottom
end gap measurements is a general indication of
cylinder taper (wear). The cylinder should be
measured for taper and out of round.
3. If the installed gap measurement exceeds the service
limit, replace the rings.
NOTE: Always check piston ring installed gap when
installing new rings and/or a new cylinder.
Piston Ring to Groove Clearance:
Top / Second Ring:
0.0007" - 0.0023" (0.020 - 0.060 mm)
Service Limit: 0.0047" (0.12 mm)
Piston Ring Installed Gap:
Top Ring: .010" - .014" (.25 - .35 mm)
Service Limit: .020" (.50 mm)
Second Ring: .015" - .025" (.37 - .63 mm)
Service Limit: .028" (.70 mm)
Oil Control Rails: .008" - .028" (.20 - .70 mm)
Service Limit: .035" (.90 mm)
A
B
C
Head Gasket
Surface
0.59 in.
(15mm)
 Loading...