3.75
ENGINE / COOLING
3
9924096 - 2013 RANGER RZR XP 900 / RZR XP 4 900 Service Manual
© Copyright 2012 Polaris Sales Inc.
NOTE: Do not touch sealing surfaces of gasket.
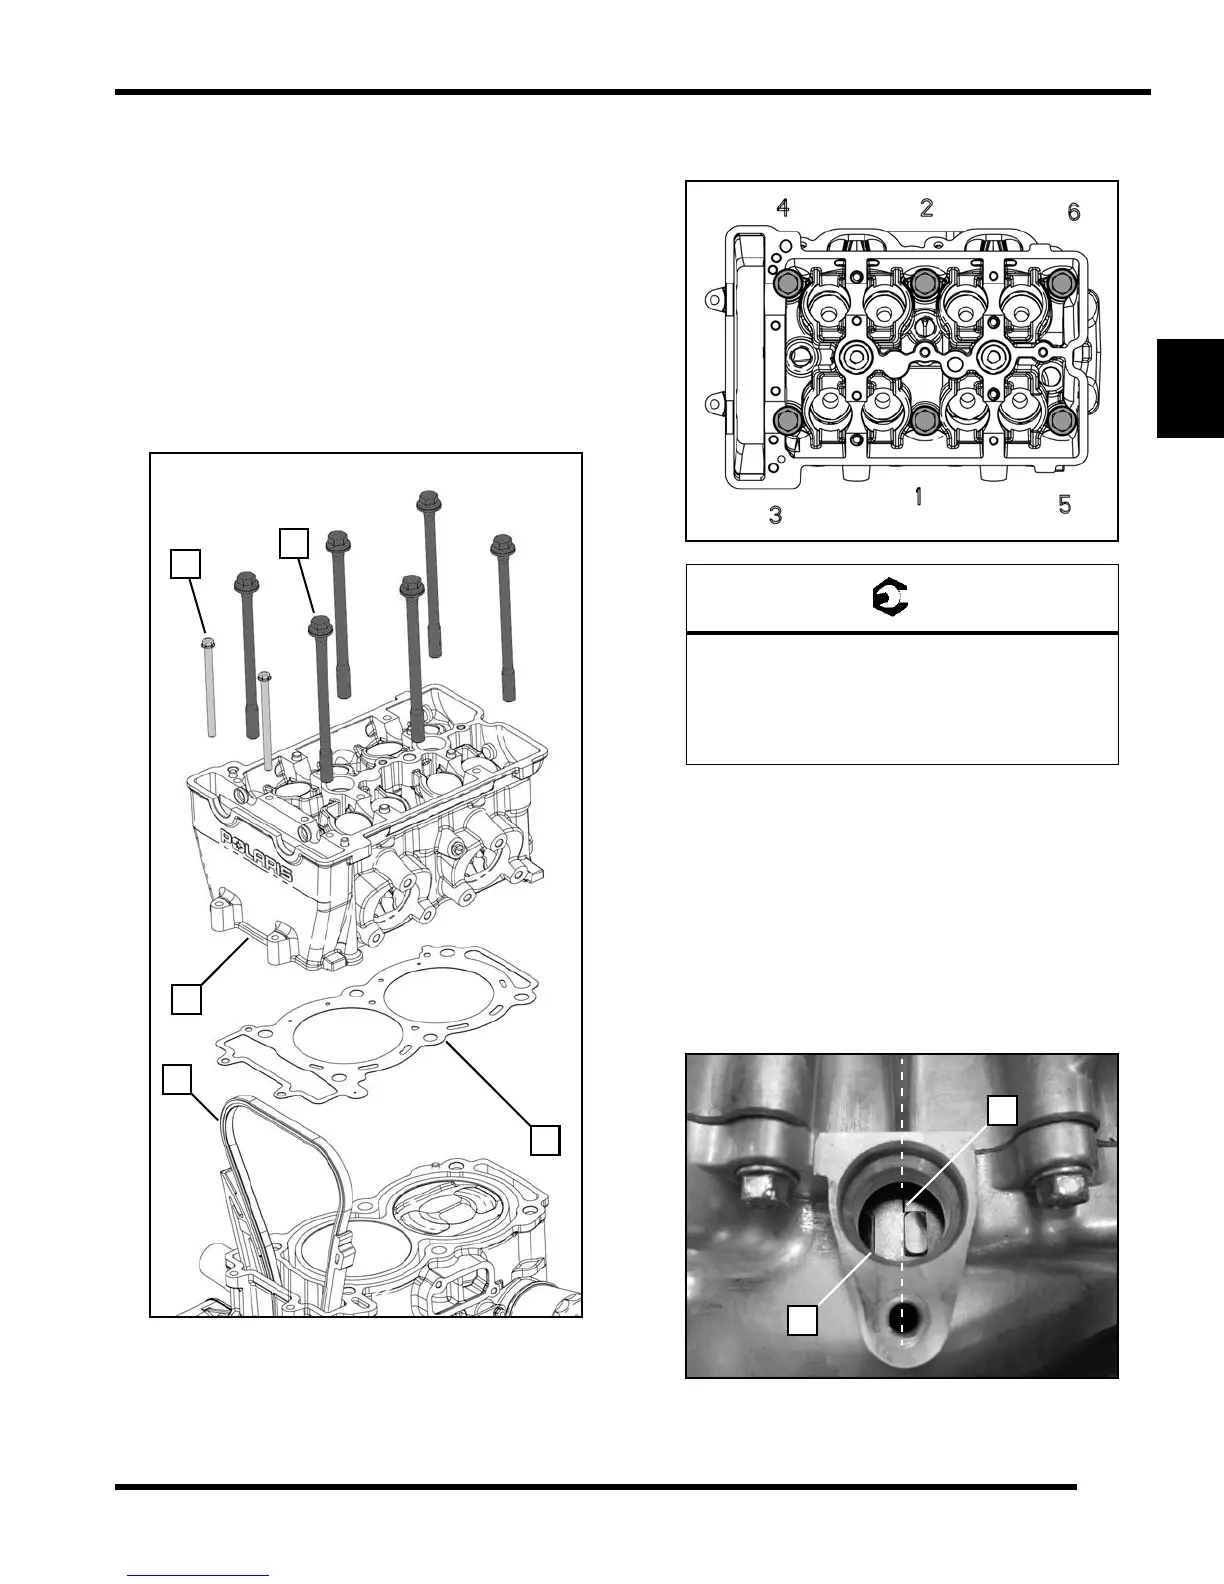
4. Guide cam chain (D) through a new head gasket (E)
and install the gasket on the cylinder, locating it on the
alignment pins.
5. Carefully set the cylinder head (F) in place on
alignment pins.
6. Install new bolts and finger tighten the (6) cylinder
head bolts (G) evenly.
7. Install and finger tighten the (2) outer M6 bolts (H)
evenly.
IMPORTANT: Install new cylinder head bolts.
8. Torque cylinder head bolts in sequence to
specification.
Camshaft Installation / Timing
IMPORTANT: If any valve train components were
replaced, refer to “Valve Clearance Adjustment”
procedure prior to “Camshaft Installation / Timing”.
1. Rotate the engine until the flywheel Top Dead Center
(TDC) mark (A) is aligned or centered in the
Crankshaft Position Sensor (CPS) mounting hole (B).
This places the PTO cylinder at TDC for camshaft
installation.
Cylinder Head Torque Procedure:
Step 1: In Sequence to 9 ft-lbs (12 Nm)
Step 2: In Sequence to 26 ft-lbs (35 Nm)
Step 3: In Sequence Additional 180° (1/2 turn)
Step 4: Outer M6 Head Bolts 89 in-lbs (10 Nm)

 Loading...