6.18
CLUTCHING (PVT)
9924096 - 2013 RANGER RZR XP 900 / RZR XP 4 900 Service Manual
© Copyright 2012 Polaris Sales Inc.
NOTE: Use Bushing Tool PA-47336.
8. Install nut (C) onto end of puller rod and hand tighten.
Turn puller barrel to increase tension on sheave if
needed. Using a hand held propane torch, apply heat
around outside of bushing until tiny smoke tailings
appear.
9. Turn sheave counterclockwise on puller rod until it
comes free. Lift sheave off puller.
10. Remove nut from puller rod and set aside.
11. Pull bushing removal tool and adapter from puller rod.
Remove bushing from tool and discard.
Moveable Sheave - Bushing Installation
1. Place main adapter (Item 8) on puller.
2. Apply Loctite 609 evenly to bushing bore inside
moveable sheave.
3. Set bushing in place on sheave.
4. Insert installation puller tool (Item A/B) with “A” side
down, into center of bushing.
5. With towers pointing upward, slide sheave, bushing
and tool onto puller rod.
6. Install nut on puller rod and hand tighten. Turn barrel
to apply additional tension if needed.
7. Turn sheave counterclockwise, making sure bushing
is drawn straight into bore. Continue until bushing is
seated.
8. Remove nut from puller rod and set aside.
9. Remove sheave from puller.
10. Remove installation tool.
Cover Bushing Removal
1. Install main adapter (Item 8) on puller.
2. Install adapter reducer (Item 9).
3. From outside of clutch cover, insert removal tool (Item
3) into cover bushing.
4. With inside of cover toward vise, slide cover onto
puller.
5. Install nut onto puller rod and hand tighten. Turn puller
barrel to increase tension as needed.
6. Turn clutch cover counterclockwise on puller rod until
bushing is removed and cover comes free.
7. Remove nut from puller rod and set aside.
8. Remove bushing and bushing removal tool from
puller. Discard bushing.
Cover Bushing Installation
1. Apply Loctite™ 609 evenly to bushing bore in cover.
2. Working from inside of cover, insert new bushing and
bushing installation tool into center of clutch cover.
3. With main adapter on puller, insert cover onto puller
rod, placing outside of cover toward vise.
4. Install nut on rod and hand tighten. Turn puller barrel
to apply more tension if needed.
5. Turn clutch cover counterclockwise on puller rod until
bushing is seated.
6. Remove nut from puller rod. Take installation tool and
clutch cover off rod.
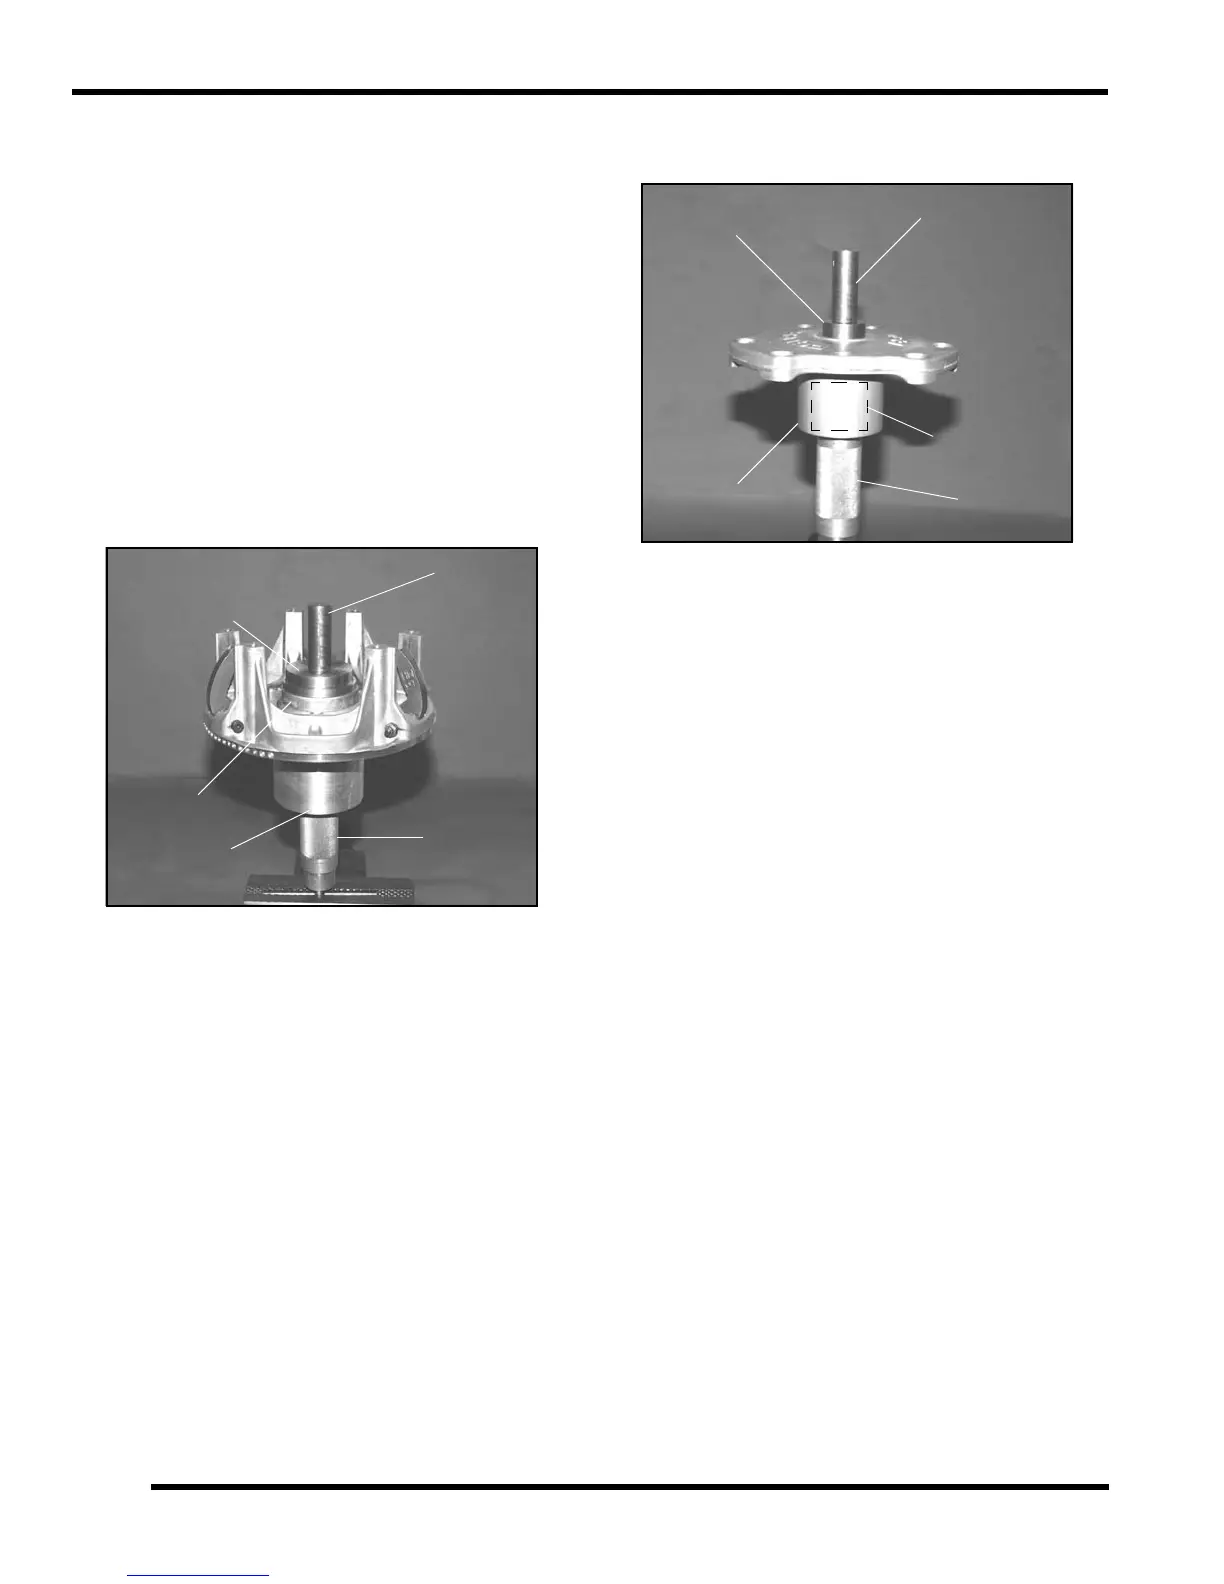
Puller Tool (A,B)
Side “A” toward
sheave
Nut (C)
Bushing
Main Adapter
(8)
Piston Pin
Puller
Removal Tool
(3)
Nut (C)
Adapter Reducer
(9)
Piston Pin
Puller
Main
Adapter (8)
 Loading...