Drive Unit
G133 3-54 SM
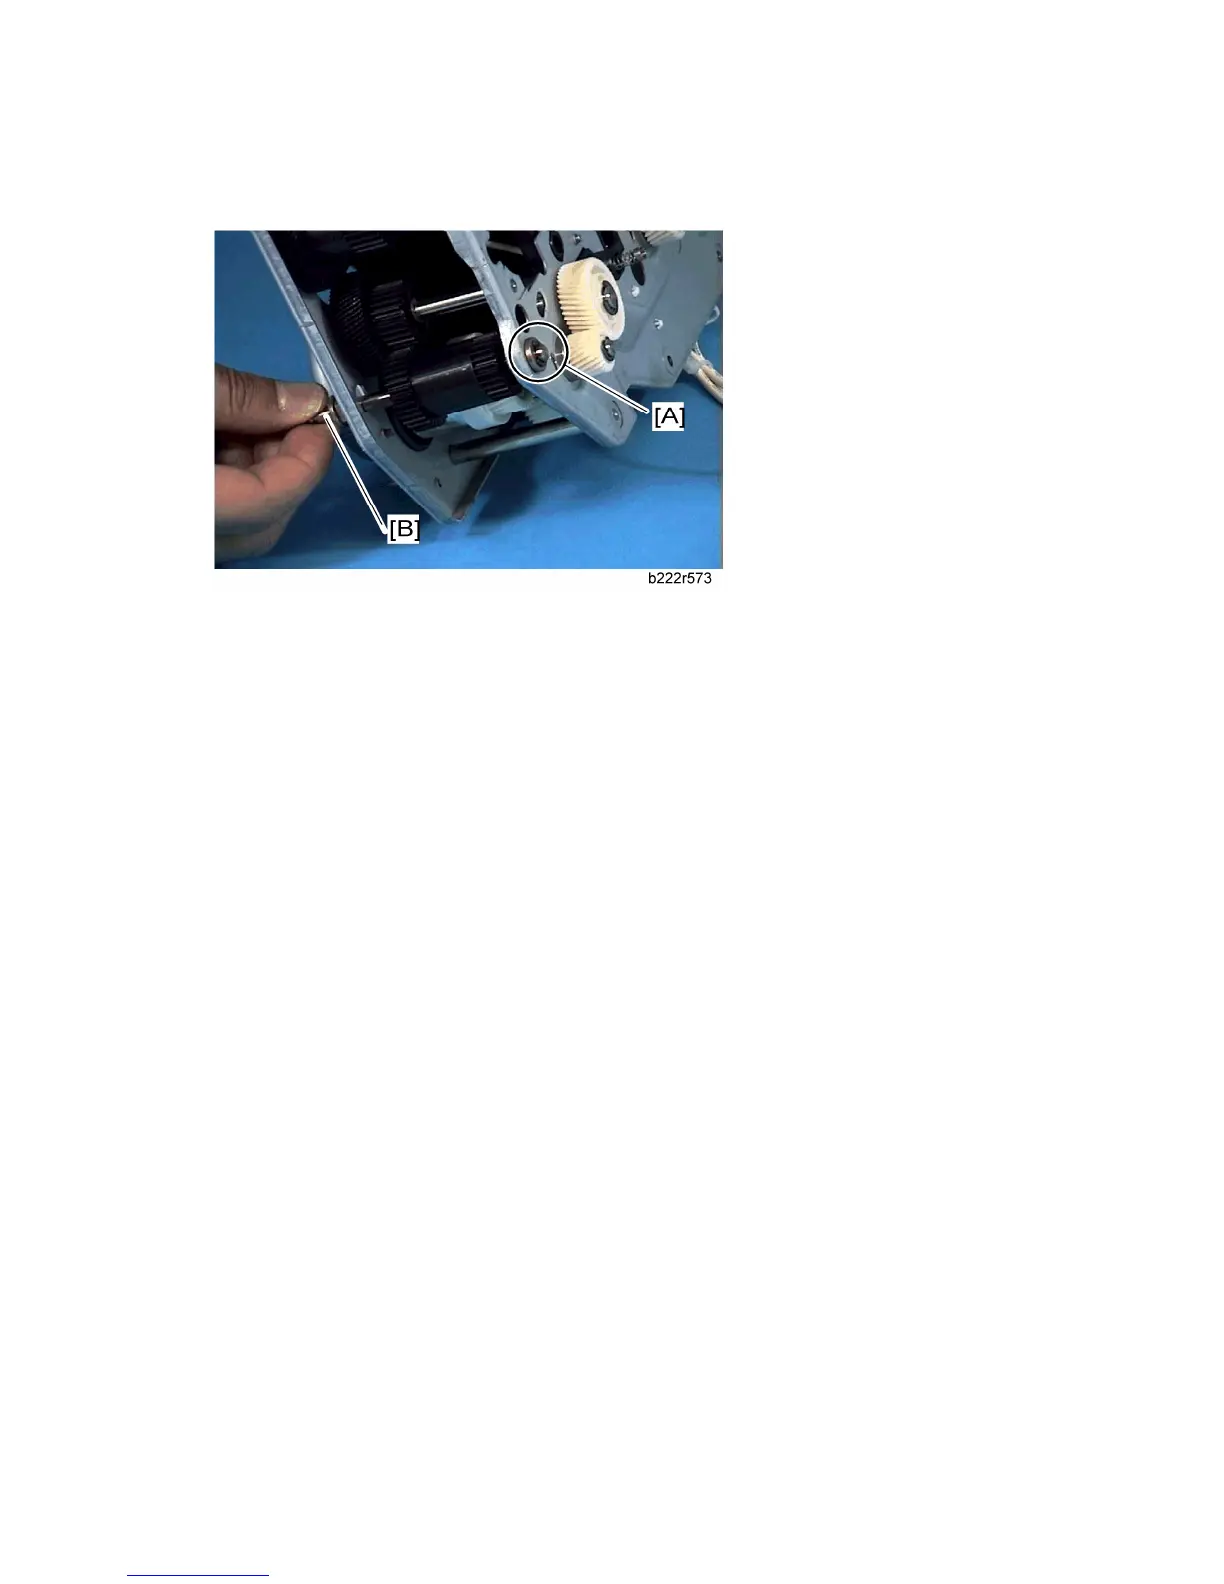
When installing the drive unit
Make sure that the bushing [A] is fully set in the frame of the gear unit before installing the
timing belt and pulley on the shaft [B].
Adjustment after replacing the gear unit
Do the following procedures after replacing the gear unit.
1. Turn on the main power switch.
2. Enter "Copy SP" in the SP mode.
3. Do the "Drum Phase Adjustment" with SP1-902-001.
4. Check the result of the drum phase adjustment with SP1-902-002.
0: Success, 2: Failure due to no sampling data,
3: Failure due to insufficient number of pattern detections
When the result of this adjustment is "2" or "3":
Check that all the PCUs are correctly set and that the image transfer belt unit is
correctly set.
Do the "Drum Phase Adjustment" again after checking the PCUs and image
transfer belt unit.
When the result is still "2" or "3" after checking the PCUs and image transfer belt unit:
Check that the gear unit is installed correctly.
5. Exit the SP mode.
3.9.2 REGISTRATION MOTOR
1. Rear cover ( "p.3-3 "Rear Cover"")
2. Right rear cover ( "p.3-3 "Right Rear Cover"")
3. Ventilation duct ( "p.3-3 "PSU"")
4. Turn the harnesses aside (= x 5)

 Loading...


