Overview
SM 6-7 G133
Detailed
Descriptions
the transfer belt. Four toner images are super-imposed onto the belt.
Paper transfer: Then, the ITB drive roller pushes the toner from the transfer belt to the
paper (the transfer roller is an idle roller).
5. Cleaning for OPC drum: The cleaning blade removes remaining toner on the drum
surface after image transfer to the paper.
6. Quenching for OPC drum: Quenching is done by illuminating the whole area of the
drum with the laser at the end of every job.
7. Cleaning and quenching for transfer belt: The cleaning brush and blade clean the
belt surface. The grounding roller inside the transfer belt unit removes the remaining
charge on the belt.
8. ID sensors: The ID sensors detect the density of ID sensor patterns on the transfer
belt.
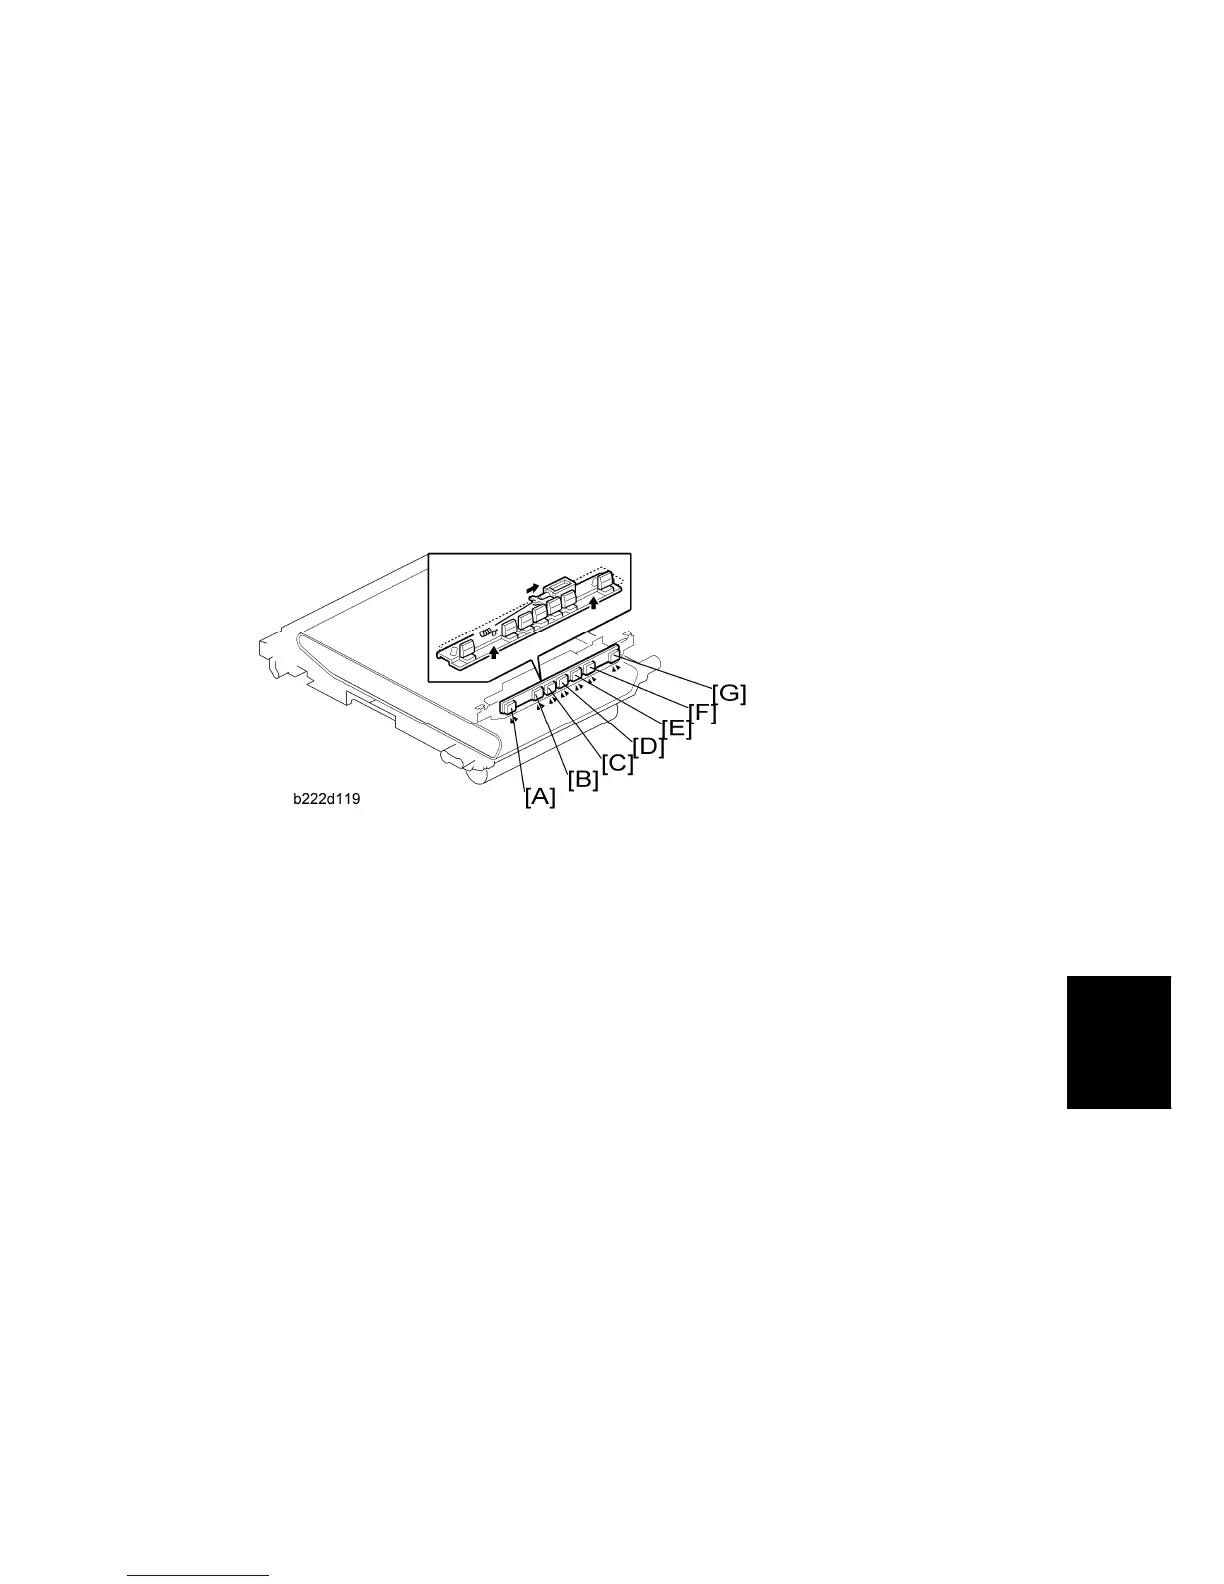
The ID sensor board contains three ID sensors for the line position adjustment (front,
center, and rear) and four ID sensors for the process control. On this board, there are 7
ID sensors in total, as follows.
[A]: Line position adjustment (front)
[B]: Process control (K)
[C]: Process control (C)
[D]: Line position adjustment (center)
[E] Process control (M)
[F]: Process control (Y)
[G]: Line position adjustment (rear)
The ID sensor output is used for the following:
Process control and for automatic line position
Skew correction
Color registration adjustments for the latent image.

 Loading...


