PCDU
G179 3-20 SM
Re-installation
Put toner on the edge of cleaning blade 1 and the mylar at the back side of cleaning blade
1 before re-installing this blade.
After re-assembly, make sure that the front spring of the movable cleaning blade is
re-attached to the , position. ( Drum)
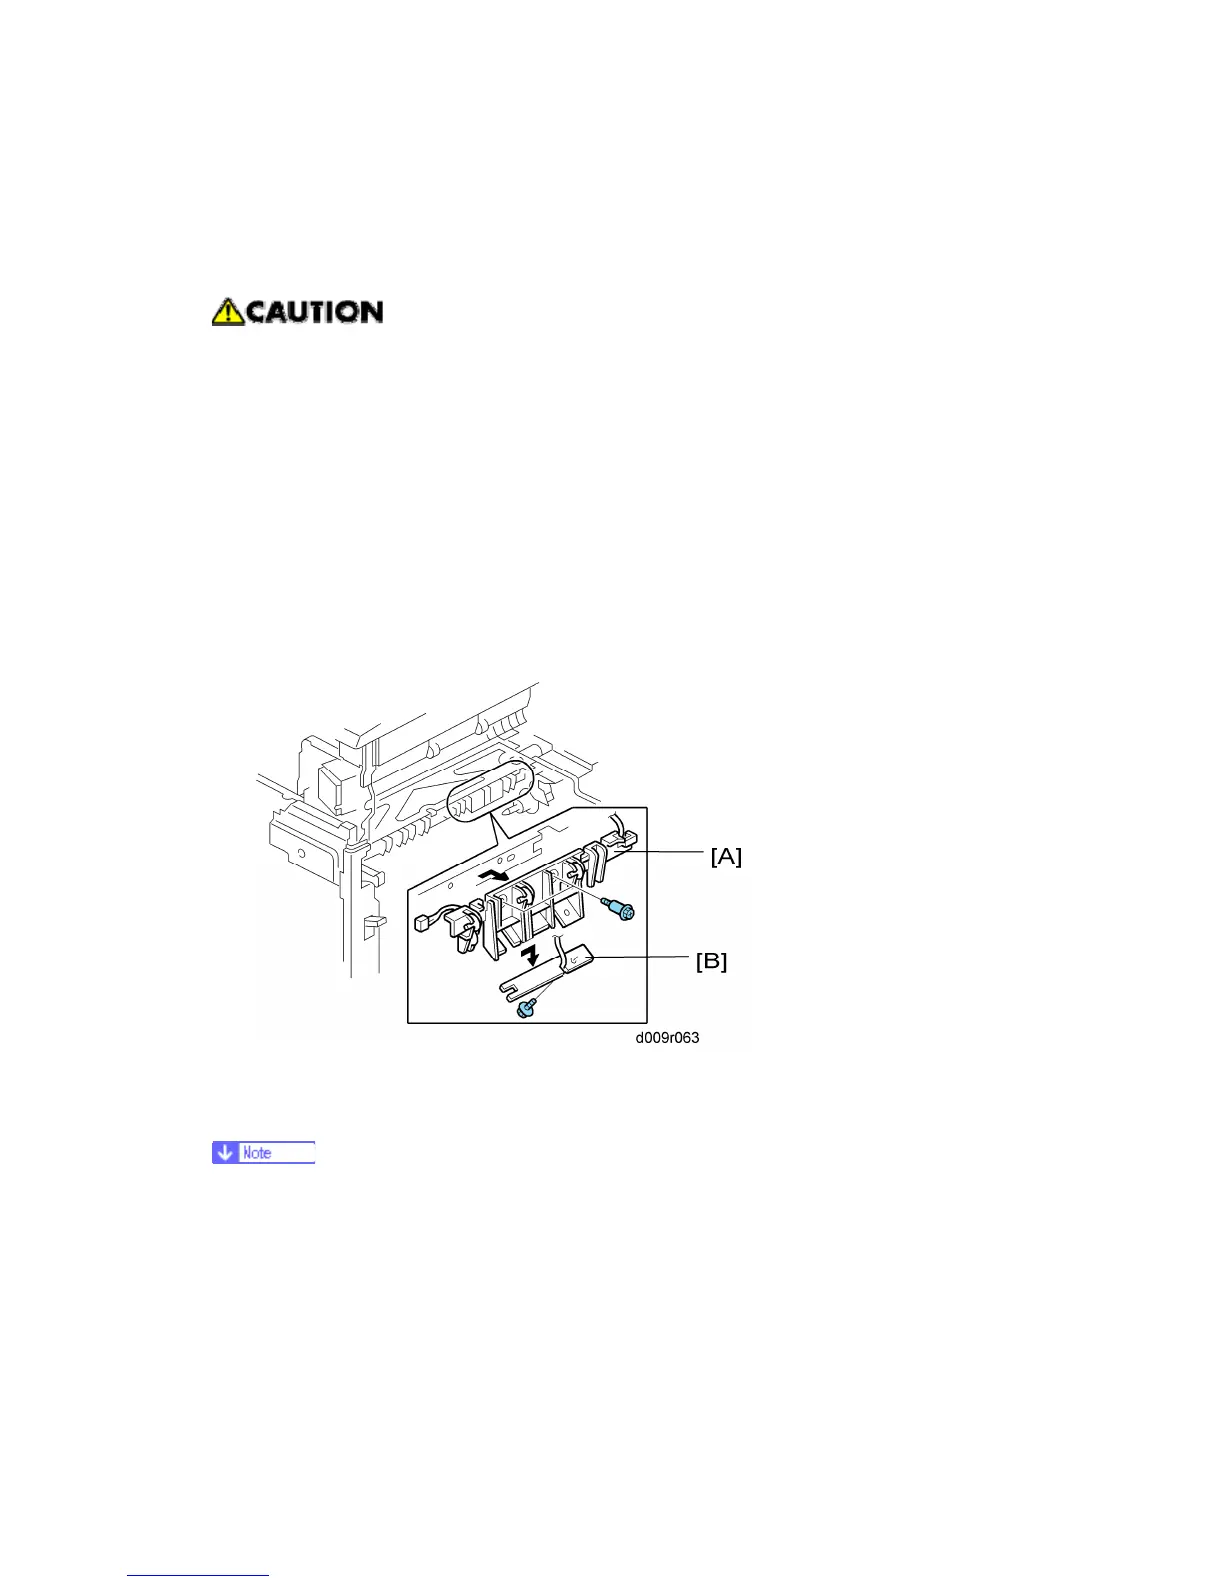
3.5.7 ID SENSOR
1. Left cover ( Left Cover)
2. Paper exit cover ( Paper Exit Cover)
3. Output tray ( Output Tray)
4. Exhaust duct ( Toner Supply Motor)
5. PCDU ( PCDU (Photoconductor and Development Unit))
6. Fusing unit ( Fusing Unit)
7. ID sensor bracket [A] ( x 2, x 1)
8. ID sensor [B] ( x 1)
Do SP3-001-002 to initialize the ID sensor after replacing.

 Loading...


