20
Track Operations
Creating a Track
The MC-707 has four track types: TONE, DRUM, DRUM + COMP, and
LOOPER.
Up to eight track types can be freely combined in each track.
Depending on the track type, there is a maximum number that can be
used simultaneously.
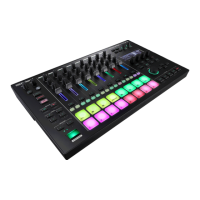
1.
Press the [SEL] button of an empty track.
The TRACK TYPE SELECT screen appears.
2.
Use the cursor [<] [>] buttons to select type, and then press
the [ENTER] button.
The track is created, and you return to the home screen.
Track type Explanation
TONE
This is a synthesizer sound engine.
It can also be used as a pitched sampler.
DRUM
This is a drum sound engine.
It can also be used as a sampler.
DRUM + COMP
This is a drum sound engine with compressor (maximum
one track).
If this track is used, looper tracks are limited to ve.
LOOPER
This is a sampling looper that supports time stretch.
It supports loading samples from SD card, and recording
from an external input or a track. (A maximum of ve
looper tracks can be used if the project uses a DRUM +
COMP track; if not, a maximum of eight looper tracks
can be used.)
Changing a Track to a Dierent Type
To change the type of a track, delete the track and then create a new
track.
1.
In the home screen, press the cursor [ ] button several
times to select the entire track.
2.
Use the cursor [<] [>] buttons to select the track that you
want to change.
3.
Turn the [C4] knob to select “DELETE,” and then press the
[C4] knob.
A conrmation message appears.
4.
Use the cursor [<] [>] buttons to select “O K ,” and then press
the [ENTER] button.
The track is deleted.
If you decide to cancel, use the cursor [<] [>] buttons to select
“CANCEL,” and then press the [ENTER] button.
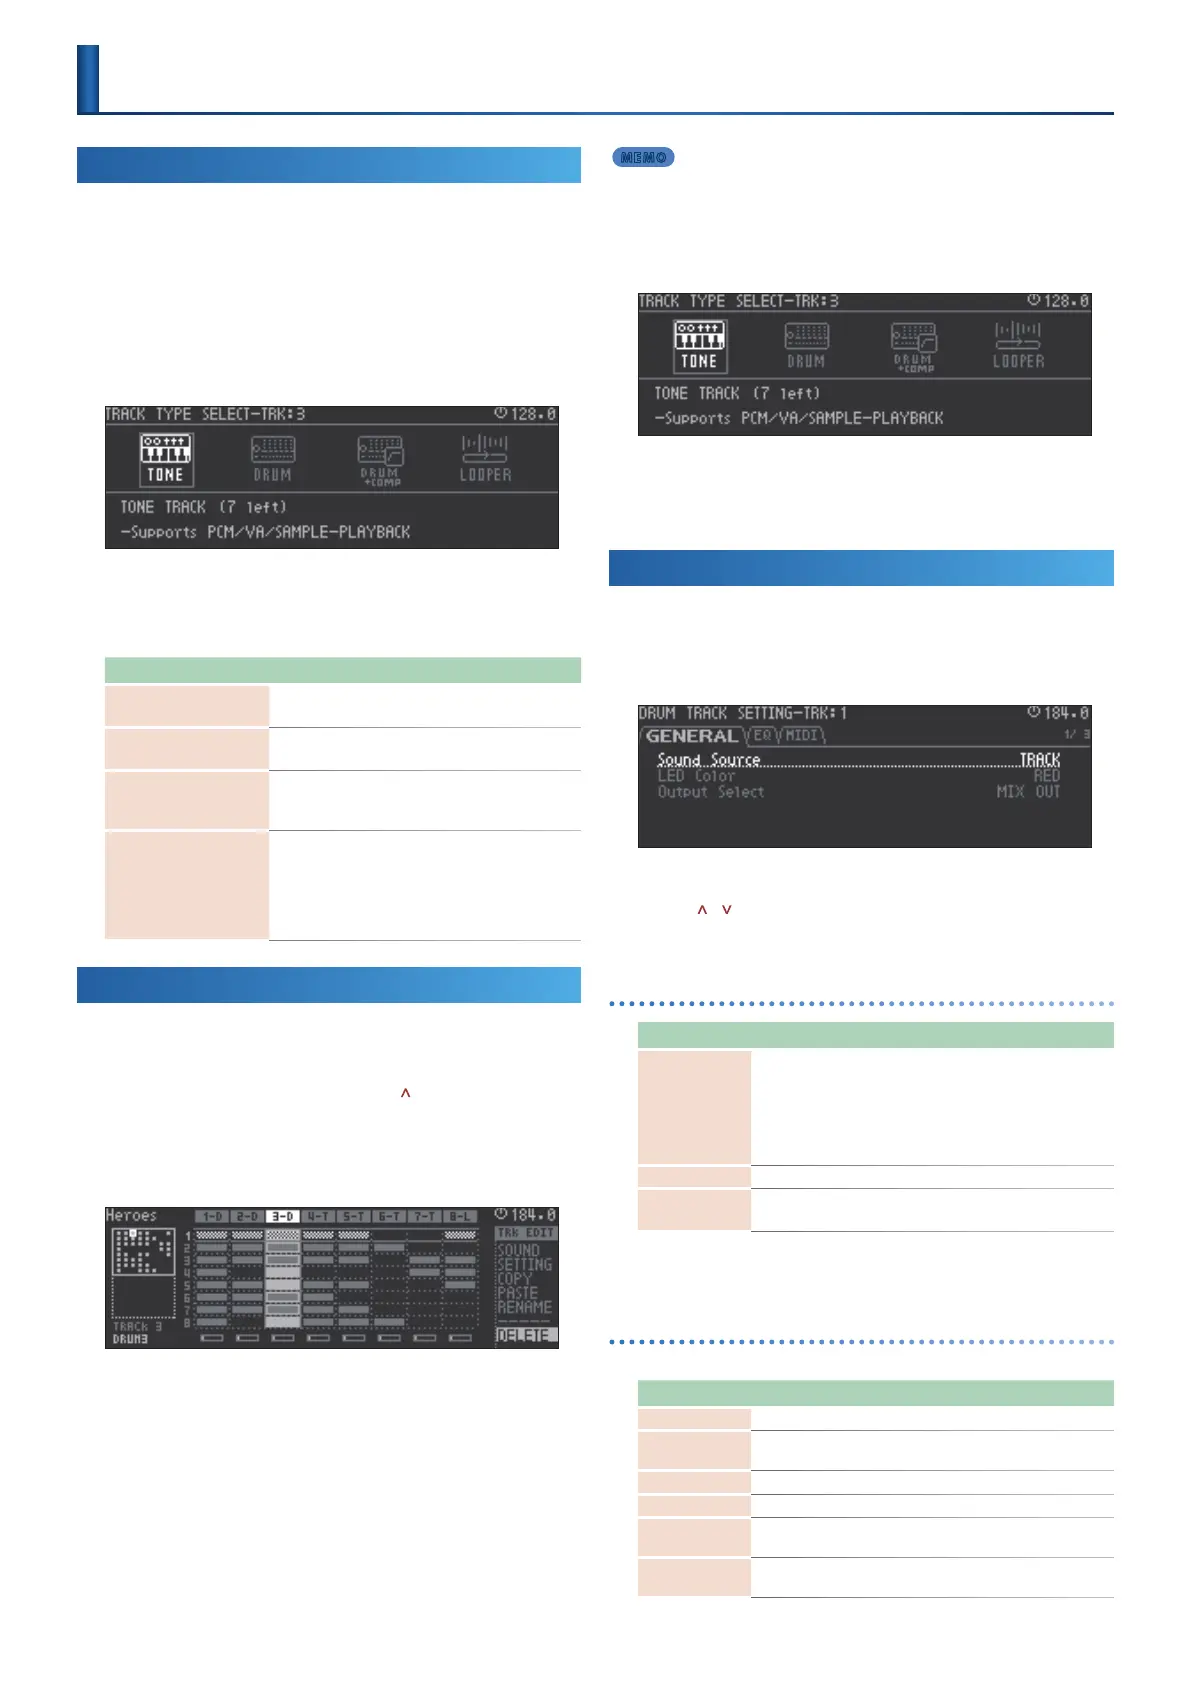
MEMO
You can also execute by pressing the [C4] knob once again.
5.
With the track that you want to delete selected, press the
[ENTER] button.
The TRACK TYPE SELECT screen appears.
6.
Use the cursor [<] [>] buttons to select type, and then press
the [ENTER] button.
The track is created, and you return to the home screen.
Making Track Settings
1.
Hold down the [SHIFT] button and press the [SEL] button of
the track for which you want to make settings.
The setting screen appears.
2.
Use the cursor [<] [>] buttons to select a tab, and use the
cursor [
] [ ] buttons to select a parameter.
3.
Use the [C4] knob to edit the value.
GENERAL tab
Parameter Value Explanation
Sound Source
TRACK,
CLIP
Species whether the track’s sound uses the
settings of the track or of the clip.
* If this is TRACK, all sounds used in the same
track will be in common.
* If this is CLIP, dierent sounds can be used for
each clip.
* A looper track does not have this setting.
LED Color *1 Species the color shown for the level fader.
Output Select
MIX OUT,
ASSIGN OUT
Species the output destination of
assignable out.
*1
ORANGE, YELLOW, GREEN, BLUE, PURPLE, PINK, WHITE, SKYBLUE, P.YELLOW,
P.BLUE, P.PINK, L.RED, L.ORANGE, L.YELLOW, L.GREEN, P.GREEN, L.SKYBLUE, L.BLUE,
L.PURPLE
EQ tab
These are the track EQ settings.
Parameter Value Explanation
EQ Sw OFF, ON Turns the equalizer on/o.
EQ Input Gain -24–+24 [dB]
Adjusts the amount of boost/cut at the input
to the EQ.
EQ Low Gain -24–+24 [dB] Gain of the low frequency range.
EQ Low Frequency 20–16000 [Hz] Frequency of the low range.
EQ Mid Gain -24–+24 [dB]
Adjusts the amount of boost/cut for the mid
frequency range.
EQ Mid Frequency 20–16000 [Hz]
Species the center frequency of the mid
frequency range.
 Loading...