54
System Settings
(SET)
In MENU, choose SET and make settings to specify the operation of the
pads, MIDI, and knobs.
These settings are saved in the MC-707 unit.
1.
Hold down the [SHIFT] button and press the [KNOB ASSIGN]
button.
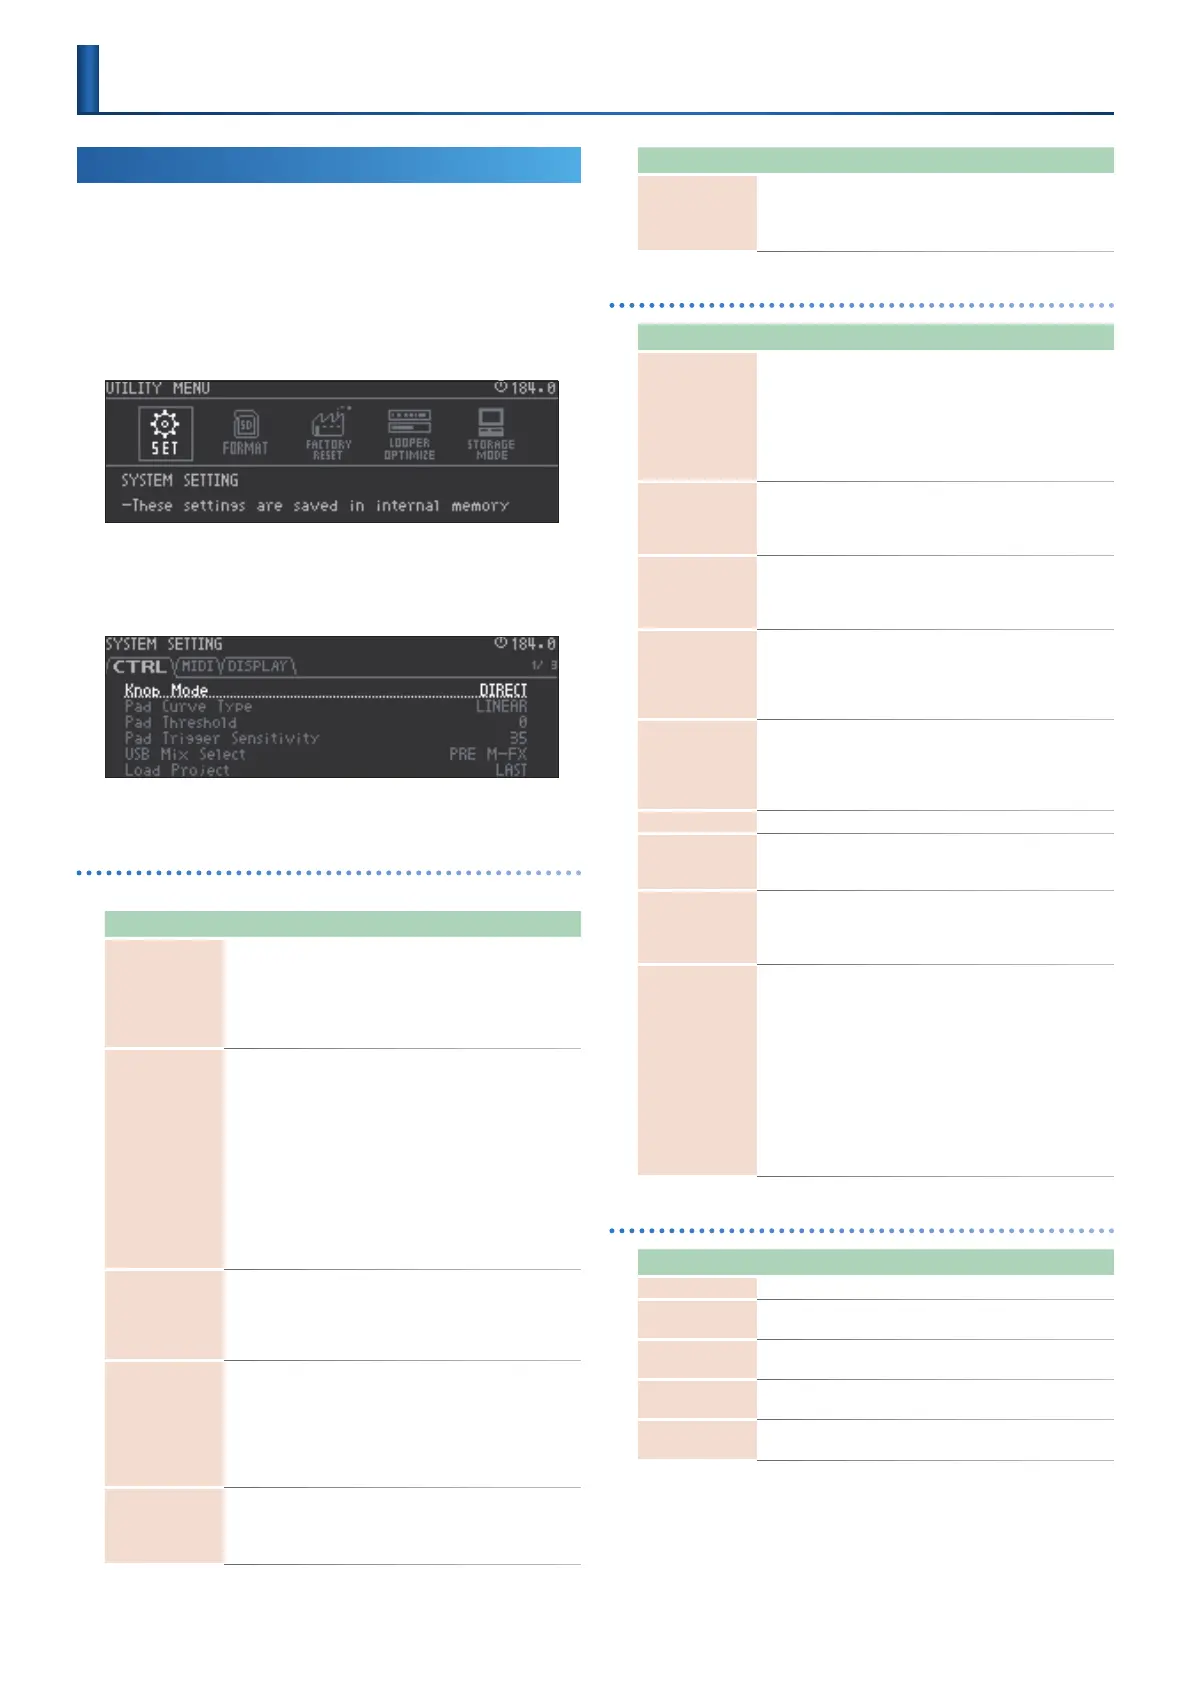
The UTILITY MENU screen appears.
2.
Use the cursor [<] [>] buttons to select “ S E T,” and then press
the [ENTER] button.
The SYSTEM SETTING screen appears.
3.
Use the cursor buttons to select the tabs, and make settings.
CTRL tab
Here you can make settings for the pads and knobs.
Parameter Value Explanation
Knob Mode
DIRECT,
CATCH
DIRECT: When a knob is moved, control
data of the corresponding position is
always output.
CATCH: Control data is output after the
knob passes through the current value of
the parameter.
Pad Curve Type
LINER,
EXP,
LOG,
FIX10-127
Species how the volume changes in
response to the force of your strike on the
pad.
LINER: This is the normal setting. This
allows the most natural-feeling relation
between strike strength and volume
change.
EXP: Compared to LINEAR, this produces
greater volume change for stronger strikes.
LOG: Compared to LINEAR, this produces
greater volume change for softer strikes.
FIX10-127: Enters a specied xed value.
Pad Threshold 0–15
Species the pad’s minimum sensitivity so
that a trigger signal is read only if the pad is
struck more strongly than a specied level.
This can be used to prevent the pads from
picking up vibration from the environment.
Pad Trigger
Sensitivity
10–200
Adjusts the sensitivity of the pads to
repeated strikes.
With lower values, the pads will accept
repeated strikes at a shorter time
interval. Increase this value if you don’t
want repeated strikes to be accepted
inadvertently.
USB Mix Select
Pre T-FX,
Post T-FX
Species whether sound that is input via
the USB-connected MIX OUT port is input
before or after TOTAL FX.
&
“Block Diagram” (p. 121)
Parameter Value Explanation
Load Project
LAST,
INIT
LAST: At startup, the project that was last
saved will be loaded.
INIT: At startup, a project will not be
loaded. A new project will be created.
MIDI tab
Parameter Value Explanation
MIDI Sync
AUTO,
INT,
MIDI,
USB
Species the tempo source.
If this is “AUTO,” the tempo automatically
synchronizes to MIDI clock if MIDI clock is
being input via the MIDI IN connector or
the USB port.
If this is “INT,” the tempo specied on the
MC-707 is used.
MIDI Sync Out1
MIDI Sync Out2
OFF,
ON
Species whether clock, start, and stop
messages are transmitted (ON) or are not
transmitted (OFF) to the devices connected
to the corresponding MIDI port.
MIDI Sync Out USB
OFF,
ON
Species whether clock, start, and stop
messages are transmitted (ON) or are not
transmitted (OFF) to the USB-connected
device.
RX Start Stop
OFF,
ON
When synchronized to external MIDI clock,
this setting species whether the step
sequencer’s start/stop is controlled from
the device connected to the corresponding
MIDI port (ON) or is not controlled (OFF).
RX Start Stop USB
OFF,
ON
When synchronized to external MIDI
clock, this setting species whether step
sequencer’s start/stop is controlled from
the USB-connected device (ON) or is not
controlled (OFF).
Track Channel 1-8 CH1–CH16 Species the MIDI channel of each track.
Device ID 17–32
When transmitting and receiving system
exclusive messages, the device ID numbers
of both devices must match.
Soft Through 1
Soft Through 2
OFF,
ON
If this is ON, MIDI messages that are
input from the MIDI IN connector are re-
transmitted without change from the MIDI
OUT connector.
USB-MIDI Thru 1
USB-MIDI Thru 2
OFF,
ON
Species whether MIDI messages received
at the USB port or MIDI IN port are
retransmitted without change from the
MIDI OUT connector and USB port (ON) or
not (OFF).
If this is ON, MIDI messages received at the
USB port are sent to the internal sound
engine and to the MIDI OUT connector,
and MIDI messages received at the MIDI IN
connector are sent together with messages
from the internal sound engine to the USB
port.
DISPLAY tab
Parameter Value Explanation
LCD Contrast 1–10 Adjusts the contrast of the display screen.
LCD Backlight 1–10
Adjusts the brightness of the display
backlight.
LED Brightness 1–10
Species the brightness of the fader and
button LEDs.
LED Glow 1–10
Adjusts the brightness when a button LED
is dimly lit.
DEMO Mode OFF, 1min–10min
Species the time (minutes) until the LED
demo is shown.
UTILITY
 Loading...