144 • Using the Table Map Sam4POS Operators Manual v2.33
Merge & Split Tables
When using the Table Map, the Merge & Split button allows you to combine active tables for payment or to select
an item or several items from a selected active table and assign the items to another table in the Table Map. You
can choose a table in the same zone or, you can choose to merge or split the items to a table in a different zone.
Combine \ Merge Checks
When an active table is selected from the Table Map, the Merge & Split button allows you to merge (combine) the
selected table with another table in the Table Map. You can choose a table in the same seating zone or, you can
choose to merge or split the items to a table in a different seating zone.
Split Check
When an active table is selected from the Table Map, the Merge & Split button allows you to select an item or
several items from the selected table and assign the items to another table in the Table Map. You can choose a table
in the same zone or, you can choose to merge or split the items to a table in a different zone.
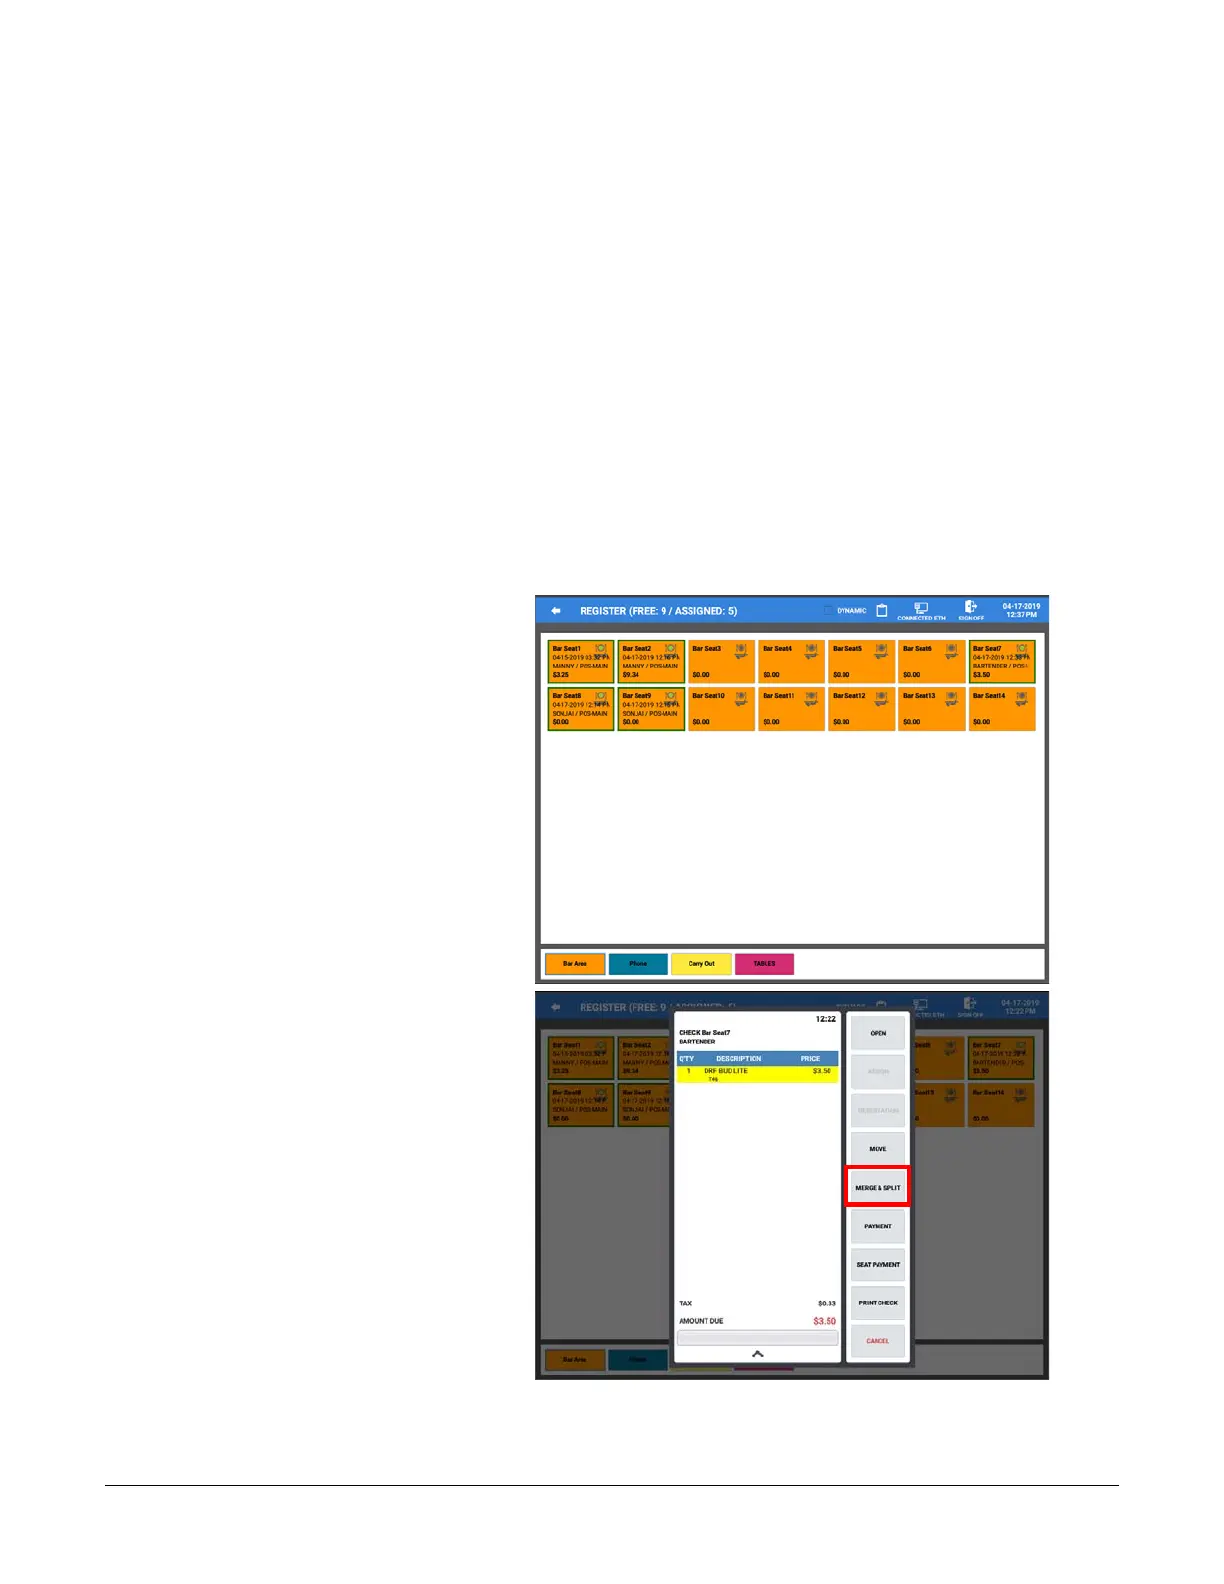
1. From the Register screen,
Touch the Table Map icon to
open the Table Map screen.
2. Select the Zone you want to
Merge or Split items from.
For our example we will
select a table in the Bar Area.
3. Select the Table you want to
Merge or Split items from.
Example: ‘BAR Seat #7’
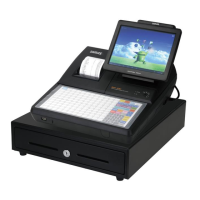
4. The ‘Check dialog’ screen is
displayed.
5. Press the ‘MERGE &
SPLIT’ button to open the
table.