REP
9.3
Photoreceptor Drum
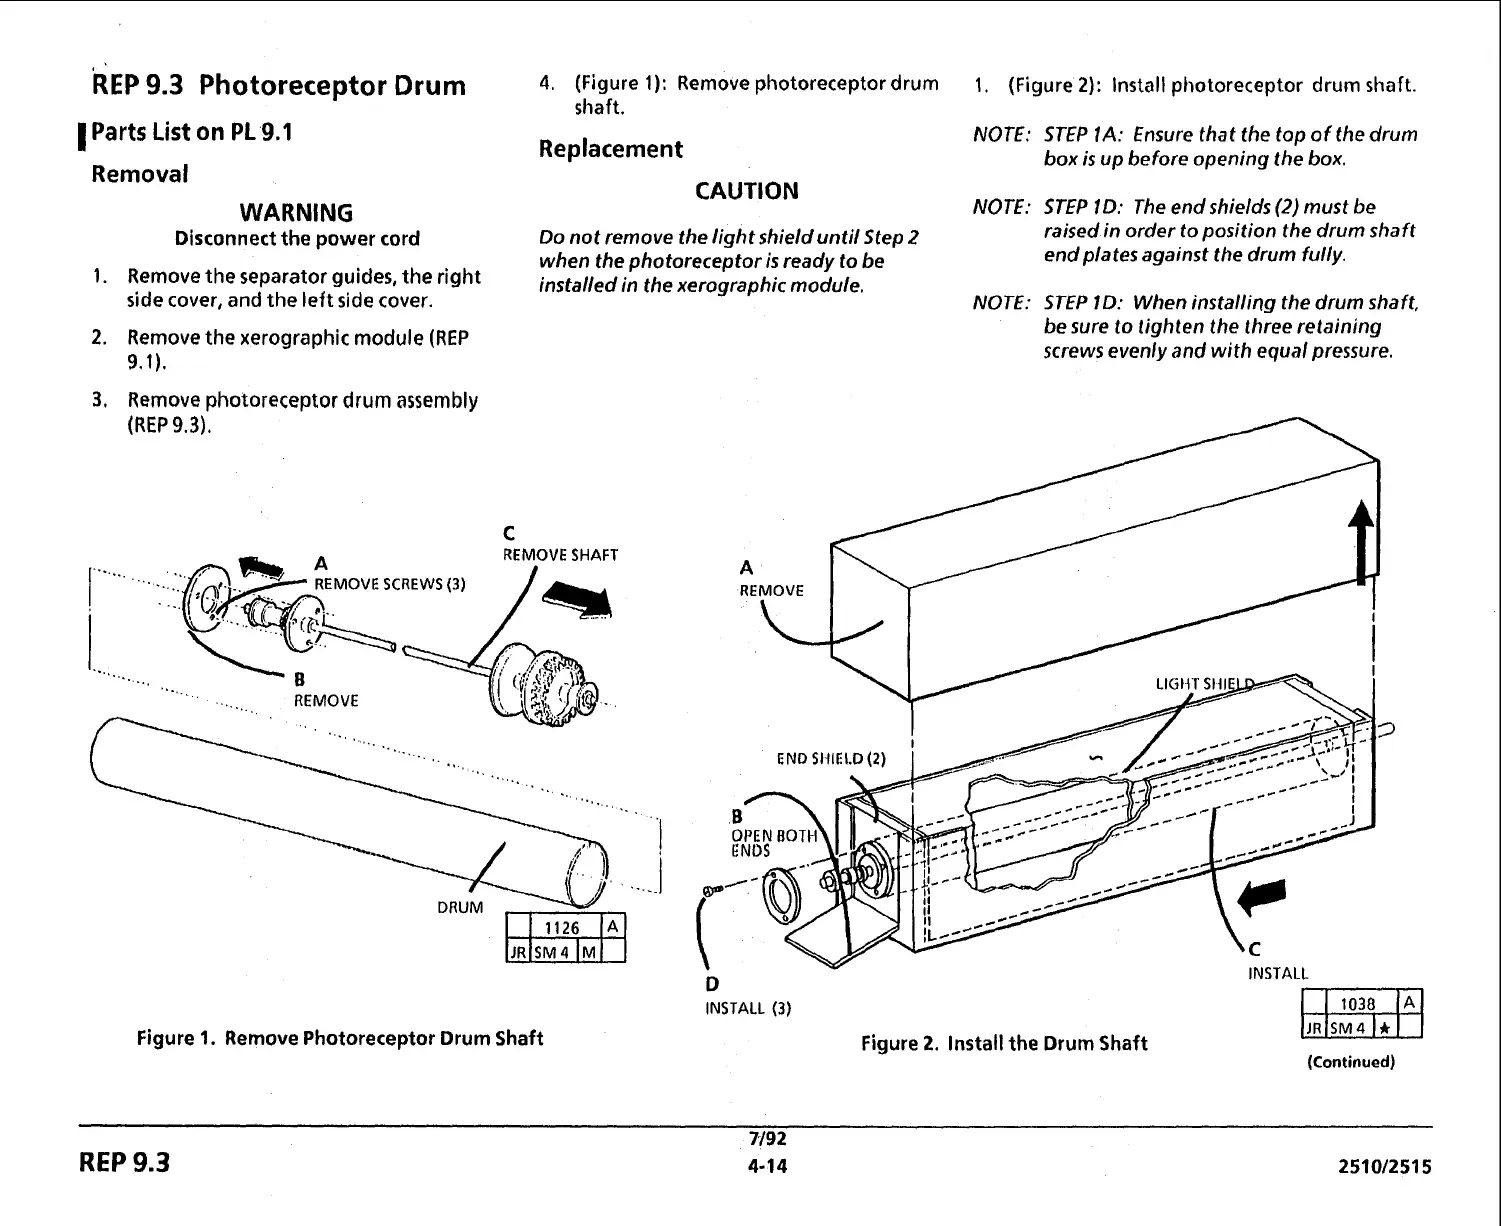
4.
(Figure
1):
Remove photoreceptor drum
1.
(Figure
2):
Install photoreceptor drum shaft.
shaft.
1
Parts List
on
PL
9.1
NOTE: STEP
1A:
Ensure that the top of the drum
Replacement
box is up before opening the box.
Removal
CAUTION
WARNING
NOTE: STEP
1
D: The end shields
(2)
must be
Disconnect the
power
cord
Do not remove the light shield until Step
2
raised in order to position the drum shaft
when the photoreceptor
is
ready to be
end plates against the drum fully.
Remove
the
separator guides, the right
installed in the xerographic module,
side cover, and the left side cover.
NOTE: STEP
ID: When installing the drum shaft,
Remove the xerographic module
(REP
9.1).
Remove photoreceptor drum assembly
(REP
9.3);
REMOVE
SHAFT
Figure
1.
Remove Photoreceptor Drum Shaft
be sure lo lighten the three retaining
screws evenly and
with
equal pressure.
n
INSTALL
Y
INSTALL
(3)
Figure
2.
Install the Drum Shaft
(Continued)
7/92
REP
9.3
4-14 2510/2515
 Loading...


