ADJ
9.1
Cleaner
Blade
Solenoid
Purpose
The purpose
is
to adjust the cleaning blade
solenoid so that the cleaner blade applies the
correct force to the drum.
NOTE:
(Figure
1)
The drum must be in the
xerographic module before performing
this check or adjustment. The nut
driver provides
a
3
point stand to
avoids
a
twist
in
the assembly which
could result in an improper gap.
1.
Remove the xerographic module
(REP
9.1).
2.
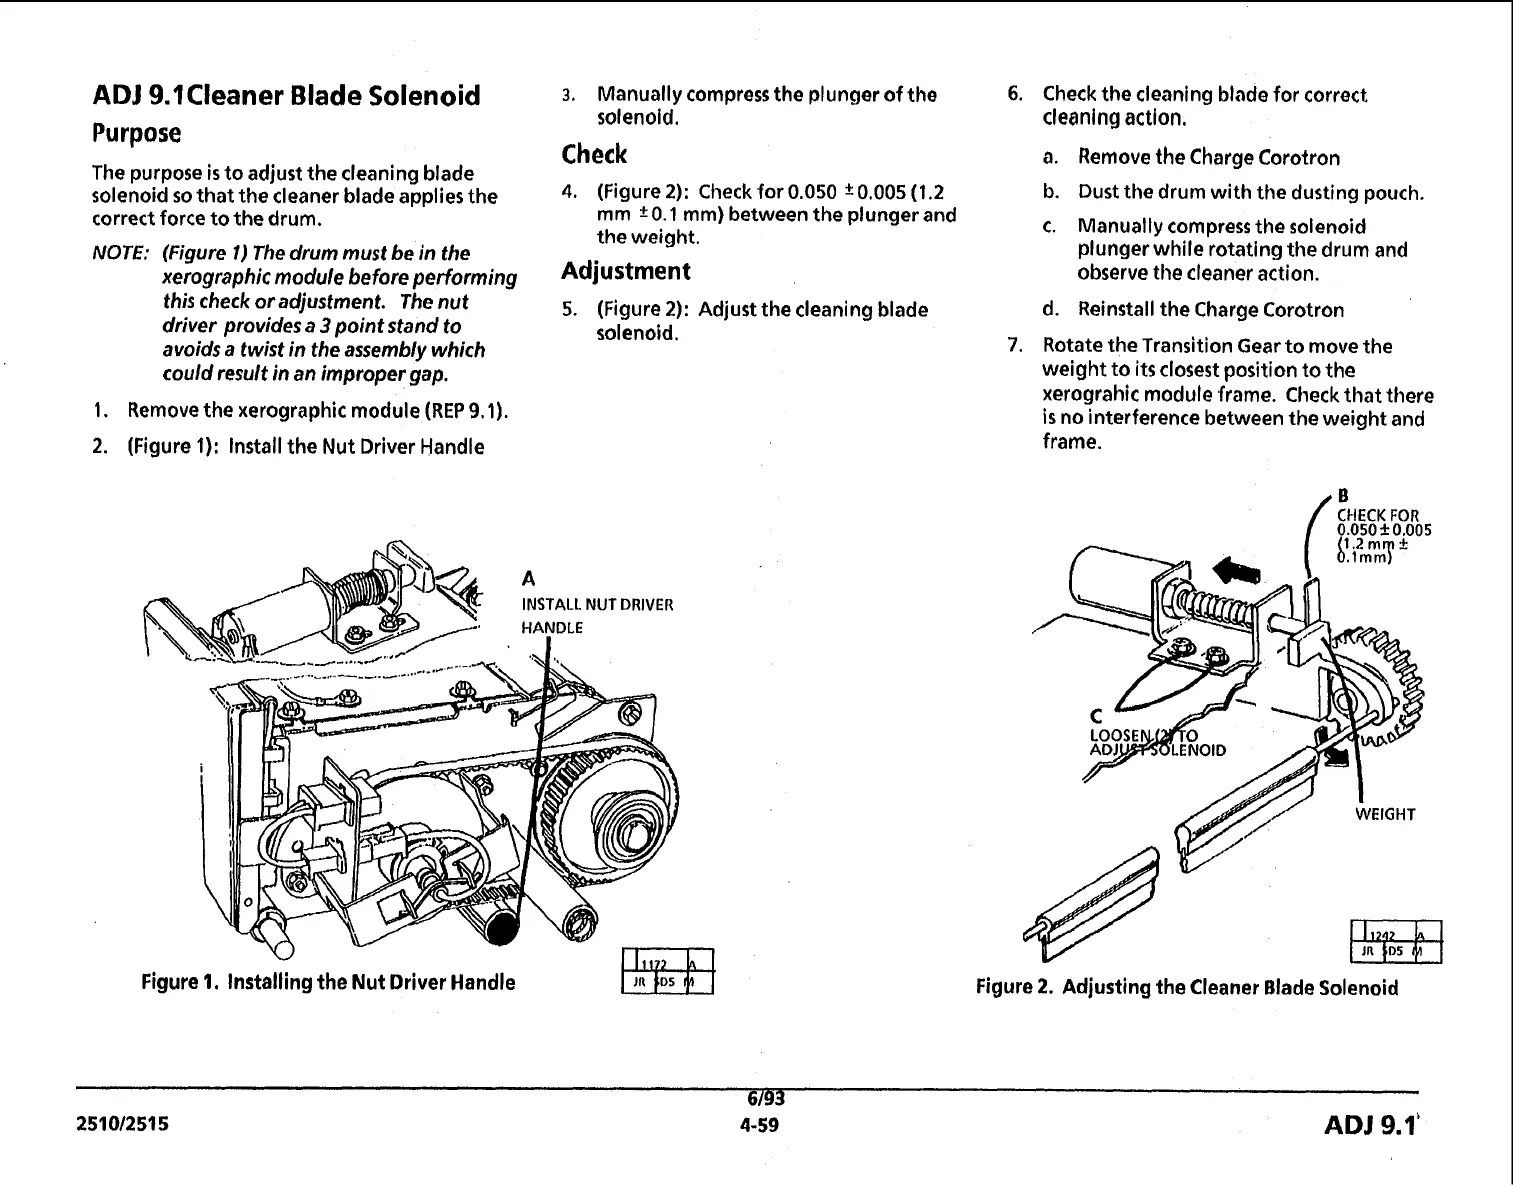
(Figure
1):
Install the Nut Driver Handle
3.
Manually compress the plunger of the
solenoid.
Check
4.
(Figure 2): Check for
0.050
f
0.005
(1.2
mm
*0.1
mm) between the plunger and
the weight.
Adjustment
5.
(Figure
2):
Adjust the cleaning blade
solenoid.
Figure
1.
Installing the Nut Driver Handle
6.
Check the cleaning blade for correct
cleaning action.
a. Remove the Charge Corotron
b.
Dust the drum with the dusting pouch.
c.
Manually compress the solenoid
plunger while rotating the drum and
observe the cleaner action.
d. Reinstall the Charge Corotron
7.
Rotate the Transition
Gear
to move the
weight to
its
closest position to the
xerograhic module frame. Check that there
is
no interference between the weight and
frame.
Figure
2.
Adjusting the Cleaner Blade Solenoid
6193
251012515
4-59
ADJ
9.1'
 Loading...


