REP
10.4
2510
Oil
Pads
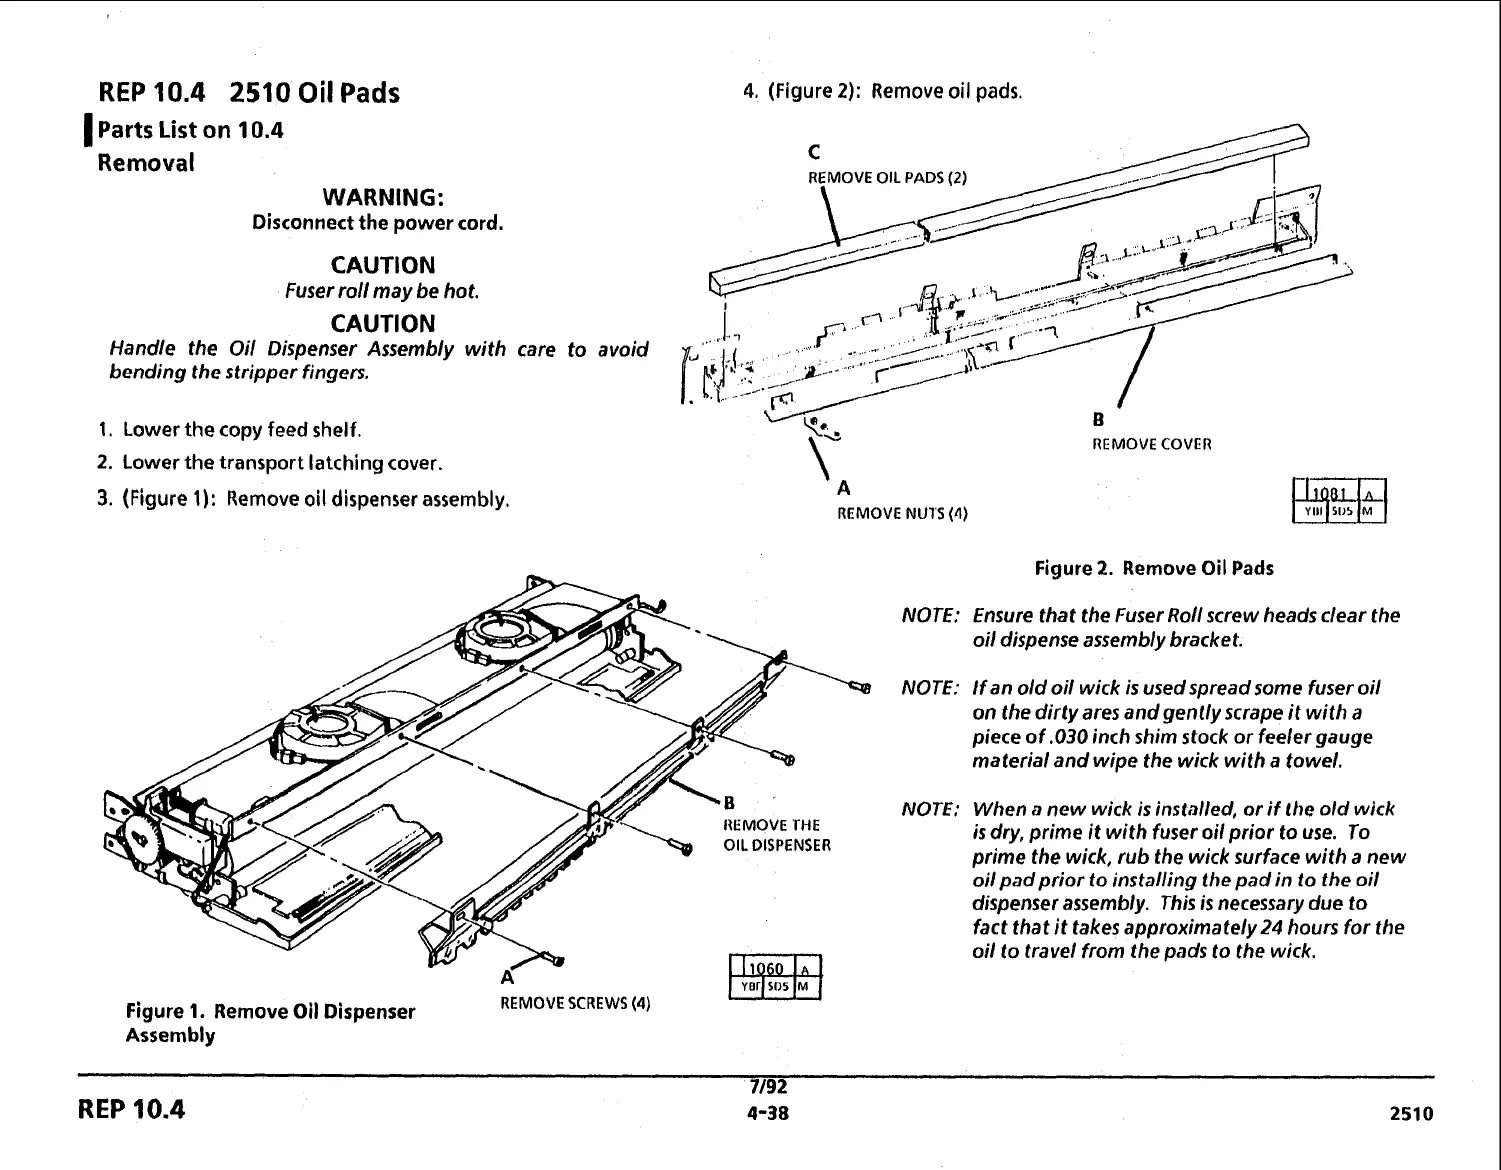
4.
(Figure
2):
Remove oil
pads.
I
Parts List
on
10.4
Removal
WARNING:
Disconnect the power cord.
CAUTION
Fuser roll may be hot.
CAUTION
Handle the Oil Dispenser Assembly with care to avoid
bending the stripper fingers.
1.
Lower the copy
feed
shelf.
2.
Lower the transport latching cover.
3.
(Figure
1):
Remove oil dispenser assembly.
1.
REMOVE
COVER
B
REMOVE
THE
OIL
DISPENSER
\
A
REMOVE
NUTS
(4)
REMOVE
SCREWS
(4)
Figure
1.
Remove
Oil
Dispenser
Assembly
Figure
2.
Remove Oil Pads
NOTE: Ensure that the Fuser Roll screw heads clear the
oil dispense assembly bracket.
NOTE: If an old oil wick is used spread some fuser oil
on the dirty ares and gently scrape it with
a
piece
of
,030
inch shim stock or feeler gauge
material and wipe the wick with a towel.
NOTE: When
a
new wick is installed, or if the old wick
is dry,
prime
it with fuser oil prior to use. To
prime the wick, rub the wick surface with a new
oil pad prior to installing the pad in to the oil
dispenser assembly. This is necessary due to
fact that
it
takes approximately24 hours for the
oil to travel from the pads to the wick.
REP
10.4
 Loading...


