,(Continued)
Replacement
CAUTION
I
(251
5
WtO
'rag
2
or
89)
I
NOTE: Ensure that the thermistor is clean and
Enter code [A] and press
Start.
touches the fuser roll after assembly.
ON
from your fingers can damage the
heat rod. Wear gloves or wrap a sheet
of paper around the heat rod when
handling the heat rod.
NOTE:
lnstall the heat rod, white connector
first.
DO
NOT
remove the connectors
from the wires on the ends of the
heat rod. The heating element
inside the rod is closer to the end
with the white connector.
NOTE:
Step
F:
When reinstalling the
(2)
screws, ensure that the head of the
screws
Ti1
inlo
the
hole In the fuser
roll.
WARNING
(2515
W/
Tags
2
or
89):
There
will
be a time
delay between the time the code
[A]
is
entered and the time the motor starts to
turn. The motor will not start until the fuser
is
at
the correct temperature.
I
1.
Enter diagnostic mode.
(2510,251
5
WIO
Tag
2
or
89)
Enter code
[l]
and press
Start.
0
Enter code
[g]
and press Start.
0
Enter code
[J]
and press Start.
0
Wait
2
at least
2
minutes.
Enter code
[A]
and press Start.
Allow the copier to run for
15
minutes so
that
the
filser
~il
will
condition the fuser roll.
Allow
the copier tb run for
15
minutes so
that the fuser oil will condition the fuser
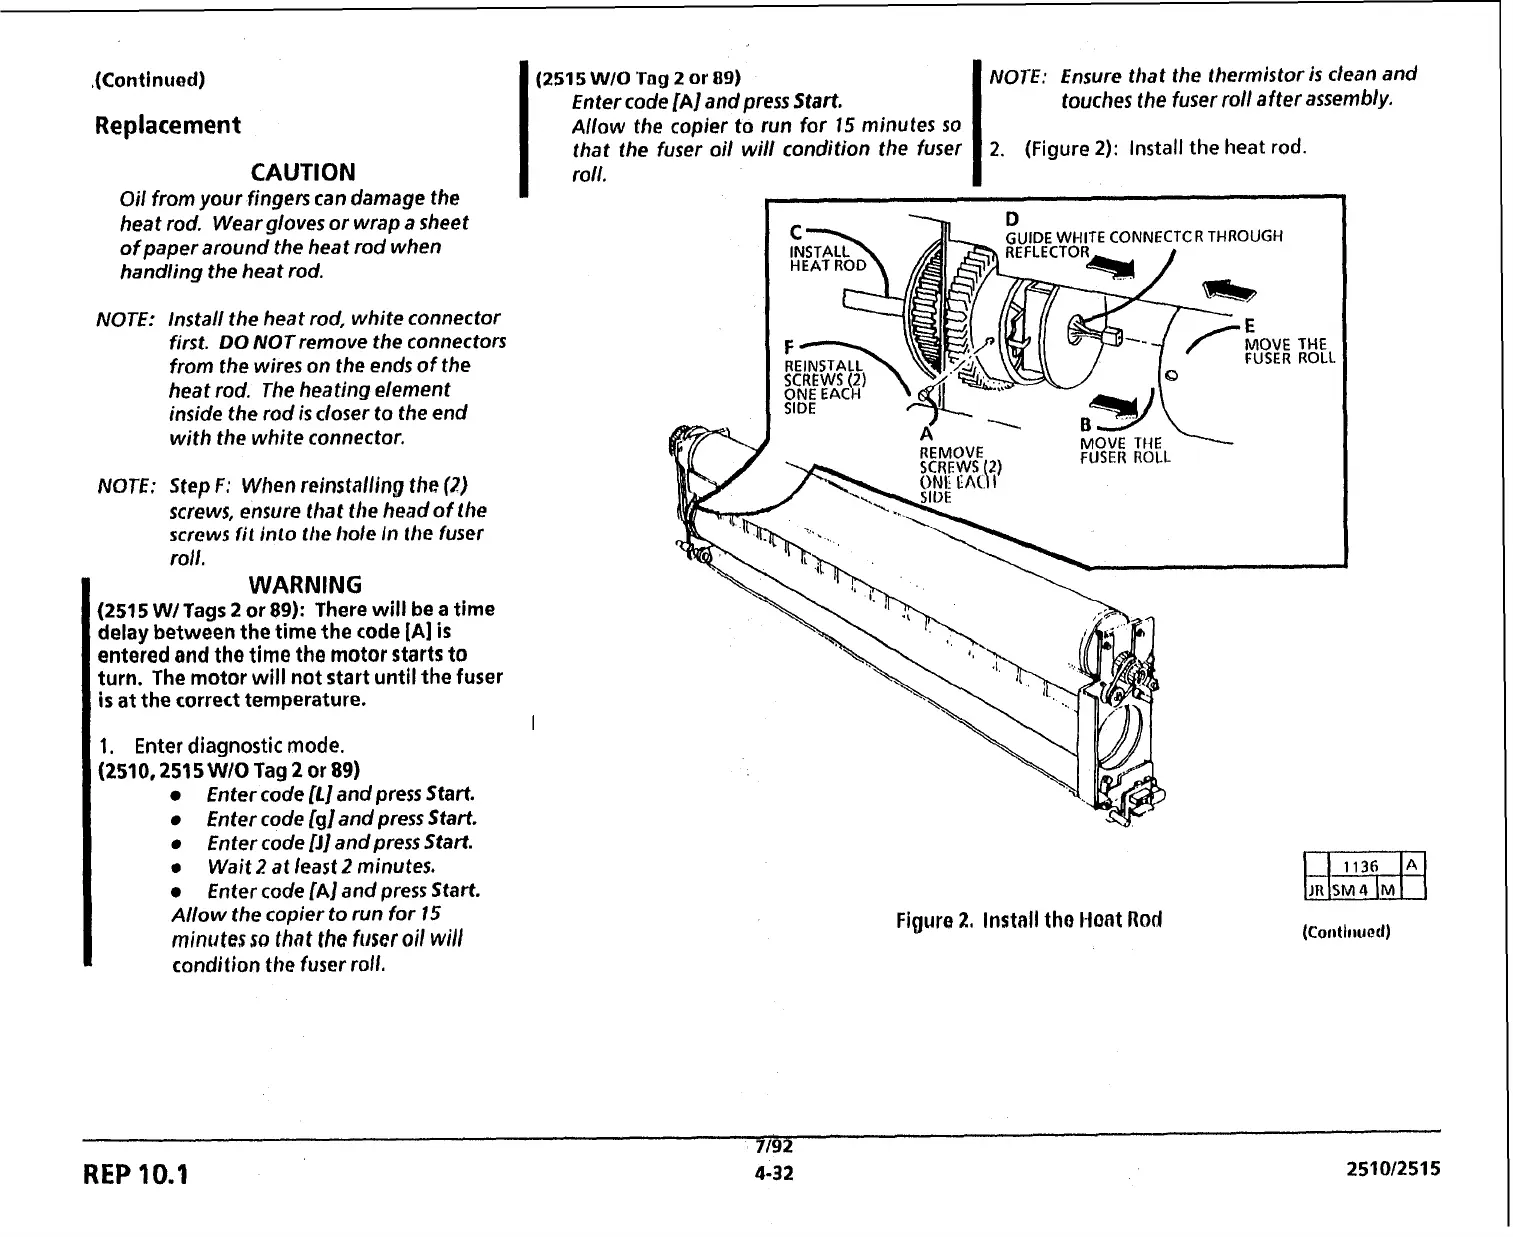
2.
(Figure
2):
Install the heat
rod.
roll.
I
Figure
2,
Install tho l-l~at
Rod
7/92
REP
10.1
4-32
 Loading...


