6-28 Removal and Replacement
Ribbon Motion Sensor
Removal Procedure
1. Turn off the printer and unplug the power cord.
2. Remove the ribbon cartridge and cleaning roller.
3. Remove the
Main Enclosure (page 6-15).
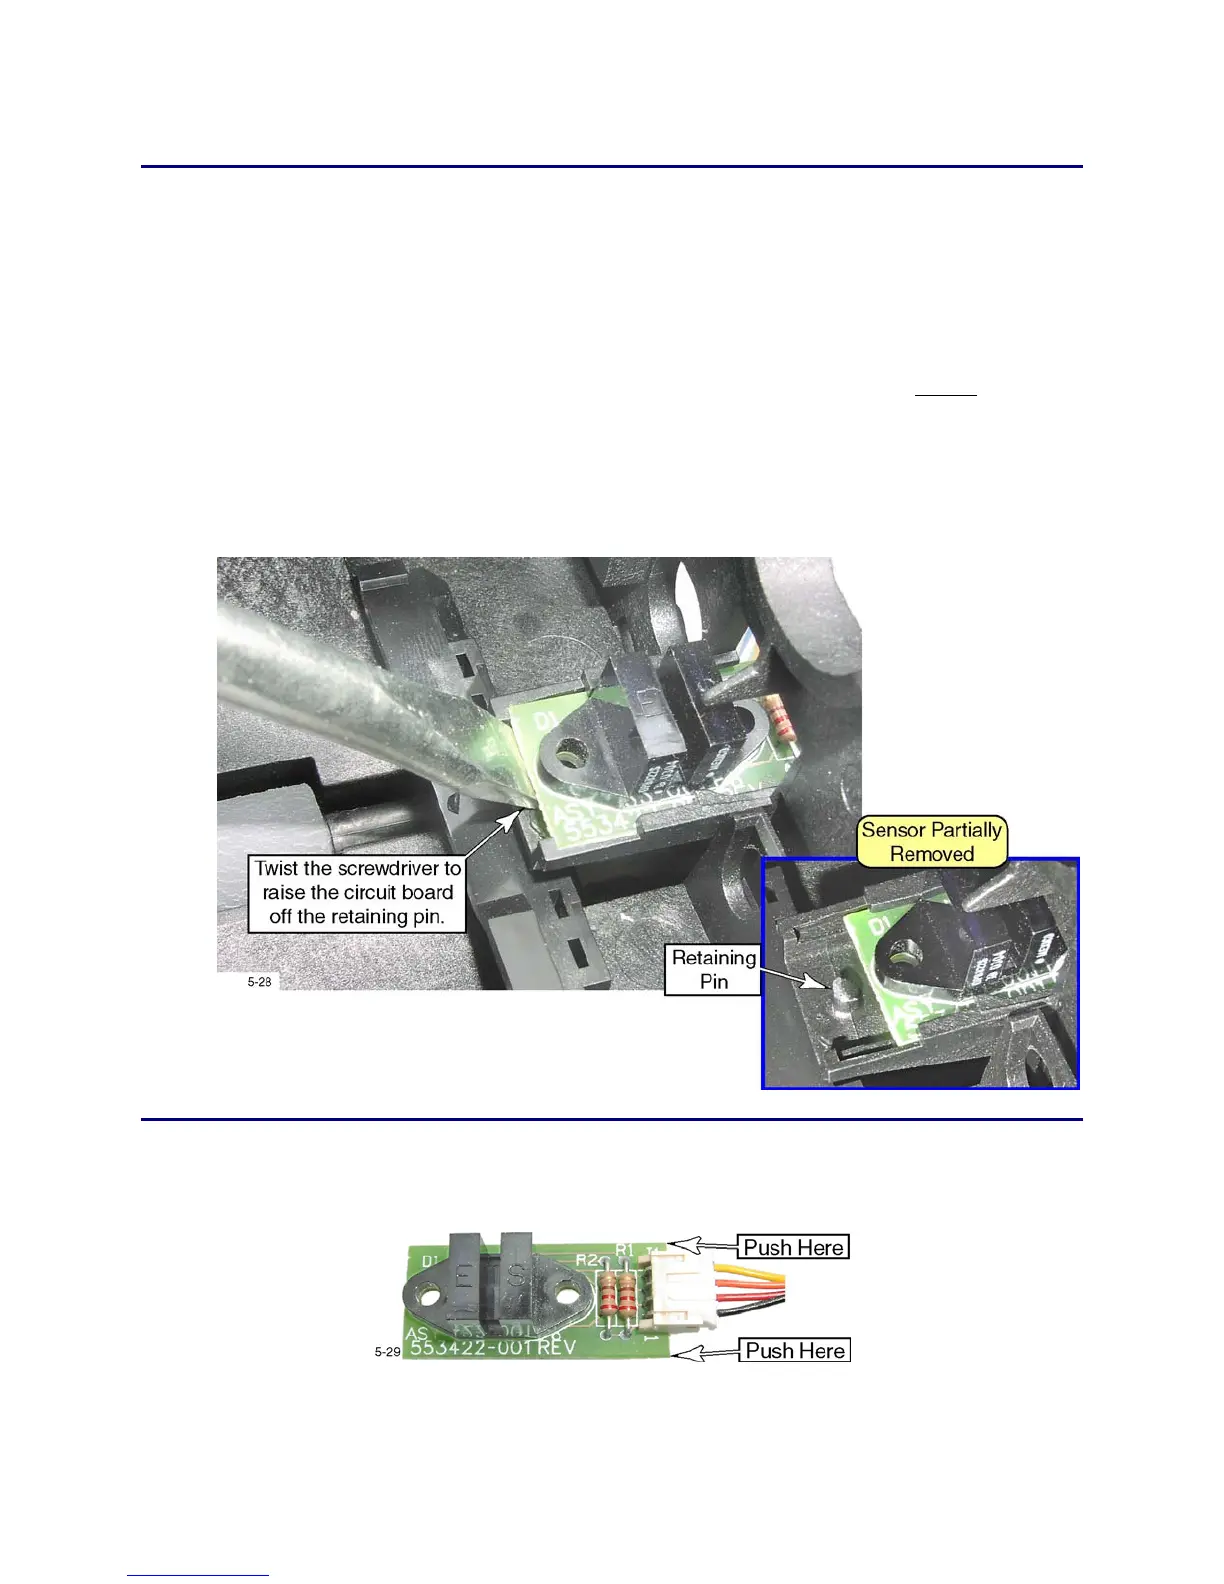
4. Remove the sensor:
A. Insert a screwdriver under the sensor's circuit board and gently
twist to
free the sensor from the retaining pin.
B. Continue to pull the sensor out of the chassis by grasping the sides of the
circuit board.
5. Disconnect the sensor cable connector from the sensor's circuit board.
Replacement Notes
• When replacing the sensor, do not push against the cable connector—the solder
leads will bend. Push against the corners of the circuit board.
• Use the sensor display in Diagnostics to verify that the sensor changes state as
the ribbon supply spindle is rotated.
 Loading...


