CP80 and CP80 Plus Service Manual 6-89
Smart Card Option
Smart Card Interface Board
Removal Procedure
1. Unplug the printer.
2. Remove the ribbon cartridge and cleaning roller.
3. Remove the
Main Enclosure (p. 6-15).
4. Remove the
Upper Printer Assembly from the base (p. 6-38).
5. Disconnect the interface and solenoid cables from the smart card interface
board. Refer to the
Print Engine Cable Connection Diagram (p. 6-11) for
location and details.
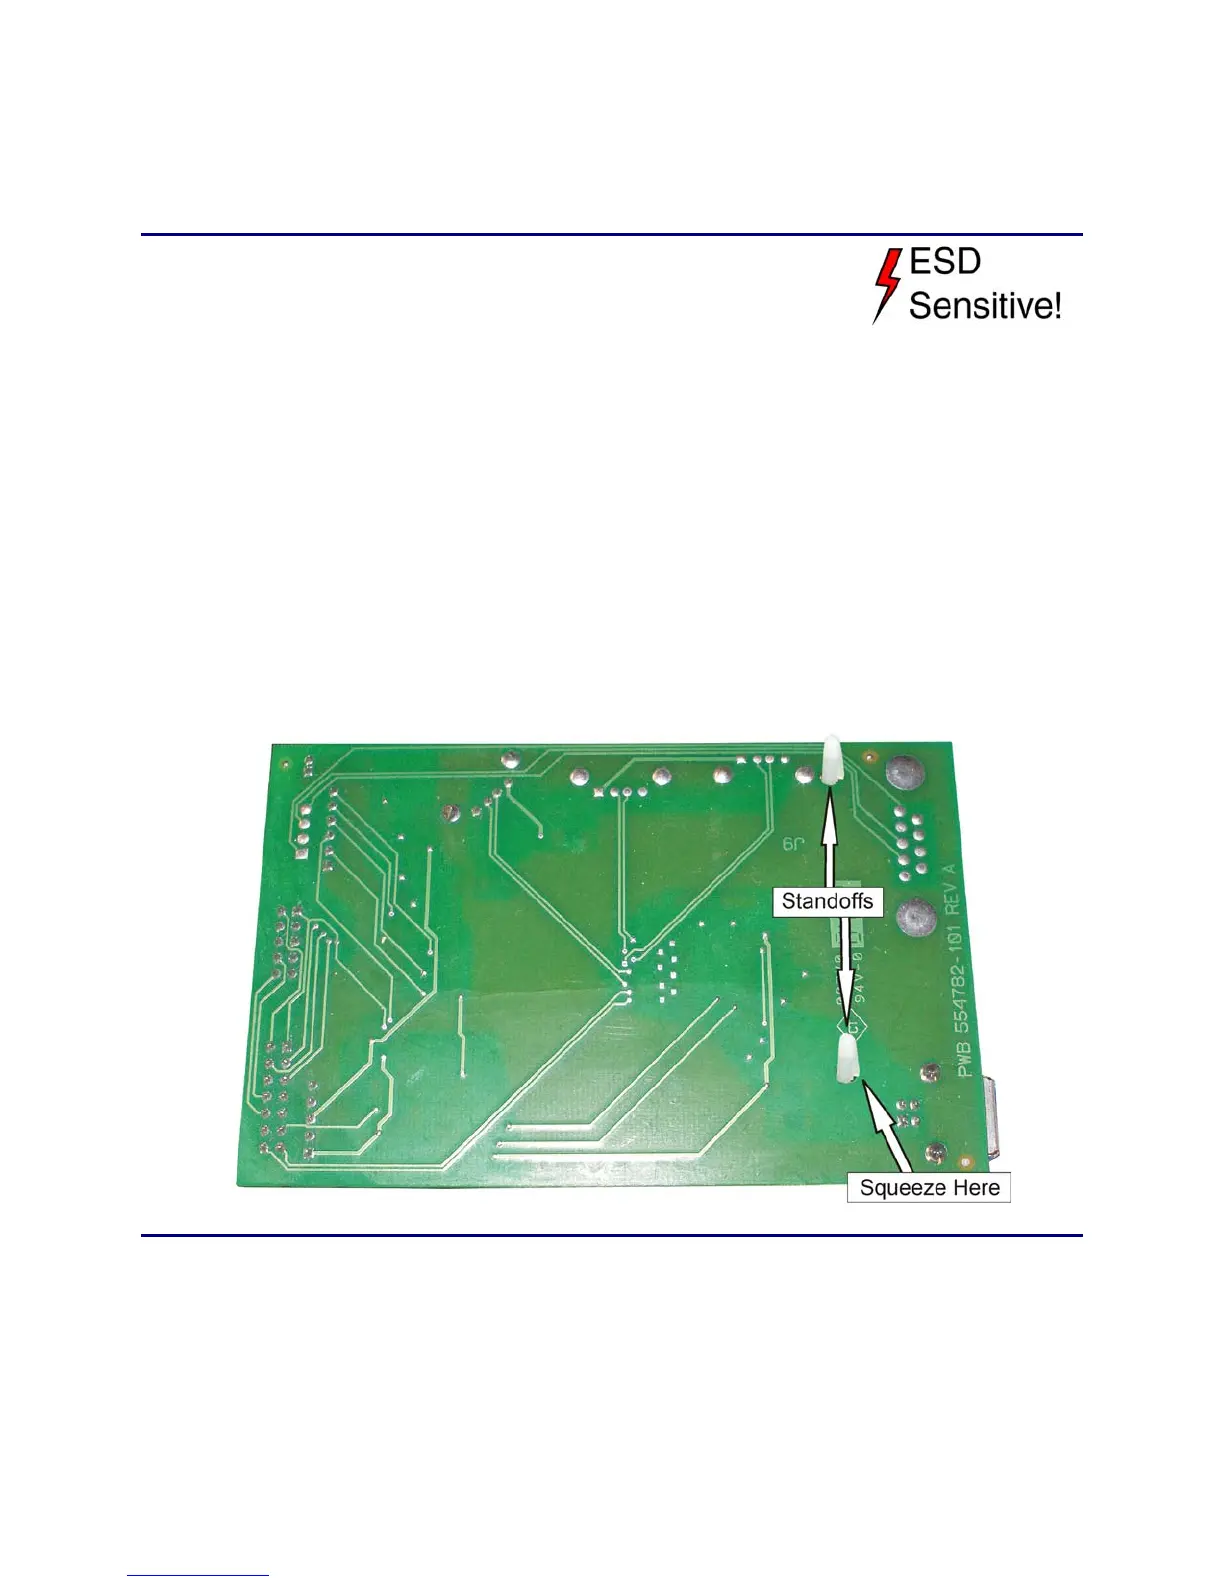
6. Remove the interface board from the main control board. The board needs to
be removed straight up to prevent damage to the connector.
A. Squeeze the locking tab on one standoff and lift the board up slightly.
B. Repeat for the other standoff.
C. Gently pry the board off the connector.
Follow-up Procedure
Using Diagnostics, perform the Smart Card Test Card procedure as described in
chapter 5 of this manual.
 Loading...


