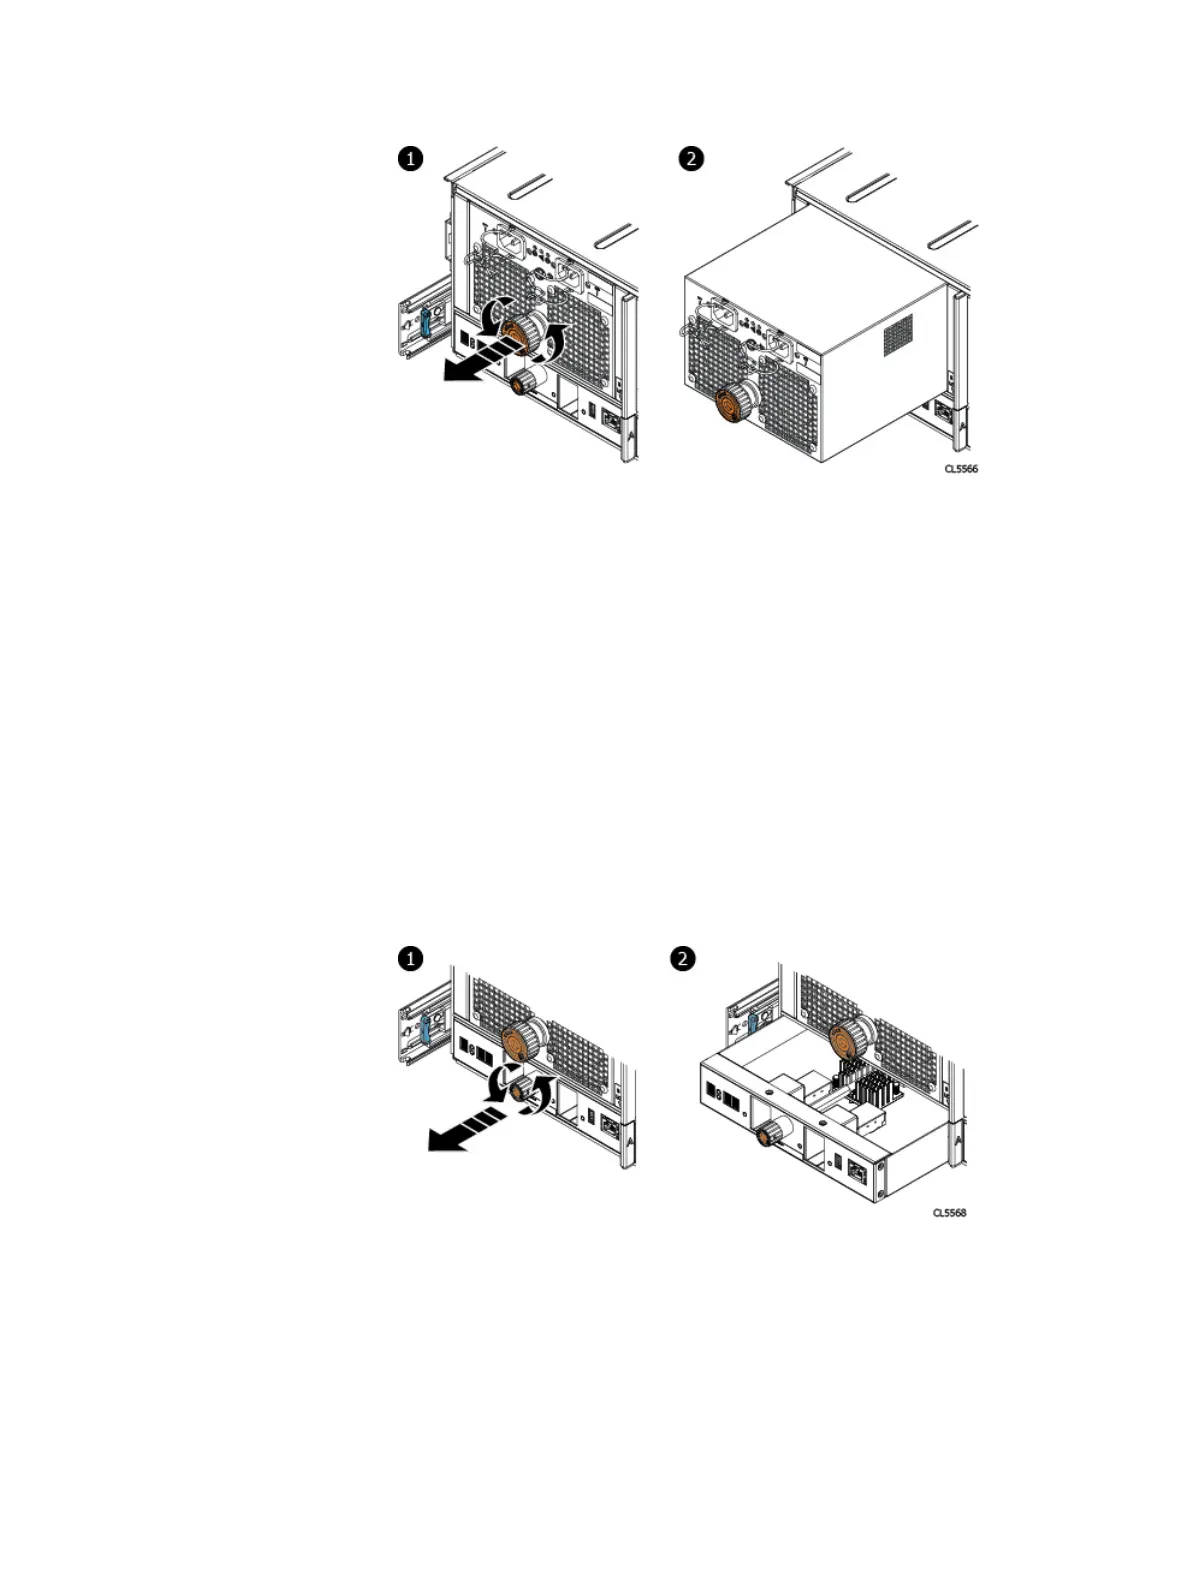
3. Refer to the previous figure. Release the PSU by turning the torque-limiting
screw handle counter-clockwise. Unscrewing the torque-limiting screw unseats
the PSU and draws it from the chassis.
4. Pull the PSU straight out from the chassis and place it on a clean, static-free
surface.
Removing an LCC
This procedure describes how to remove an LCC from the rear of the chassis. There
are two LCCs accessible from the rear of the chassis. This procedure can be used to
remove either assembly.
Before you begin
Attach an ESD wristband to your wrist and the shelf with the LCC you are removing.
Procedure
1. If the shelf is installed using rear cable management arms (CMAs), open the
CMAs.
2. Refer to the previous figure. Disconnect data cables from the LCC. Release the
LCC by turning the torque-limiting screw handle counter-clockwise until
extends from the rear of the chassis by approximately 1/2 inch. Unscrewing the
torque-limiting screw unseats the LCC and draws it from the chassis.
3. Remove and save the black triangular plastic filler plugs for later use.
4. Pull the LCC straight out from the chassis and place it on a clean, static-free
surface.
Removing and Replacing FRUs
Removing an LCC 103
 Loading...