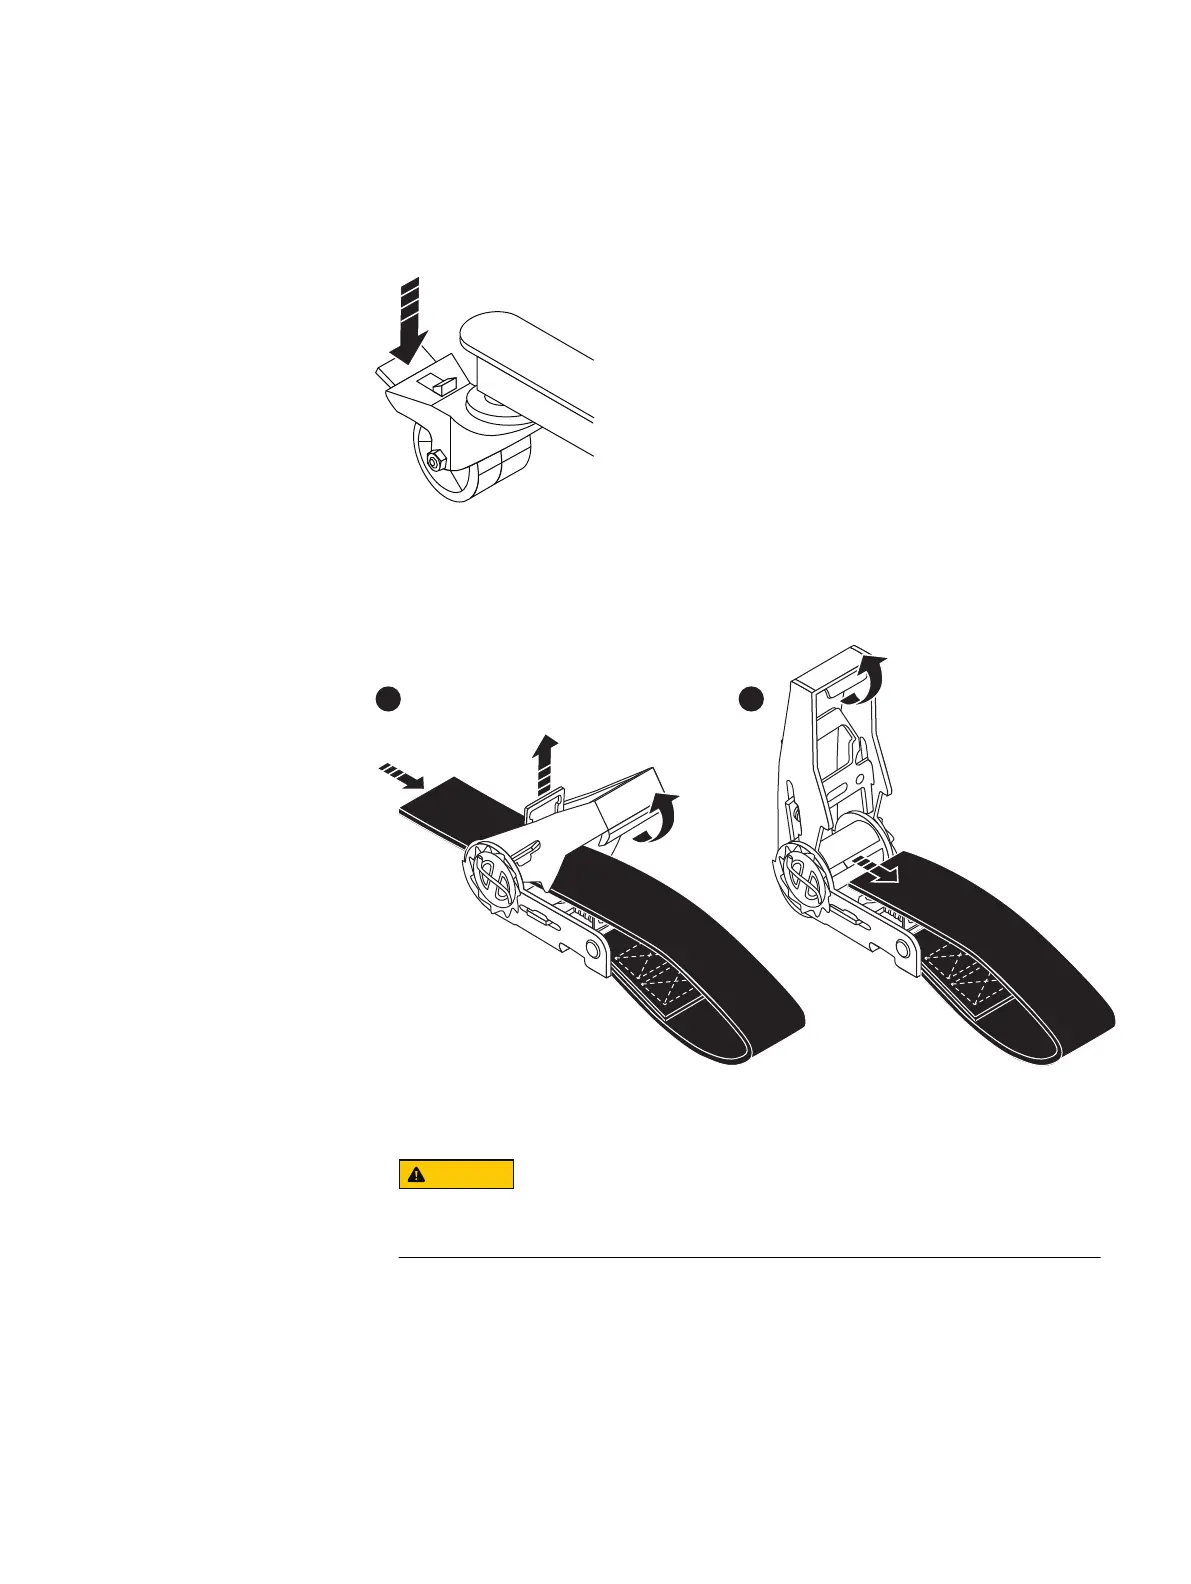
5. Release the lift casters
6. Lock all four casters by pressing down on the locking tab so the lift will not roll
as the shelf is pushed into the cabinet.
Figure 8 Locking the casters
7. Remove the securing strap by pulling up on the retaining key and pull the
ratchet handle upwards as needed.
Figure 9 Removing the straps
8. Carefully push the shelf off the lift arms/tray and into the cabinet.
Make sure to leave the lift under the chassis until the shelf is safely
balanced and secured within the cabinet.
9. If the shelf was de-populated prior to installation, re-populate the shelf as
follows:
a. Re-install the disk drives in the exact location from which they were
removed.
b. Re-install the Fan modules.
c. Slide the shelf into the cabinet.
Shelf Installation and Removal
30 EMC Data Domain DS60 Expansion Shelf Installation and FRU Replacement Hardware Guide
 Loading...