d. From the rear of the cabinet, re-install the power supplies and the LCCs into
the shelf.
Inserting and securing the top cover and chassis
How the chassis is inserted and secured into the cabinet depends upon which
configuration of securing mechanism is installed on the shelf. The first configuration
has orange self-locking latches above the enclosure latch handles. The second
configuration has captive shoulder screws which attach the chassis to the cabinet.
Procedure
1. If your shelf has the orange self-locking latches above the enclosure latch
handles, proceed as follows:
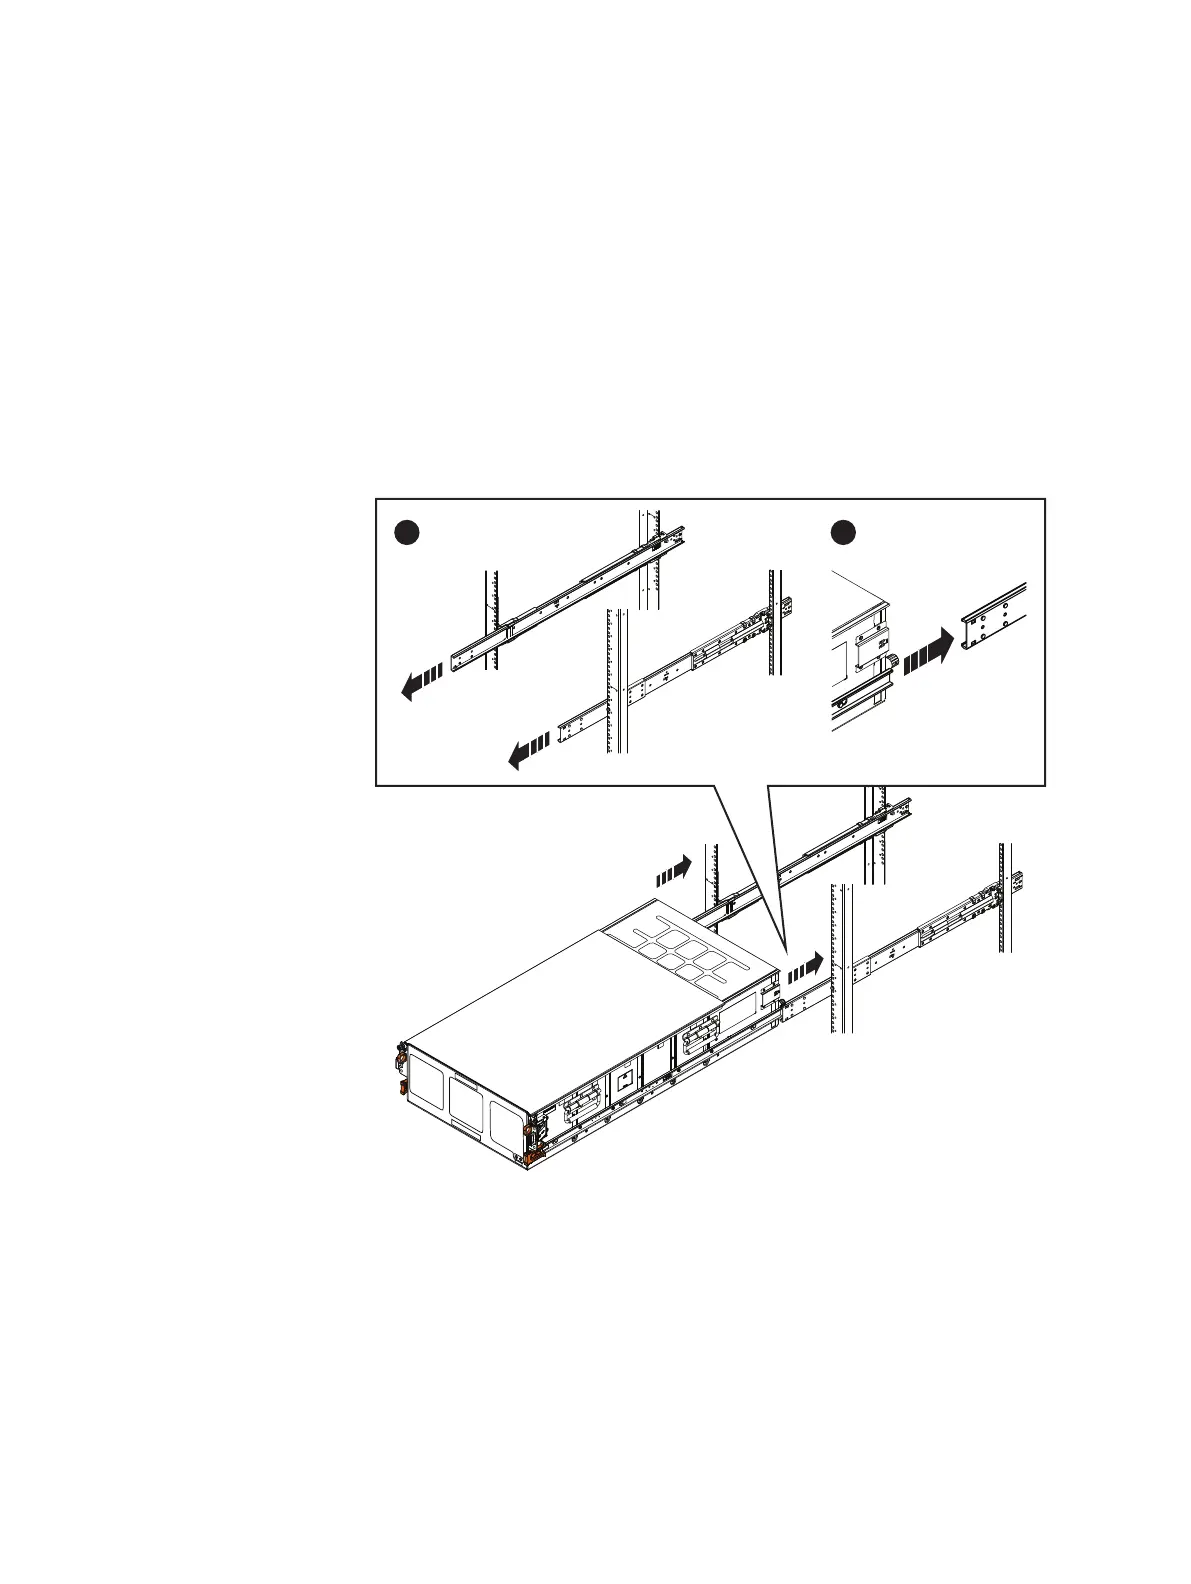
Figure 95 Inserting and securing the chassis to the cabinet
a. Using the orange enclosure latch handles, push the shelf completely into the
cabinet. Make sure the self-locking latches are pushed in and fully engaged,
and the enclosure cannot slide back out of the cabinet.
b. Secure the two knurled black captive screws to the NEMA channel and nut
clips. These screws secure the chassis cover and prevent the cover from
coming out of the cabinet during service.
2. If your shelf has the two-shoulder screw configuration, proceed as follows:
Removing and Replacing FRUs
120 EMC Data Domain DS60 Expansion Shelf Installation and FRU Replacement Hardware Guide
 Loading...