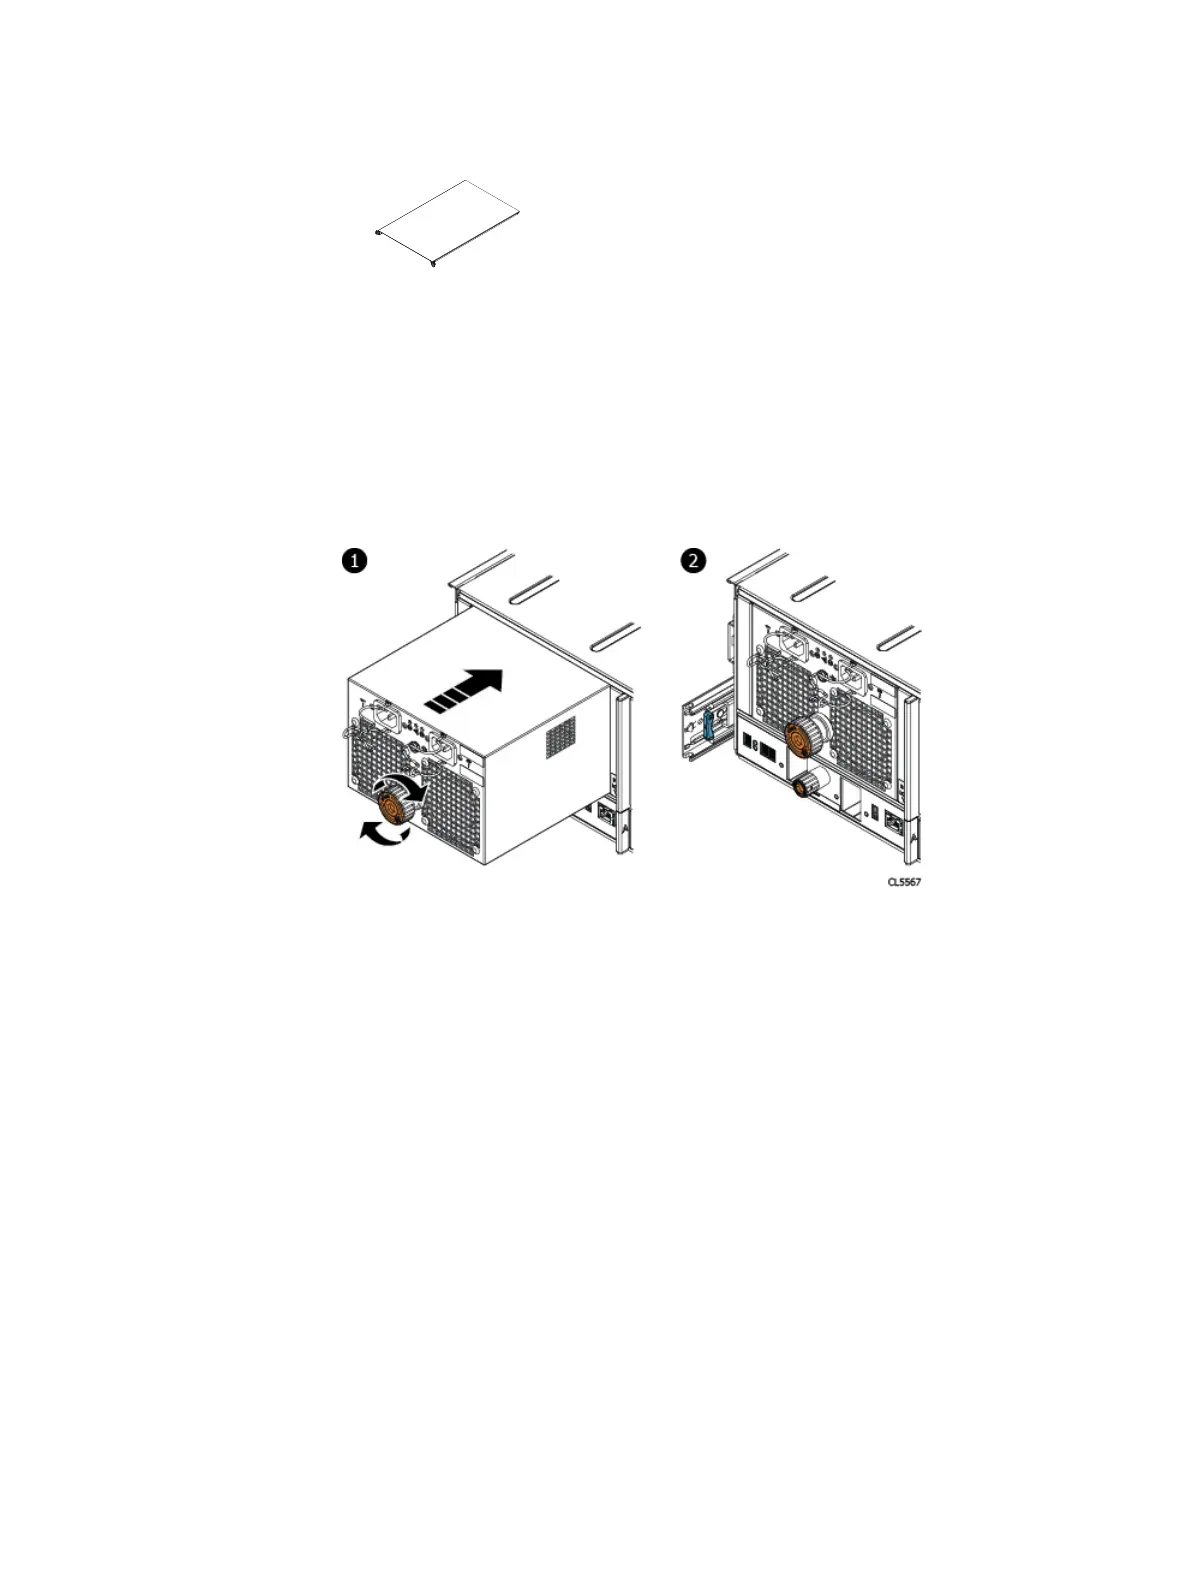
Figure 146 Removal of semi-captive screws
Replacing a power supply.
There are two Power Supply Units (PSU) located at the rear of the chassis. The
following procedure can be used to replace either one of them.
Before you begin
Attach an ESD wristband to your wrist and the shelf with the PSU you are removing.
Refer to as you perform the following steps:
Procedure
1. Refer to the previous figure. Push the PSU straight into the chassis until it is
seated into the chassis.
2. Fully seat the PSU in the chassis by turning the torque-limiting screw handle
clockwise until a single click is heard.
Turning the torque-limiting screw draws the PSU into the chassis and fully
seats it into the chassis. The single click indicates the PSU is fully seated.
3. Match the labels on the cables with the correct connectors on the PSU.
Connect the power cables to the PSU.
Replacing an LCC
This procedure describes how to replace an LCC into the rear of the chassis. There
are two LCCs accessible form the rear of the chassis. This procedure can be used to
replace either assembly.
Before you begin
Attach an ESD wristband to your wrist and the shelf with the LCC you are removing.
Removing and Replacing FRUs
Replacing a power supply. 163
 Loading...