Procedure
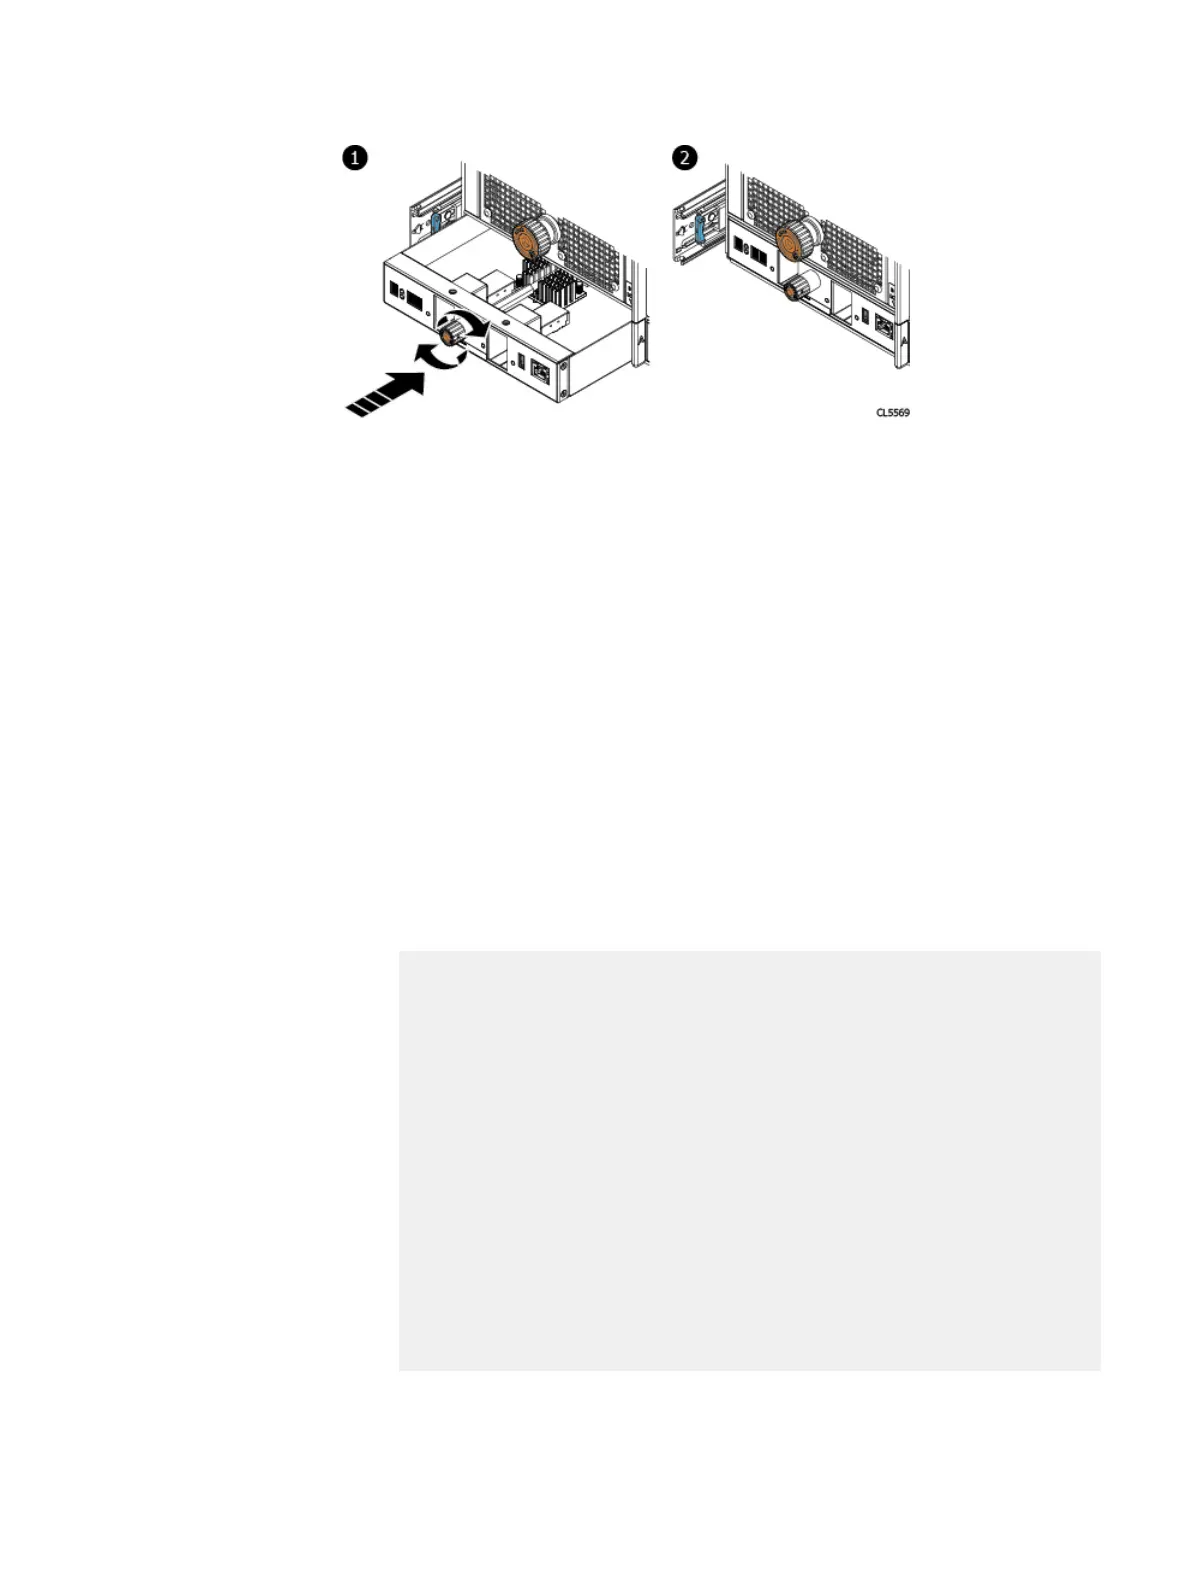
1. Refer to the previous figure. Push the LCC straight into the chassis until it is
seated in the chassis.
2. Fully seat the LCC in the chassis by turning the torque-limiting screw handle
clockwise until a single click is heard.
Turning the torque-limiting screw draws the LCC into the chassis and fully seats
it into the chassis. The single click indicates the LCC is fully seated.
3. Connect the data cables to the LCC.
4. Insert the black triangular plastic filler plugs in slots 1 and 3 for both the LCCs.
Verify the
Verify that the new component is recognized by your system and operating correctly.
Procedure
1. Log in as sysadmin
2. Enter the enclosure show controllers command to verify that the
controller is operating correctly:
# enclosure show controllers 9
Encl 9
Model DS60
Capacity 60 Slots
WWN N/A
Serial # APM00152002461
Number of Controllers 2
Controller A
WWN 500604811082407F
Firmware 1.1.0
Serial # JWXCL150500003
Status OK
HOST port 48.0 Gbps
EXP'N port 0.0 Gbps
Controller B
WWN 500604811086317F
Firmware 1.1.0
Serial # JWXCL150500066
Status OK
HOST port 24.0 Gbps
EXP'N port 48.0 Gbps
Removing and Replacing FRUs
Verify the 85
 Loading...