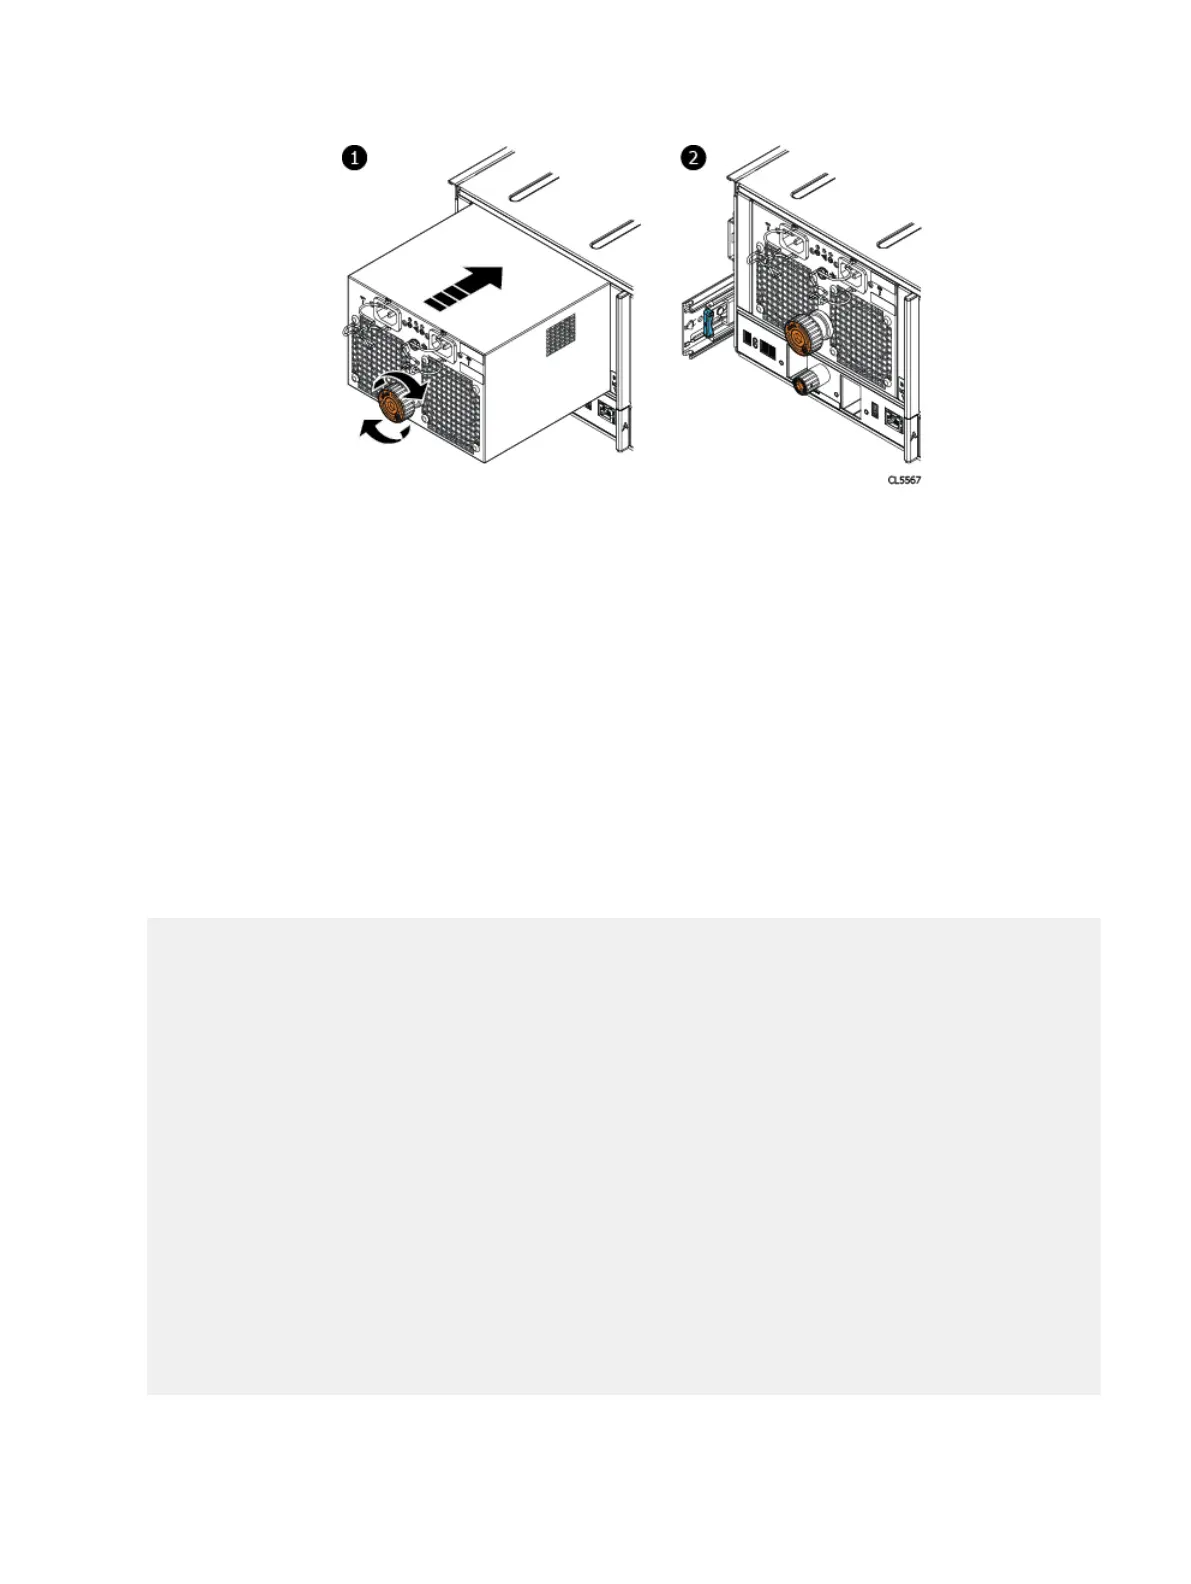
Procedure
1. Refer to the previous figure. Push the PSU straight into the chassis until it is
seated into the chassis.
2. Fully seat the PSU in the chassis by turning the torque-limiting screw handle
clockwise until a single click is heard.
Turning the torque-limiting screw draws the PSU into the chassis and fully
seats it into the chassis. The single click indicates the PSU is fully seated.
3. Match the labels on the cables with the correct connectors on the PSU.
Connect the power cables to the PSU.
Verify the power supplies
Procedure
1. Enter the enclosure show powersupply command to find the status of all
the power modules.
# enclosure show powersupply
This command may take up to a minute to complete. Please wait...
Enclosure Description Product ID Part No. Serial No. Version Status
--------- ------------------- ------------ -------------- -------------- ------ -----
1 Power module A Power Supply 071-000-555-01 AC7E6132316539 na OK
1 Power module B Power Supply 071-000-555-01 AC7E6132316535 na OK
2 Power module A OK
2 Power module B OK
3 Power module A pack 1 OK
3 Power module A pack 2 OK
3 Power module A pack 3 OK
3 Power module A pack 4 OK
3 Power module B pack 1 OK
3 Power module B pack 2 OK
3 Power module B pack 3 OK
3 Power module B pack 4 OK
4 Power module A pack 1 OK
4 Power module A pack 2 OK
4 Power module A pack 3 OK
4 Power module A pack 4 OK
4 Power module B pack 1 OK
4 Power module B pack 2 OK
4 Power module B pack 3 OK
4 Power module B pack 4 OK
--------- --------------------- ------------ -------------- ------------ ------- -----
2. Enter the enclosure show powersupply command and specify a specific
power module. The output for power supply module 11 should be similar to the
following example:
Removing and Replacing FRUs
82 EMC Data Domain DS60 Expansion Shelf Installation and FRU Replacement Hardware Guide
 Loading...