Disconnecting cables for an shelf installed with the 1U cable management
tray
When servicing an shelf installed with the 1U cable management tray, cables may need
to be disconnected to perform servicing procedures. Follow this procedure when
disconnecting cables on an shelf installed with the 1U cable management tray
Procedure
1. Unplug/disconnect all cables from the rear of the shelf to be serviced.
2. Disconnect the cable guide clips from the chassis.
3. Disconnect the cable guide clips from the 1U cable management tray.
4. Move the cables out of the way to provide access for servicing the shelf.
1U cable tray removal
This section describes how to remove the 1U cable tray.
Removing the 1U cable tray
This procedure describes how to remove the 1U cable tray.
Before you begin
Make sure to retain any hardware that is removed as part of the removal procedure.
This hardware will have to be re-used if the 1U cable tray is re-installed.
Procedure
1. Disconnect all cables from the rear of the shelf.
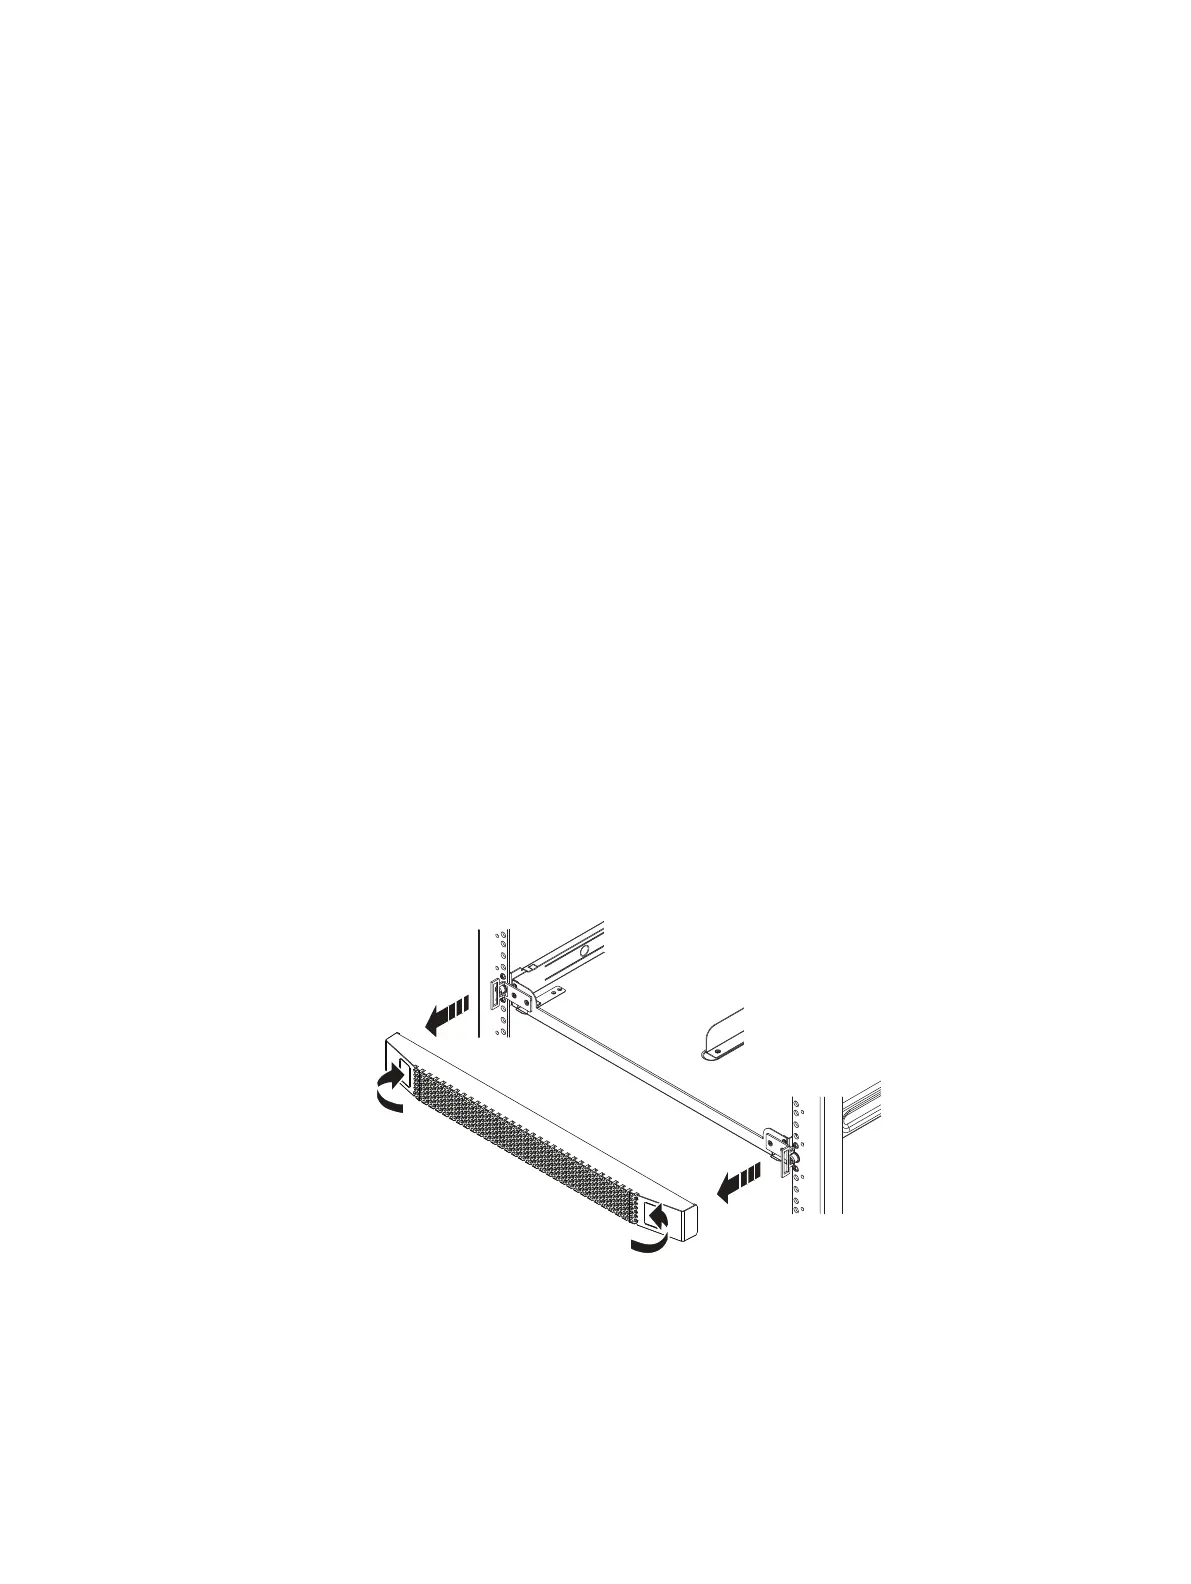
Figure 53
Remove the bezel
2. At the front of the rack, press the release buttons on the front bezel and
remove it from the tray.
Shelf Installation and Removal
Disconnecting cables for an shelf installed with the 1U cable management tray 59
 Loading...