Disks can be removed and replaced with the power applied to the shelf.
Procedure
1. Attach and ESD wristband to your wrist and the shelf in which you are installing
the disk
2.
Do not drop the disk drive into the slot. Dropping the disk drive may
damage the disk drive and the drive interface backplane, which requires a
full chassis replacement.
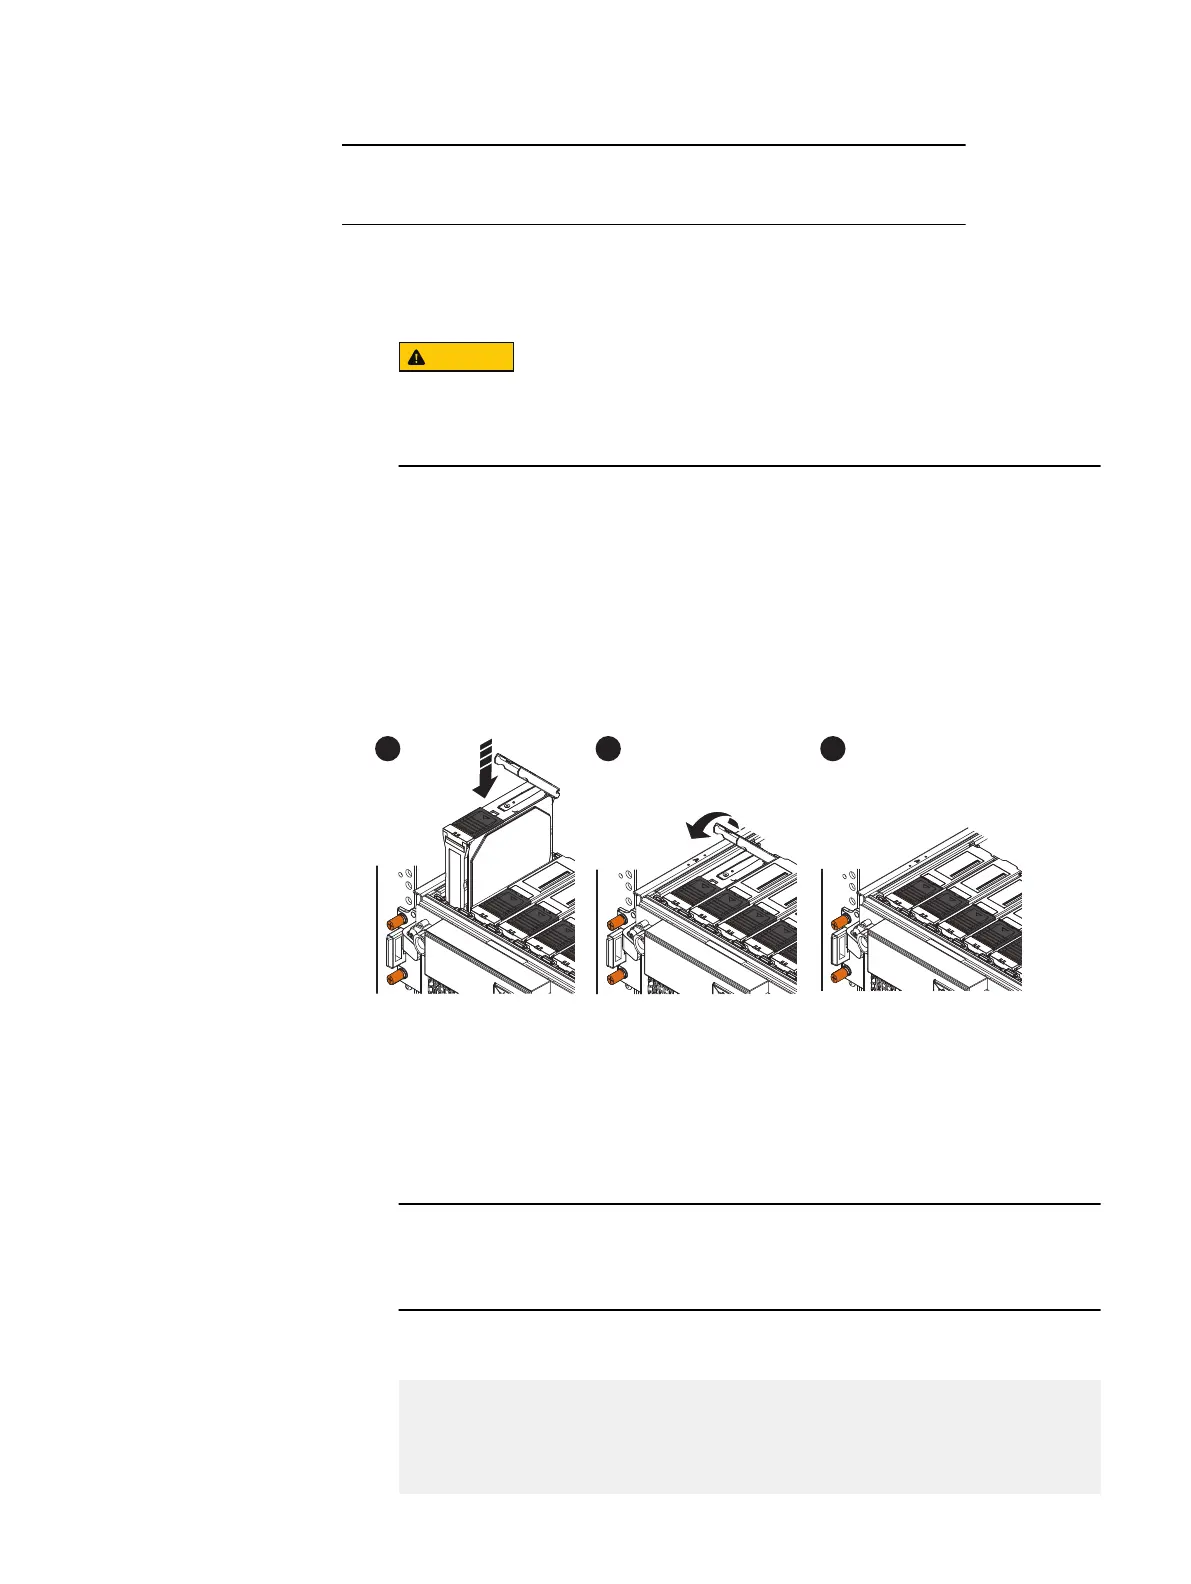
With the disk carrier latch fully open, align the module with the guides and
gently lower the disk into the slot (1).
The latch begins to rotate downward when its tabs meet the shelf.
3. Push on the latch tab to engage the latch (2).
4. When the latch is engaged, push firmly on the module to verify that the disk is
properly seated (3).
The disk's Active light flashes to reflect the disk's spin-up sequence.
Figure 72
Installing a disk
Verify the operation of the new disk drive
Procedure
1. Rescan all of the disks by entering the disk rescan command
This command does not generate any output. The amount of time it takes to
complete depends on how many disks are attached.
2. After the rescan completes, enter the disk show state command to verify
the state of all drives. This command checks that the drive is recognized.
# disk show state
|--------|--------|--------|--------|
| Pack 1 | Pack 2 | Pack 3 | Pack 4 |
E(49-60) |. . . |. . s |. . s |. . s |
D(37-48) |. . . |. . . |. . . |. . . |
Removing and Replacing FRUs
Verify the operation of the new disk drive 93
 Loading...