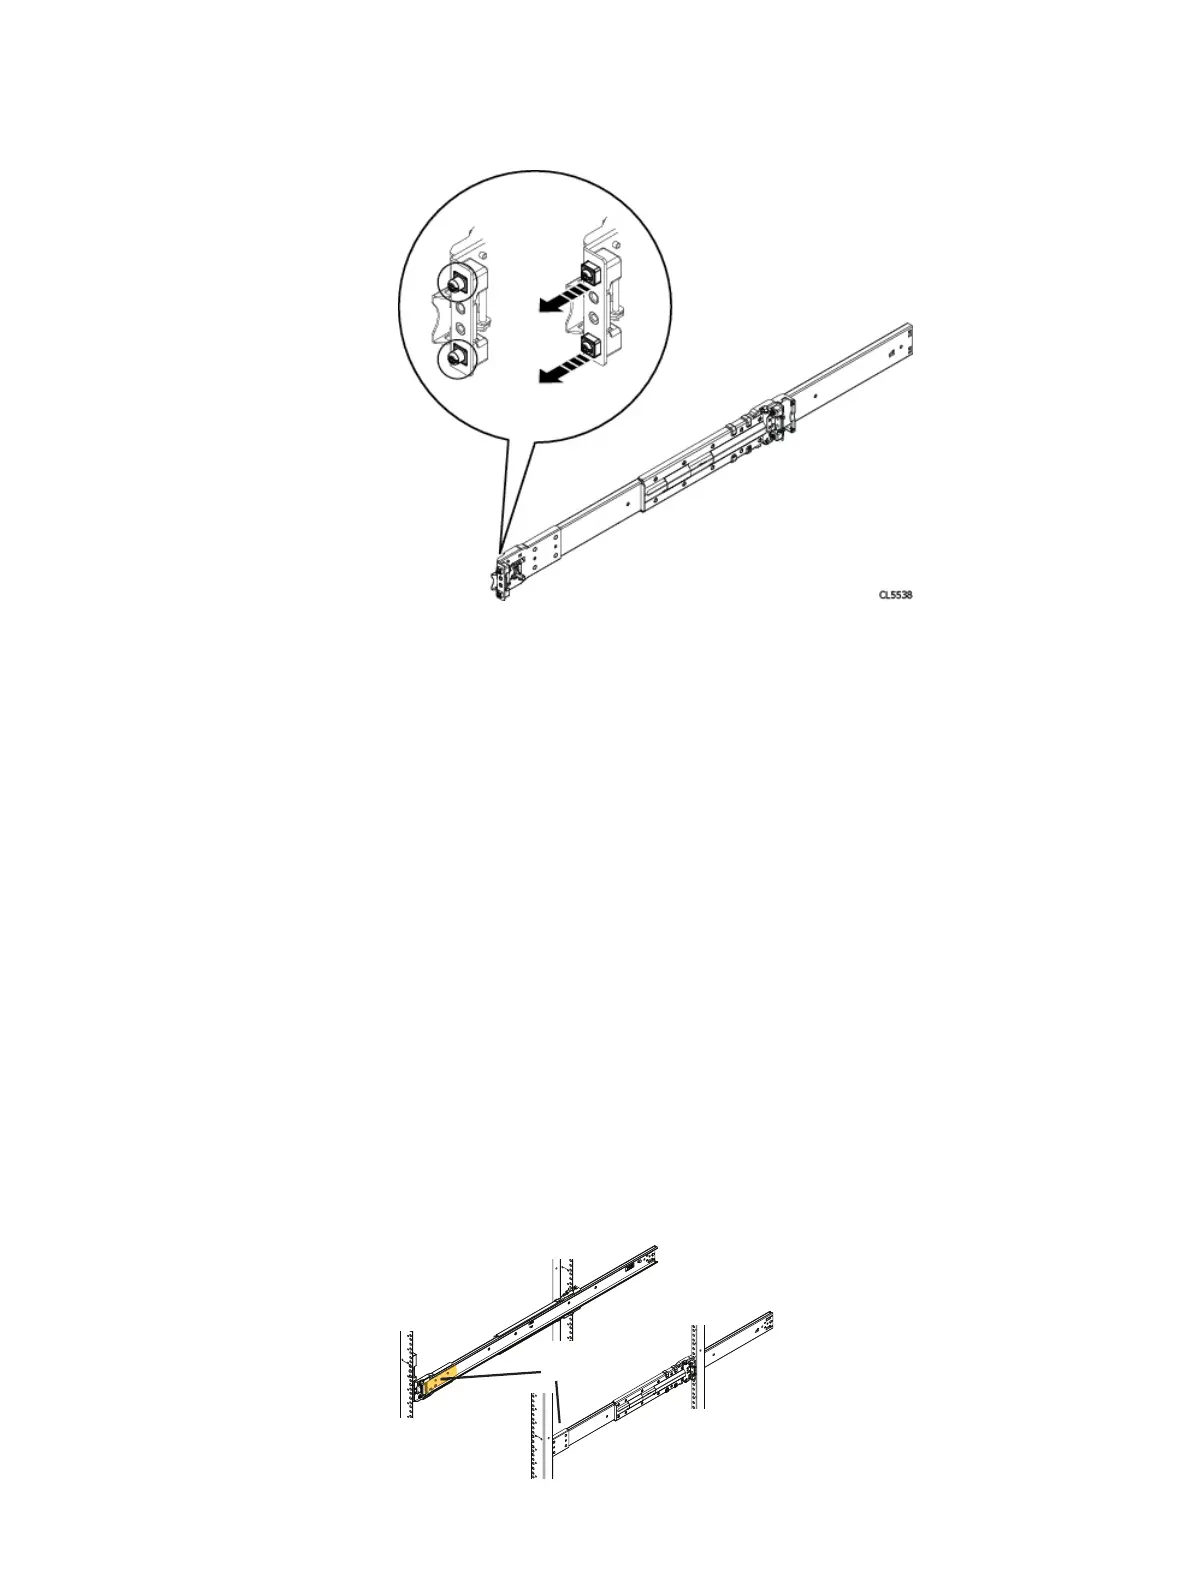
the kit. Do this as follows:
a. Using a flat-bladed screwdriver, remove the two 6.8mm adaptors from the
adaptor mounting block on the rails.
b. Identify the correct adaptors needed from the hardware kit and install the
adaptors into the adaptor mounting block.
2. Locate the 4U rack space designated for the shelf.
3. Install the right rail to the rear channel.
a. Align the right rail so that the alignment pins are centered on the middle
holes of the bottom two U spaces of the 4U space and then move the
bracket with the alignment pins in their proper location.
b. Push the rail back to secure the rail posts in the cabinet channel.
An audible click indicates that the rail is secure in the channel. Make sure the
rear post/catch mechanism is secure and attached.
4. Install the right rail to the front channel.
a. Align the front of the right rail so that it is level and the front rail pins are
aligned with the middle holes of the bottom two U spaces of the 4U space.
b. Pull the rail forward, with the posts aligned with the middle holes of the
bottom two U spaces of the 4U space.
An audible click indicates that the connection is secure.
5. Install the left rail by mirroring the previous steps.
6. Remove the shipping tape attached to the node rails.
Shelf Installation and Removal
Shelf rail installation in non-EMC racks 69
 Loading...