NVR User Manual 061220NA 17
1. Go to Menu > Settings > General > More Settings by operating the front control panel or the mouse.
2. Check and remember NVR ID#. The default ID# is 255. This ID# is valid for all the IR Remote controls.
3. Press the DEV button on the remote control.
4. Enter the NVR ID# you set in step 2.
5. Press the ENTER button on the remote.
NOTE: If the Status indicator on the front panel turns blue, the remote control is operating
properly. If the Status indicator does not turn blue and there is still no response from the
remote, please check the following:
• B
atteries are installed correctly and the polarities of the batteries are not reversed.
• Batteries are fresh and not out of charge.
• IR receiver is not obstructed.
• No fluorescent lamp is used nearby
• If the remote still can’t function properly, change the remote and try again, or
contact the device provider.
1.3 USB Mouse Operation
A regular 3-button (Left/Right/Scroll-wheel) USB mouse can also be used with this NVR. To use a USB
mouse:
1. Plug USB mouse into one of the USB interfaces on the front panel of the NVR.
2. The mouse should automatically be detected. If the mouse is not detected, the possible reason may
be that the two devices are not compatible, refer to the recommended device list from your provider.
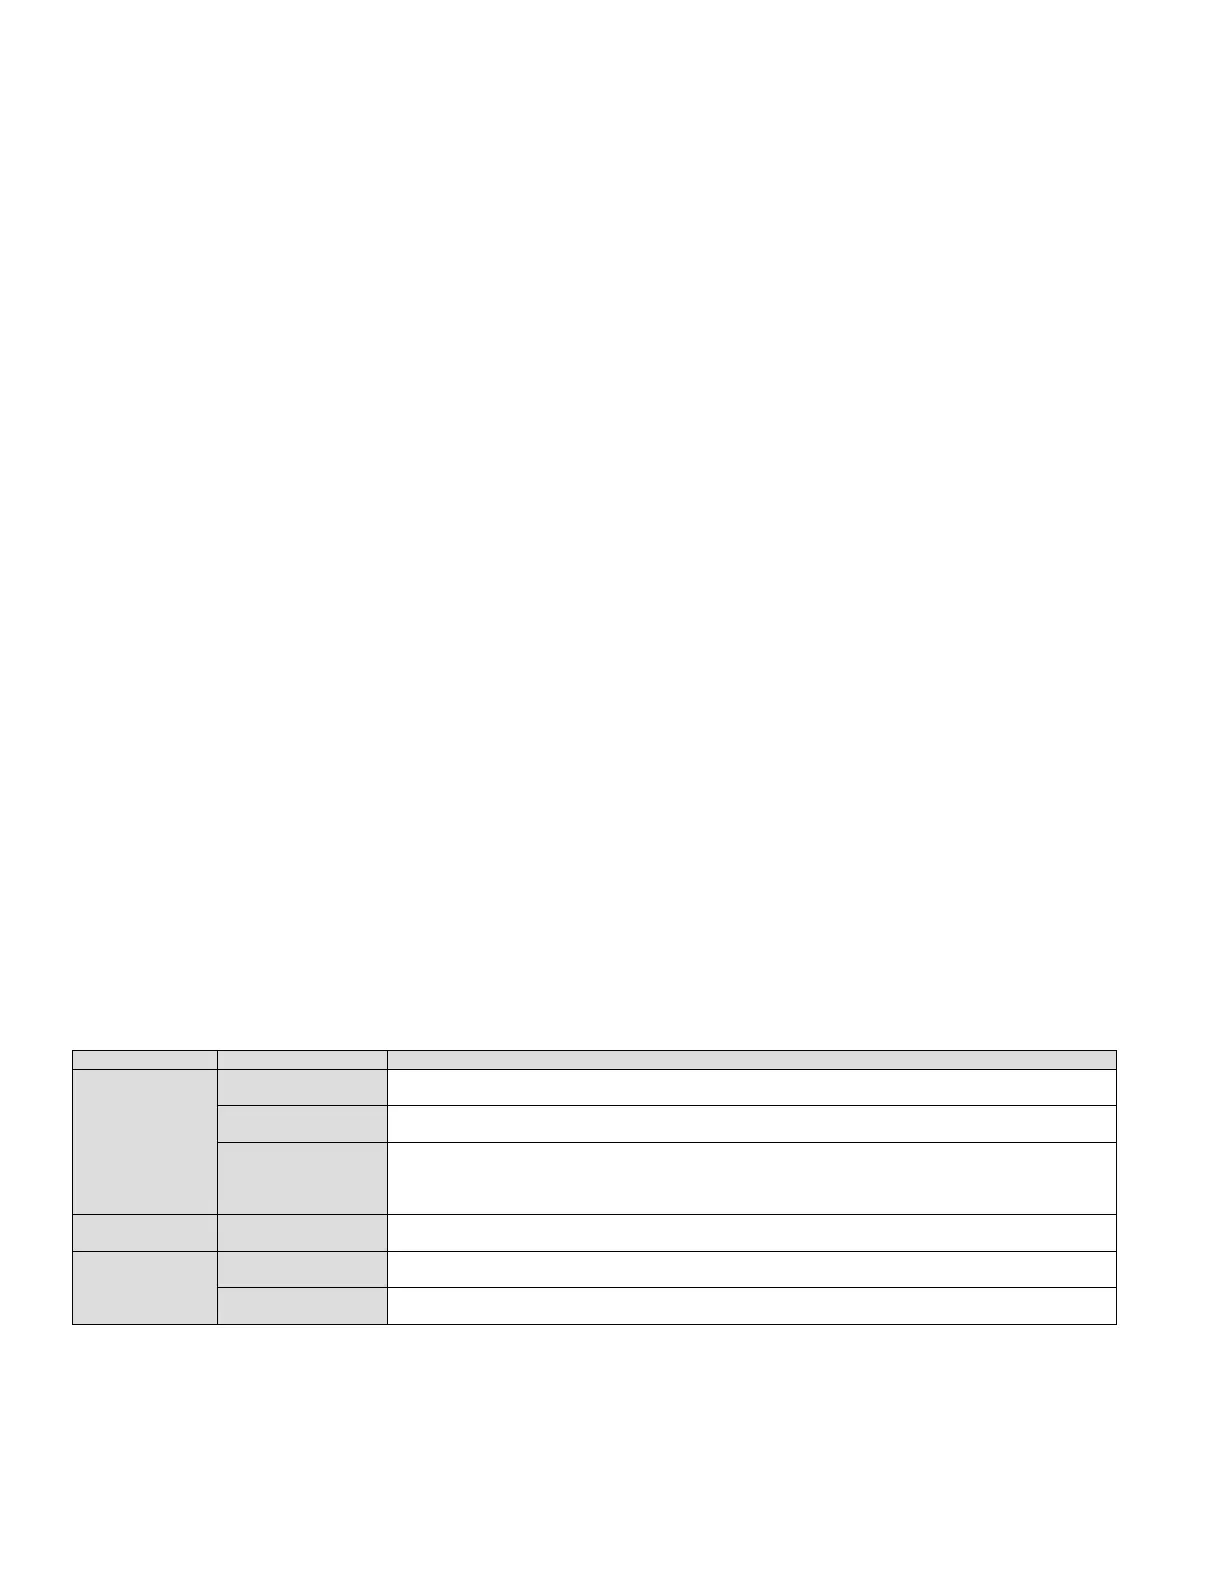
Table 1-5 Description of the Mouse Control
Left-Click
Single-Click
nel and show the quick set menu
Double-Click
Click and Drag
Video tampering, privacy mask, and motion detection: Select target area
Digital Zoom-in: Drag and select target area
iew: Drag channel/time bar
Right-Click Single-Click
urrent menu to upper level menu
Scroll-Wheel
Scrolling Up
Scrolling Down
 Loading...