only be performed once.
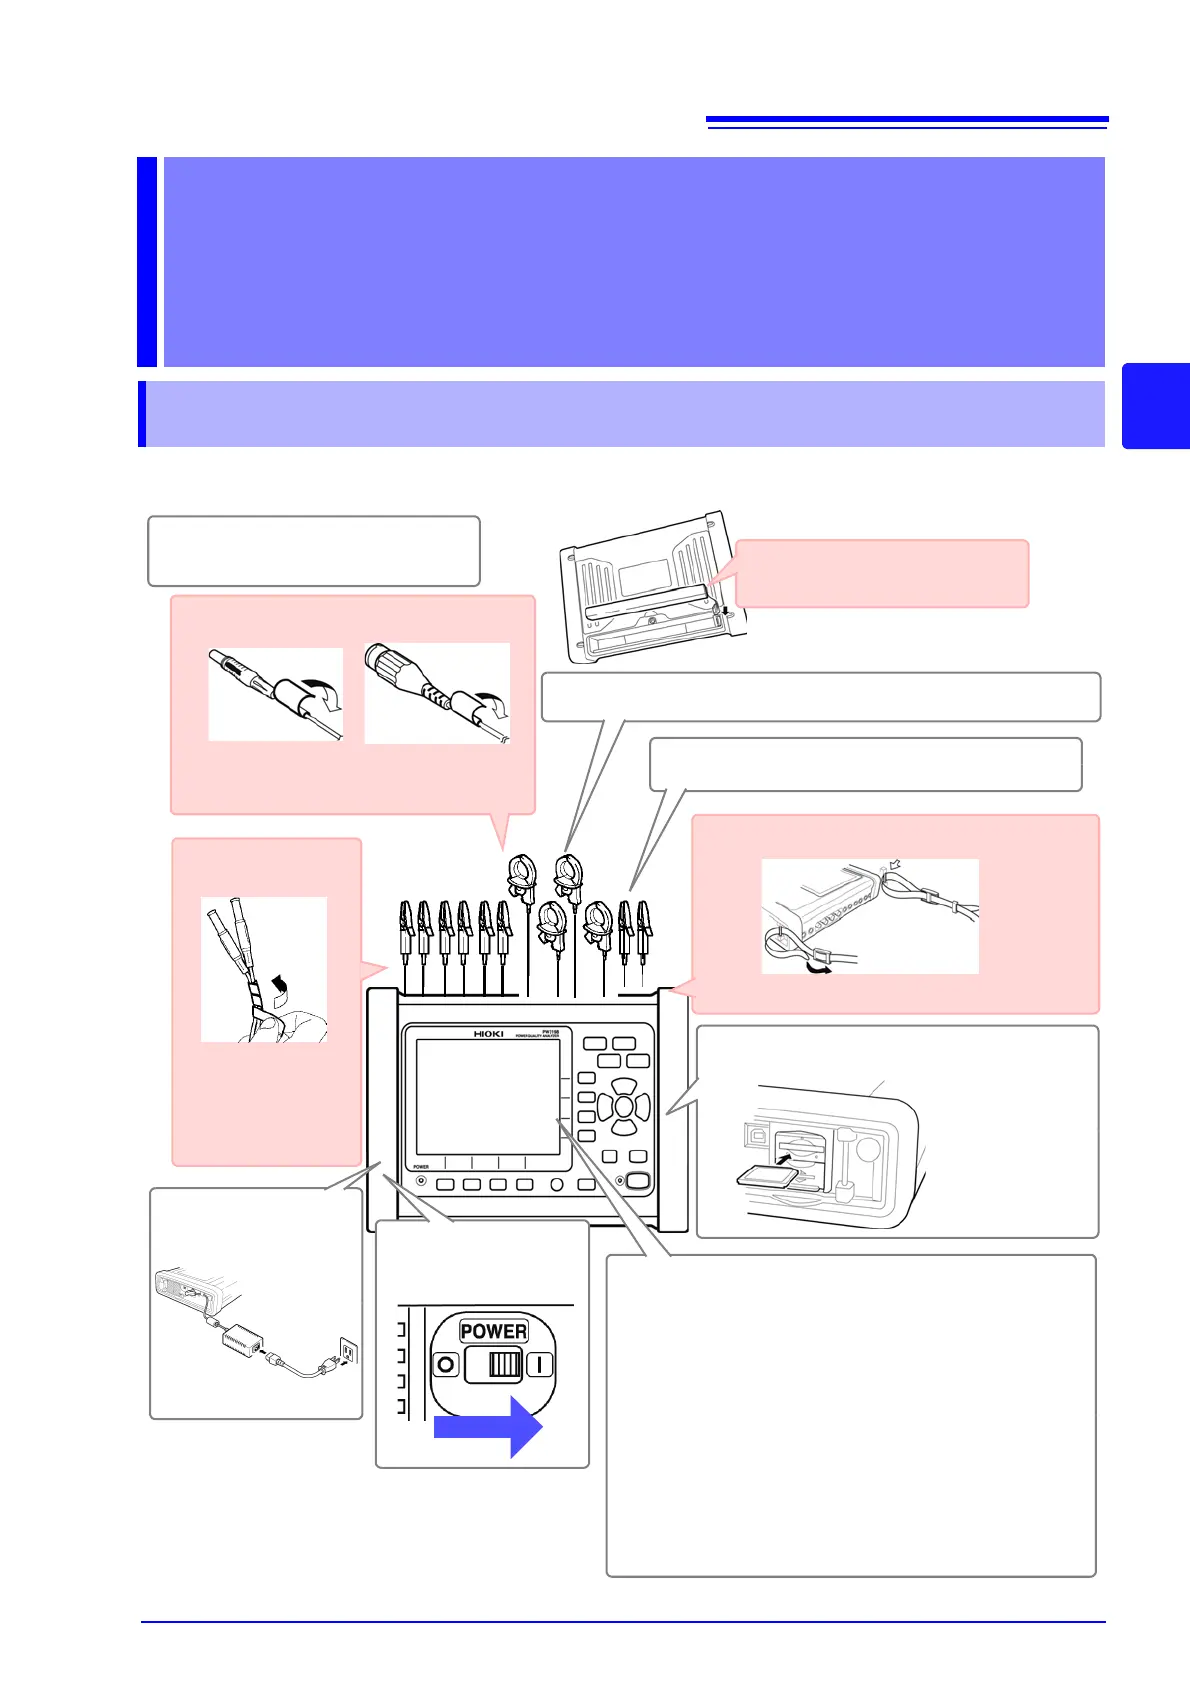
Apply input code input cable labels to
the voltage cords and clamp sensors.
(p.28)
Attach the strap. (p.28)
Secure the voltage
cords together with
a spiral wrapper.
(p.29)
Perform the pre-measurement
inspection. (p.31)
1
After-purchase item (1) (voluntary)
After-purchase item (2)
After-purchase
item (3)
Connect the AC
adapter. (p.32)
2
Connect the voltage cords (p.34) and clamp sensors (p.34).
4
Turn on the in-
strument. (p.36)
5
Set the connection mode. (p.39)
9
Connect to the measurement line (p.46)
8
Verify that the connections have been
made properly.(p.48)
10
Perform quick setup. (p.50)
11
Back side
Perform zero adjustment. (p.37)
To ensure you are able to obtain precise mea-
surements, it is recommended to allow the in-
strument to warm up for at least 30 minutes
before performing zero adjustment or making
measurements.
6
Insert an SD memory card. (p.32)
3
After-purchase item (4)
Install the battery pack. (p.30)
Set the clock. (p.65)
7
Be sure to close
the cover after
inserting the
card.
 Loading...