3-9 ● Setting Print Format
6
4
3
2
Press Back .
You are then returned to the "Print description" screen.
¡
To correct another column, press Previous item or Next item and
repeat steps 2 through 4 .
Press Previous item or Next item to select an item whose print
format is to be changed.
Press ↓ or ↑ to move the cursor to the setup item to be edited.
Change the value as desired with a numeric key, Decrement key,
or Increment key.
1
1234567890
Incre-
ment
Decre-
ment
Print format
2011.07.07 12:45
Back
Column 1 Column 2 Column 3
[・・・・・・・・・・] [・・・・・・・・・・][・・・・・・・・・・]
[・・・・・・・・・・] [・・・・・・・・・・][・・・・・・・・・・]
[・・・・・・・・・・] [・・・・・・・・・・][・・・・・・・・・・]
Manual
Show
cursor
Prev.
item
Next
item
↓
↑
Status: Ready Com=0
Message name
[
]
Start
up
Shut
down
Comm
On/Off
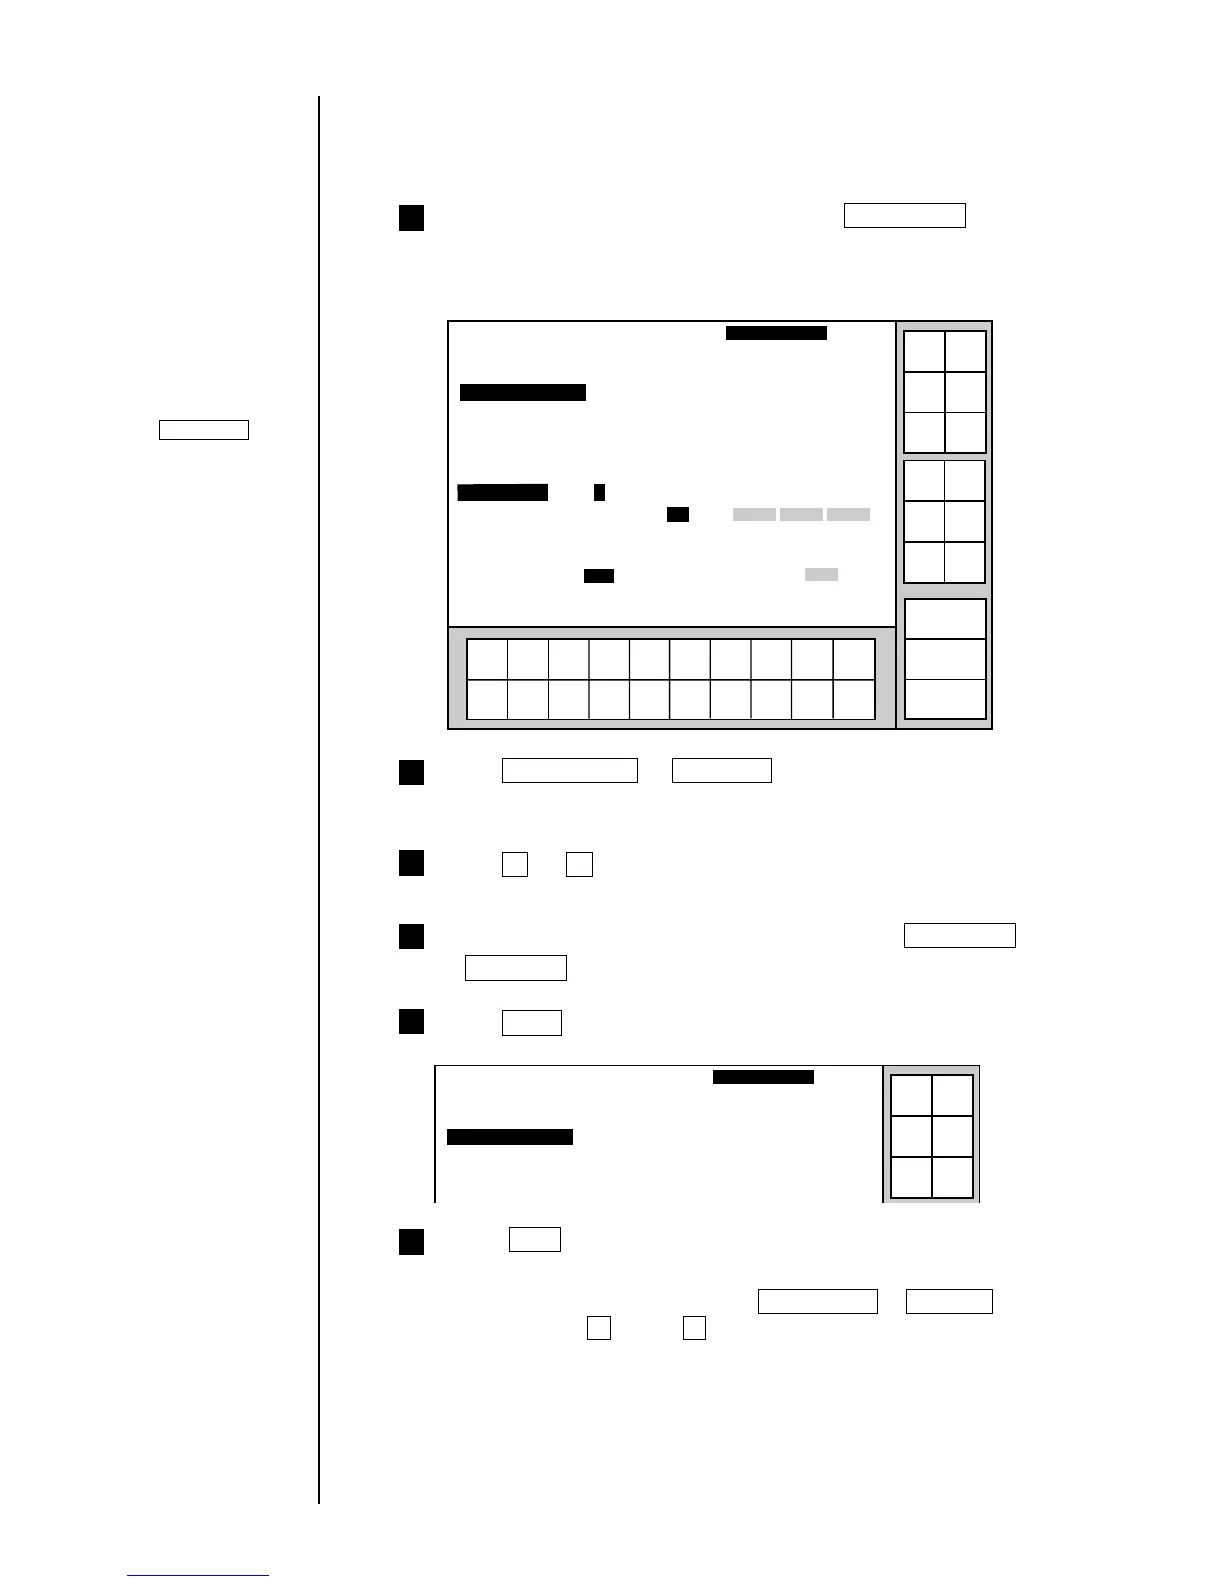
Line spacing [0](dots 0-2)
Character size [2](1: 5x5 2 :5x8 3 : 7x10 4 :12x16 5 :18x24 6 : 24x32 )
Inter-char. space
[1](dots 0-3)
Increased width [1](times 1-9)
Bar code [0](0:none 1:C39 2:ITF 3:NW-7 4:EAN-13 5:DM 6:C128)
→
←
From the "Print description" screen, press Print format .
The "Print format" screen then opens.
The on-screen cursor is positioned in the line spacing input field.
(2)Operating procedure
¡
Setting the line spacing to 1, character size to 5 × 8, inter-character
space to 1, and character width increase to 2
5
Press Apply .
Operations for
modifying the setting
contents.
(See Section 2.1.3,
Operations for
modifying the setting
contents.)
If the cursor is not
displayed, press
Show cursor .
Print format
2011.07.07 12:45
Column 1 Column 2 Column 3
[・・・・・・・・・・] [・・・・・・・・・・][・・・・・・・・・・]
[・・・・・・・・・・] [・・・・・・・・・・][・・・・・・・・・・]
[・・・・・・・・・・] [・・・・・・・・・・][・・・・・・・・・・]
Manual
Apply
Status: Ready Com=0
Message name
[
]
Start
up
Shut
down
Comm
On/Off
Cursor will move to the
line you touched.
Selected item on the
cursor-positioned line
can be changed
by touching.
 Loading...


