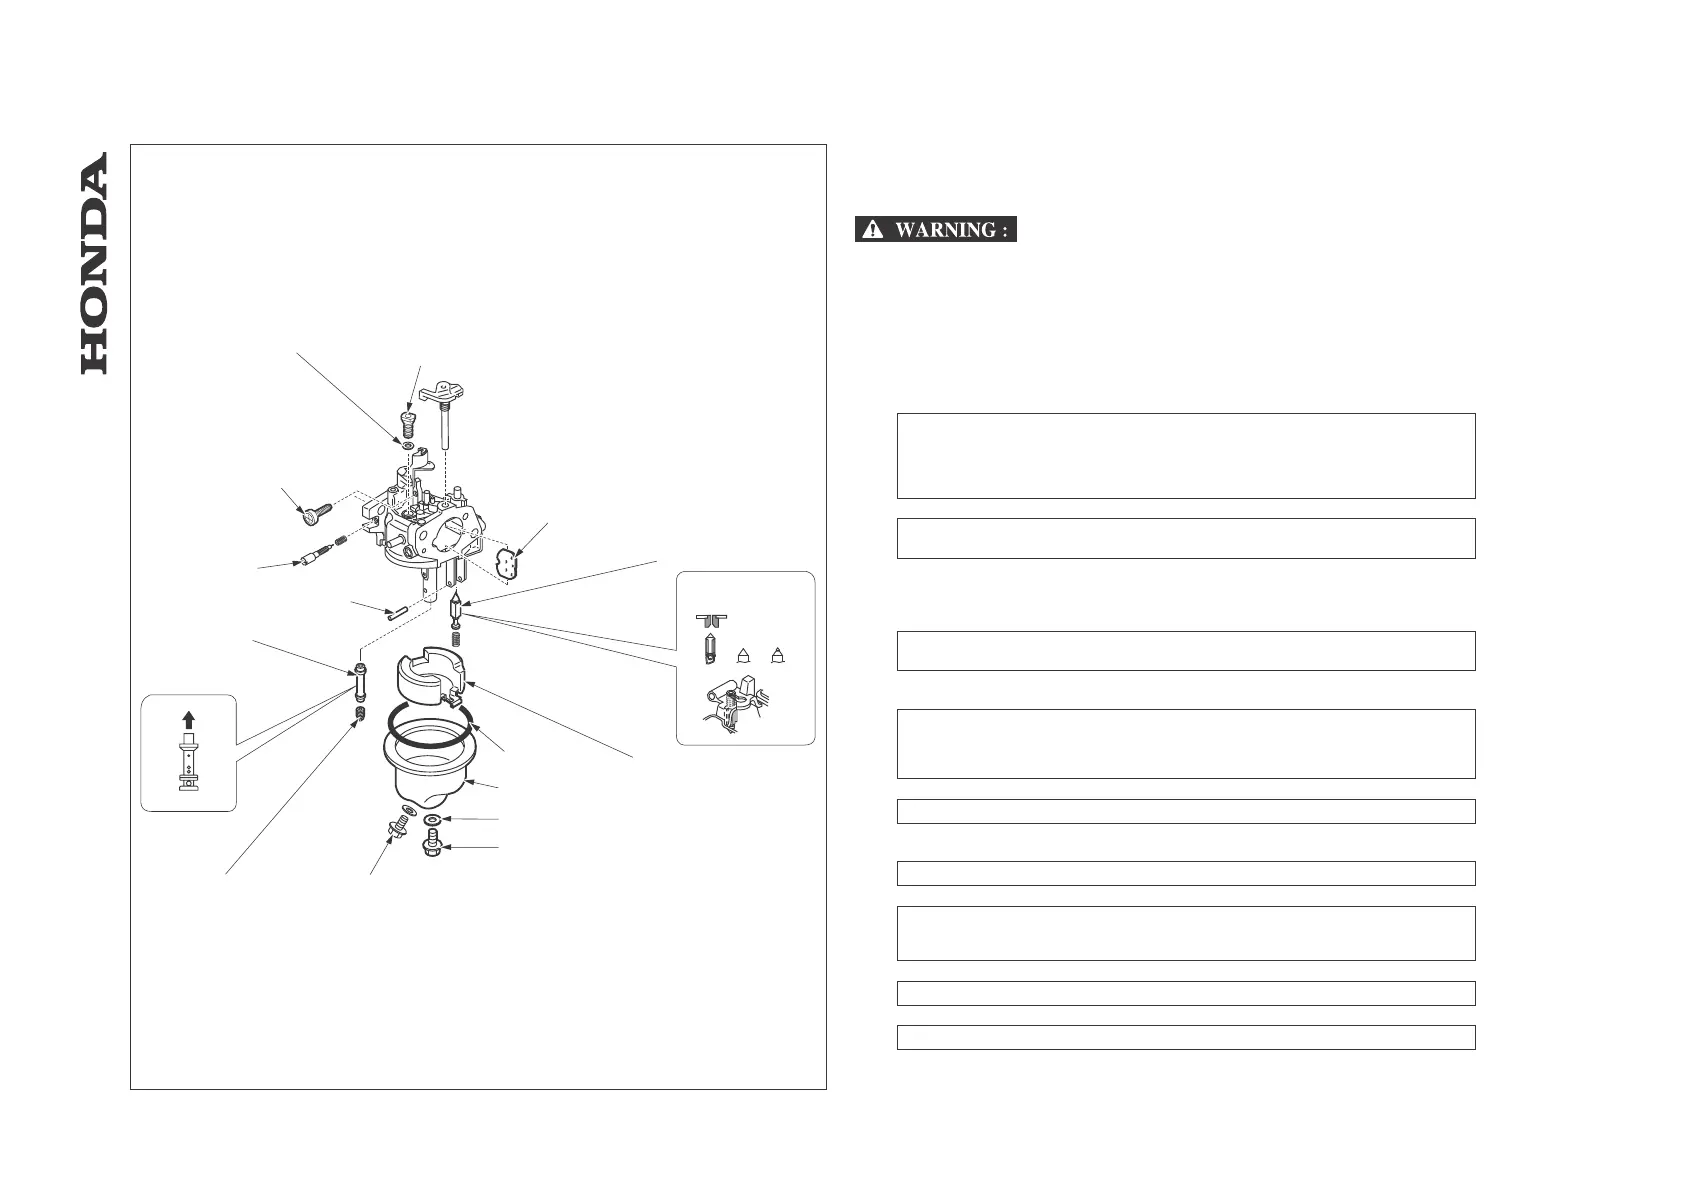
8.3 Carburetor
a. Disassembly / Reassembly
Petrol is highly flammable and explosive. If ignited, petrol can burn you severely.
When draining petrol:
- Drain petrol into a approved container.
- Keep sparks and flames away, and do not smoke.
- Wipe up spills immediately.
1. Remove the set screw and drain the petrol from the carburetor before disassembly.
[1] CHOKE PLATE
[2] FLOAT VALVE
INSPECTION: Check that the float valve or its seat are not worn and that the spring is
not weakened before reassembly.
[A] = correct
[B] = deteriorated
REASSEMBLY: Install float valve and spring as shown.
[3] FLOAT
REASSEMBLY: Check for smooth movement after assembly.
FLOAT LEVEL INSPECTION: ch. 8.3b
[4] FLOAT GASKET
[5] FLOAT CHAMBER
[6] GASKET
[7] SET SCREW
CAUTION:
•After assembly, check that no fuel leaks.
[8] DRAIN SCREW
[9] MAIN JET
REASSEMBLY: Clean thoroughly with compressed air before reassembly.
HRD535/K1/K2: #55
HRA536: #65
HRD536/K1/K2: #65
[10] MAIN NOZZLE
REASSEMBLY: Clean thoroughly with compressed air.
[11] FLOAT PIN
[12] PILOT SCREW
ADJUSTMENT: ch. 3.9
[13] THROTTLE STOP SCREW
DISASSEMBLY: The throttle stop screw must be removed before pilot jet can be
disassembled.
ADJUSTMENT: ch. 3.9.
[14] O-RING
Lubricate lightly before installation.
[15] PILOT JET
REASSEMBLY: Clean thoroughly with compressed air before installation.
-59-
HRA536 - HRD535 - HRD536
[1]
[2]
[3]
[A]
[B]
[4]
[5]
[6]
[7]
[8]
[9]
[10]
[11]
[12]
[13]
[14]
[15]
- IGNITION COIL / CONTROL ARM / CARBURETOR
 Loading...