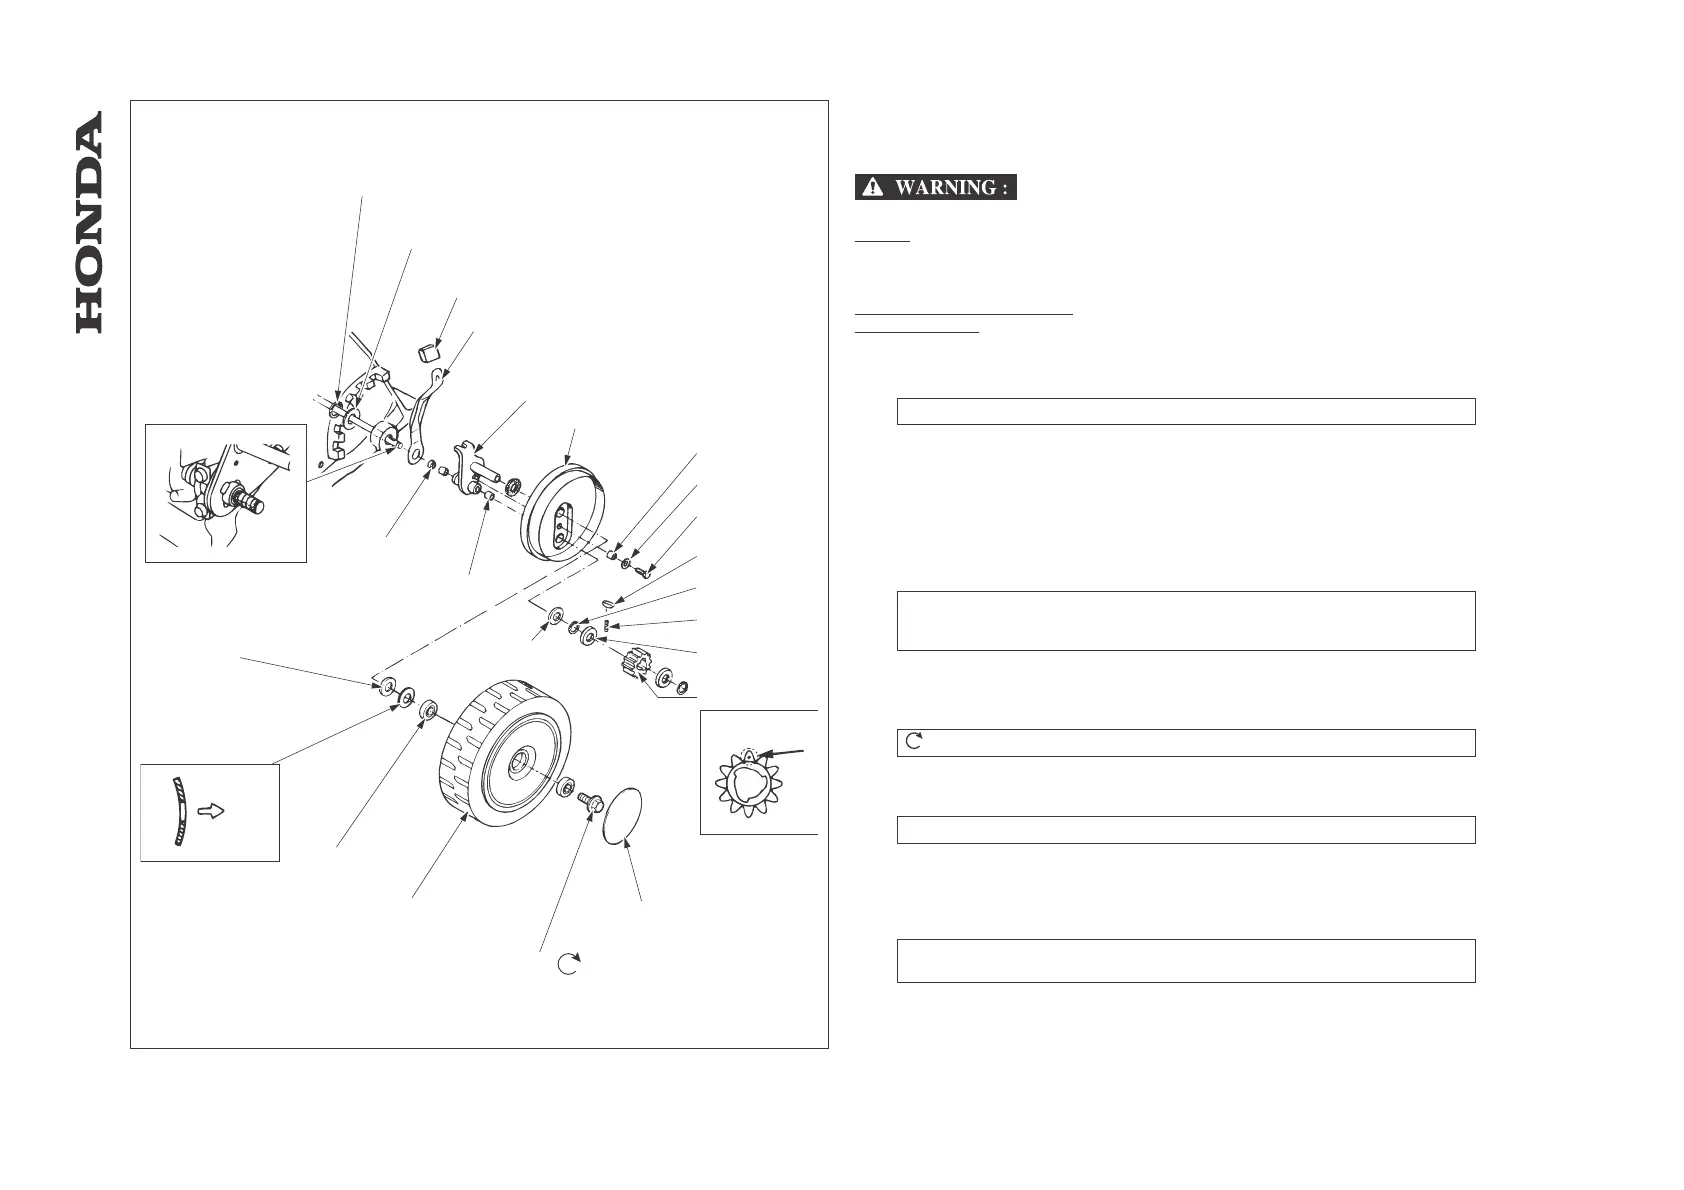
13.2 Rear wheel
a. Disassembly / Reassembly
Wear heavy gloves to protect your hand when servicing near the blade.
NOTE:
The rear wheel servicing can be done with the engine on the cutter housing.
Place the mower on wooden blocks and support the housing securely. Do not turn upside
down.
HRD535/K1 except Q type
HRD536/K1/K2
[1] REAR ADJUSTER LEVER (2)
[2] ADJUSTER GRIP (2)
[3] REAR ADJUSTER ARM (2)
REASSEMBLY: Apply grease to the inside before installing.
[4] WHEEL COVER (2)
[5] COLLAR (2)
[6] WASHER, 5 mm (2)
[7] PAN SCREW,5x12mm(2)
[8] THRUST WASHER, 13 mm (2)
[9] SNAP RING (4)
[10] RATCHET RETURN SPRING (2)
[11] PINION GEAR COLLAR
[12] PINION GEAR (2)
REASSEMBLY: Install with punch mark facing:
LEFT: inside
RIGHT: outside
[12]-1 PUNCH MARK
[13] RATCHET KEY (2)
[14] REAR WHEEL CAP (2)
[15] WHEEL SCREW,8x12mm(2)
TIGHTNING TORQUE: 24 N.m
[16] WHEEL BEARING (4)
[17] REAR WHEEL ASSEMBLY (2)
[18] WHEEL WASHER (2)
REASSEMBLY: Install the washer as shown.
[18]-1 WHEEL SIDE
[19] THRUST WASHER (2)
[20] BUSHING (4)
[21] SEAL (2)
[22] AXLE SHAFT GROOVE
REASSEMBLY: Apply transparent tape over axle grooves to protect seal when
inserting the rear adjuster arm.
[23] PLAIN WASHER, 22 mm (2)
[24] SNAP RING, 22 mm (2)
-84-
HRA536 - HRD535 - HRD536
[1]
[2]
[3]
[4]
[5]
[6]
[7]
[8]
[9]
[10]
[11]
[12]
[12]-1
[13]
[14]
[15]
[16]
[17]
[18]
[18]-1
[19]
[20]
[21]
[22]
[23]
[24]
24
- FRONT WHEEL / REAR WHEEL
 Loading...