perating and Installation
the serial device can change this to a simple “CONNECT” message by issuing an “ATX”
command. However some serial devices may simply expect a simple “CONNECT” message
and will not issue any additional c
ommands to make this happen. In this case check the
You must specify the exact message in the
window. This includes non
readable (control) characters. Non
verbose responses are often one to two ASCII numbers
followed by a carriage return character. Verbose messages are normally preceded and
followed by a carriage return and line feed combination. Use the “Enter” key on your keyboard
to insert a carriage return and line feed combination. To insert a single l
and hold the ALT key while on the keyboard’s numeric keypad enter the digits 0 1 0. Then
release the ALT key. To insert a single carriage return character press and hold the ALT key
while on the keyboard’s numeric keypad enter th
e digits 0 1 3. Then release the ALT key. In
either case you will not actually see the characters in the window, but you may see the cursor
Some serial devices may indicate a desire to place a call by
ctivating a control line. On
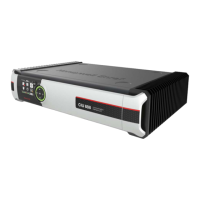
the CNI2’s TB2 terminal block is an input line called DTR.
If the DTR input line on the
communications terminal block goes positive, the CNI
will wait 10 seconds for an “ATD” (dial)
Otherwise a call will be placed
Always Send Connect Message
ice once the connection with the central computer has been
established. The call will end with a “NO CARRIER” message. If the connection cannot be
established a “NO CARRIER” message is returned.
two remote devices can be wired to t
ultiplexer board. Either remote device can raise the DTR line but the CNI
be able to determine which device is actually asserting the line. If the wrong port is selected
when this happens the CNI
may not see the “ATD” command if the remote device issues one.
power “sleep” mode it can only detect that the DTR line has gone
B” position. See the next illustration.
 Loading...