Revision:1.0(2023-01-12)
256
None
Specific Steps
1. Refer to the disassembly procedures in 7.2.2 Disassembly and Assembly, the section of
removing the main unit box, and 7.47.2
Disassembly and Assembly to take off the monitor
assembly, main unit box, and battery box cover. Then remove the fixing screws from the battery
box assembly and take off the battery box assembly. Refer to the disassembly procedures in
7.38.2
Disassembly and Assembly, 7.37.2 Disassembly and Assembly, 7.46.2 Disassembly and
Assembly
, 7.29.2 Disassembly and Assembly, 7.28.2 Disassembly and Assembly, 7.30.2
Disassembly and Assembly, 7.27.2 Disassembly and Assembly, 7.22.2 Disassembly and
Assembly
, 7.23.2 Disassembly and Assembly, and 7.25.2 Disassembly and Assembly to take off
each assembly.
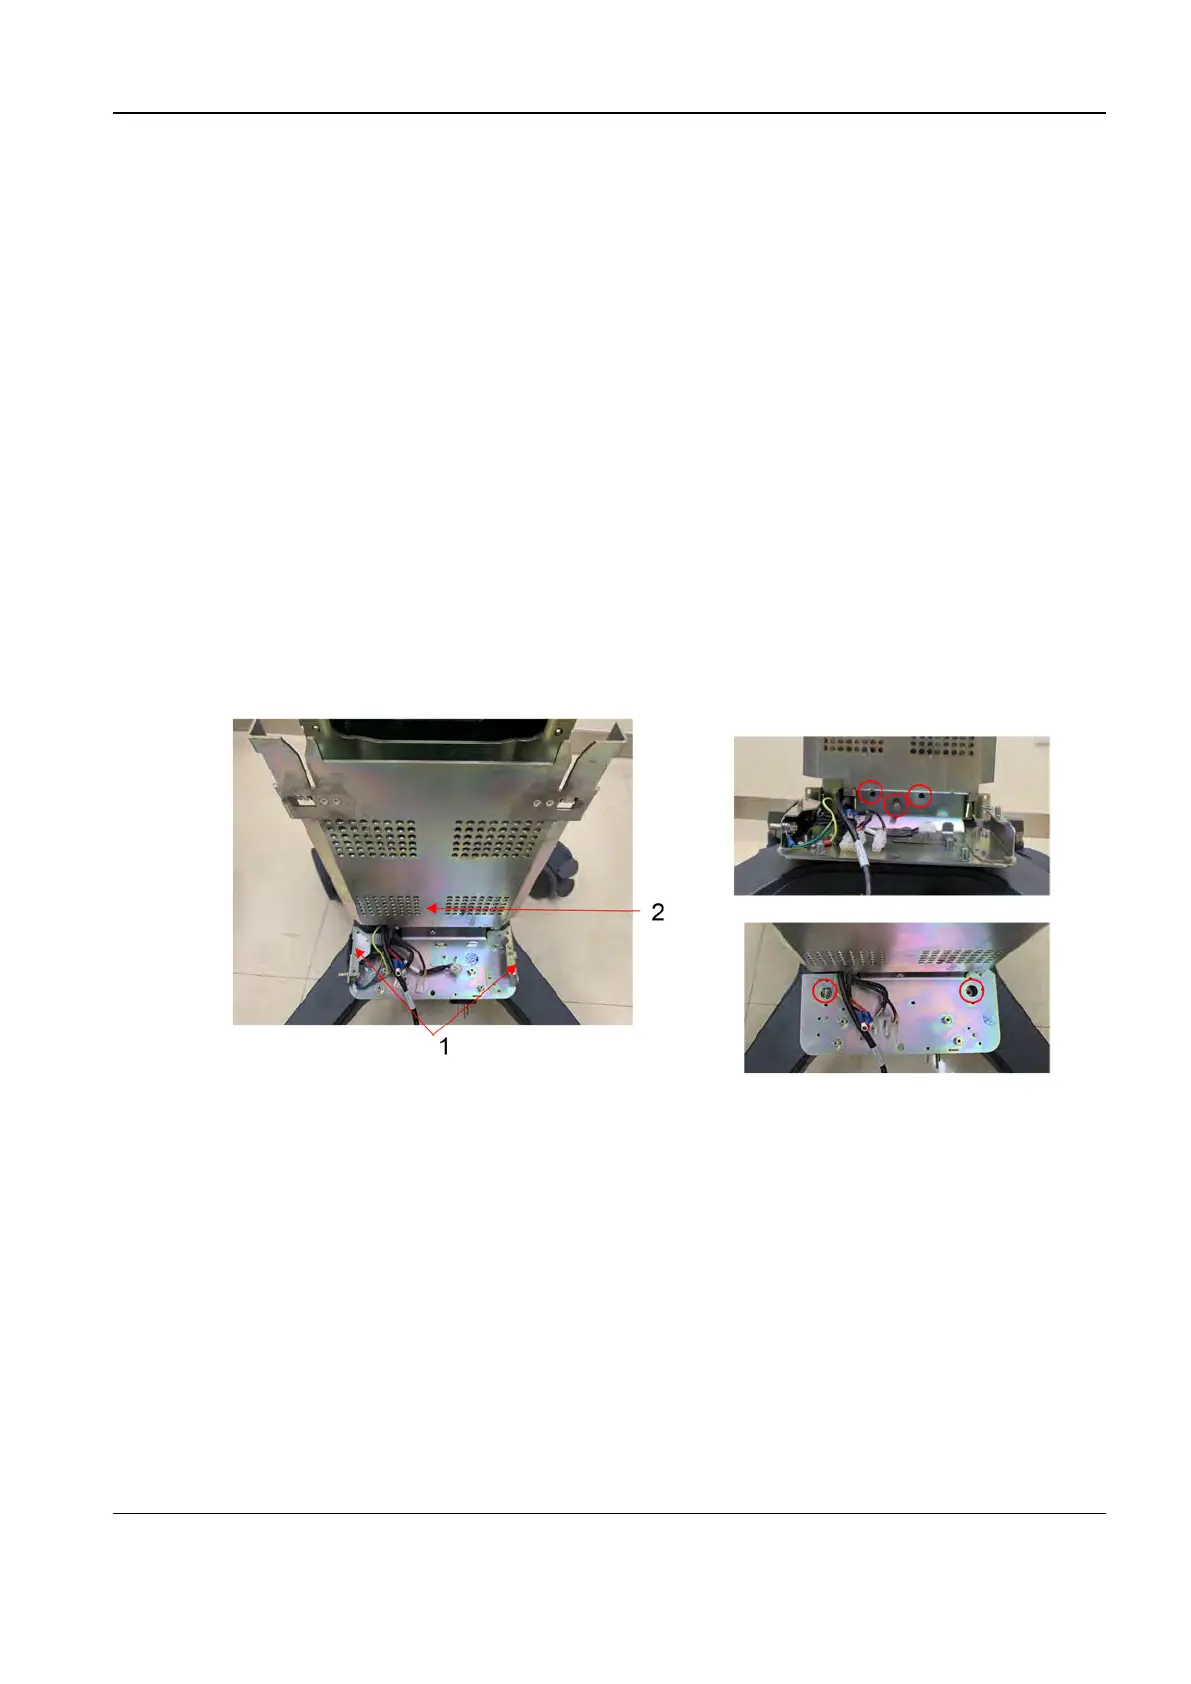
2. Before disassembling battery box support plates, remove the support plate at the bottom of the
battery box and the metal plate of the auxiliary output port, and then remove the five hexagon
socket screws that fix the battery box support plates.
1 Support plate and metal plate of the auxiliary output port
2 Battery box support plate
3. Remove the three support plates on the right and left sides and the rear of the column as
follows:
Diagnostic Ultrasound System
Service Manual
7 FRU Replacement

 Loading...


