Chapter 11 Adding Lines and Annotations to an Image
129
Adding Annotations
and Measuring
11.2
Changing Scaling and Measurement Settings
— TOOL SET Menu —
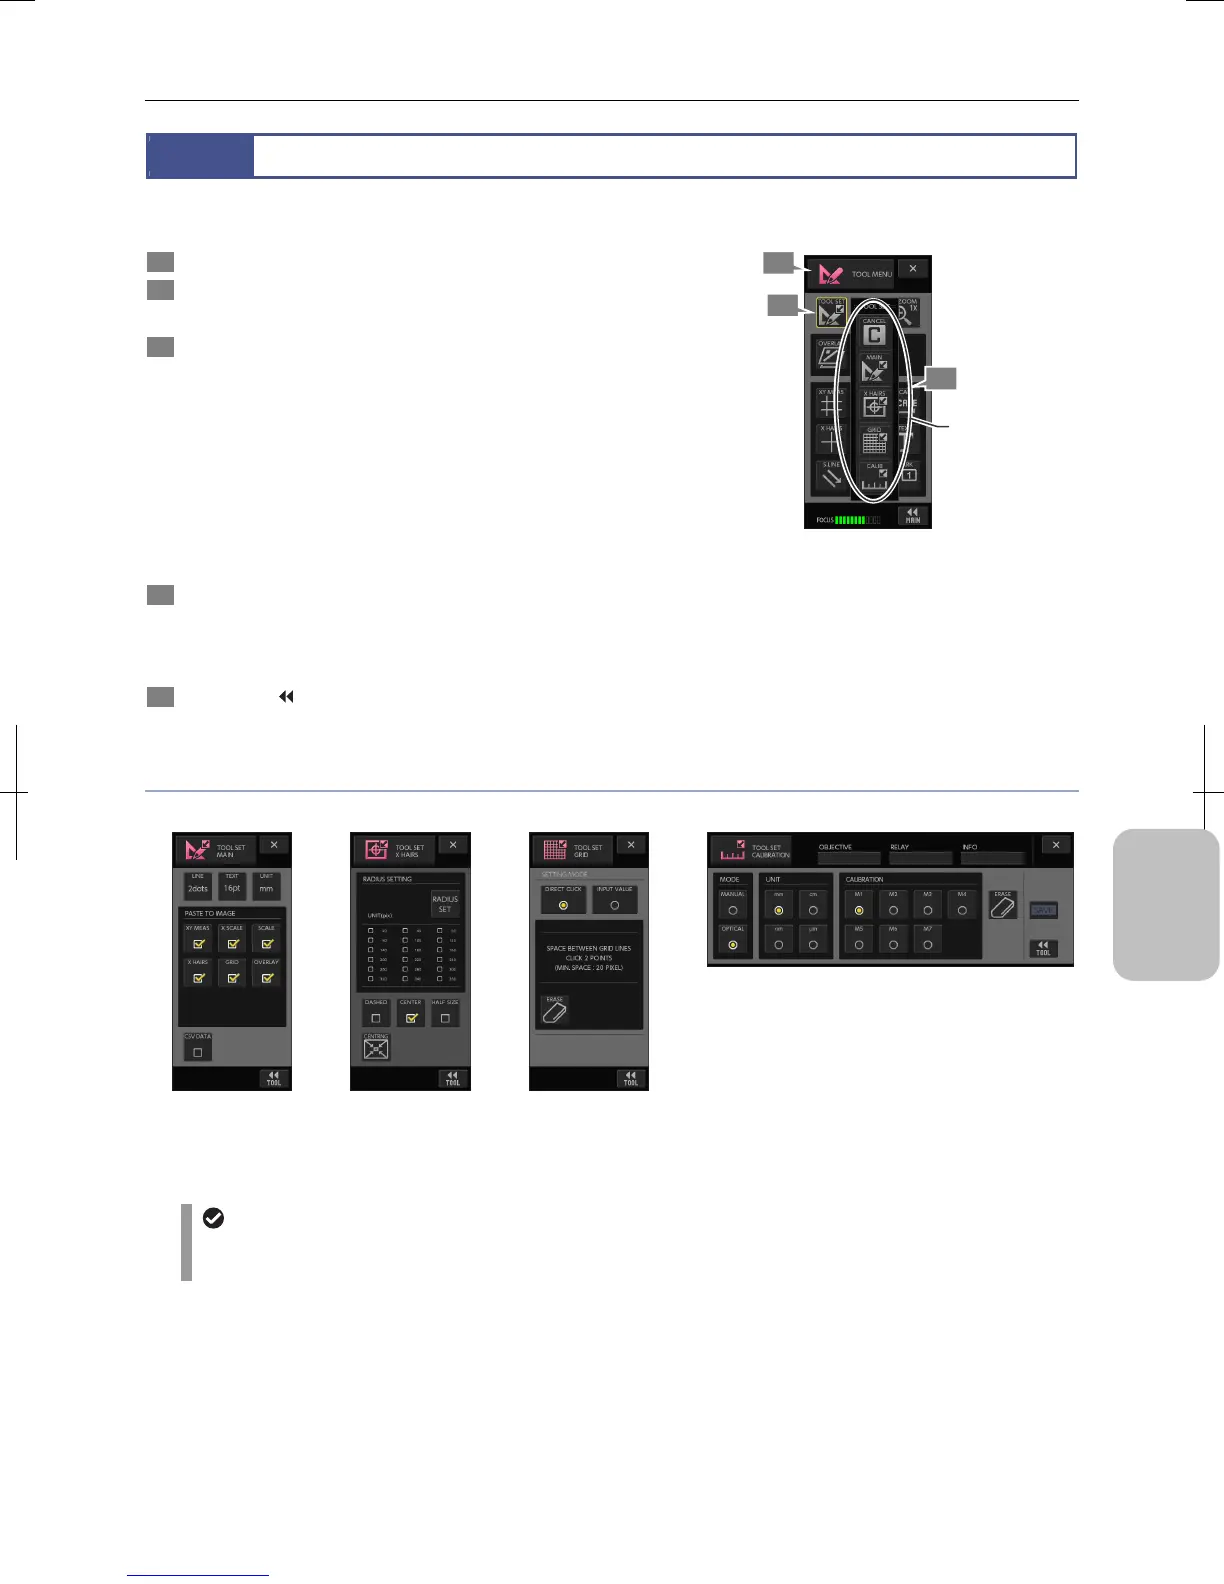
Scaling and measurement can be configured using the [TOOL SET] button on the tool menu.
1 Display the [TOOL MENU] screen.
2 Press the [TOOL SET] button.
The [TOOL SET] button appears.
3 Press a desired button on the [TOOL SET] button to
show a desired setup menu.
The menu changes as you select:
• Main: [TOOL SET: MAIN] screen
• Cross Hairs: [TOOL SET: X HAIRS] screen
• Grid Line: [TOOL SET: GRID] screen
• Calibration: [TOOL SET: CALIB] screen
• Cancel Cancels selection.
Operate the [MENU SELECT] button on each menu on
[TOOL SET] to switch to another menu.
4 Configure settings in each menu. If you see the [SAVE]
button, press it to save the settings.
Content of the setting for each screen is described in the
following pages.
5 Press the [ TOOL] button to return to [TOOL MENU].
Press the [X] button to close the menu.
Switching Setup Menu
TOOL setup menus
[TOOL SET: MAIN]
Configures basic
settings as well as
saving settings with
CSV files.
[TOOL SET: X HAIRS]
Cross hairs and circles.
[TOOL SET: GRID]
Sets up how to draw
grid lines and draws
grid.
[TOOL SET: CALIB]
Registers calibration settings to be basic lengths for
measurement.
Displaying [TOOL SET] menus
You cannot operate any annotation or measurement while a [TOOL SET] menu is displayed. [T.BAR] on the task bar
is grayed out, indicating that operation is restricted.
2
1
3
Switch
setup menu.
 Loading...