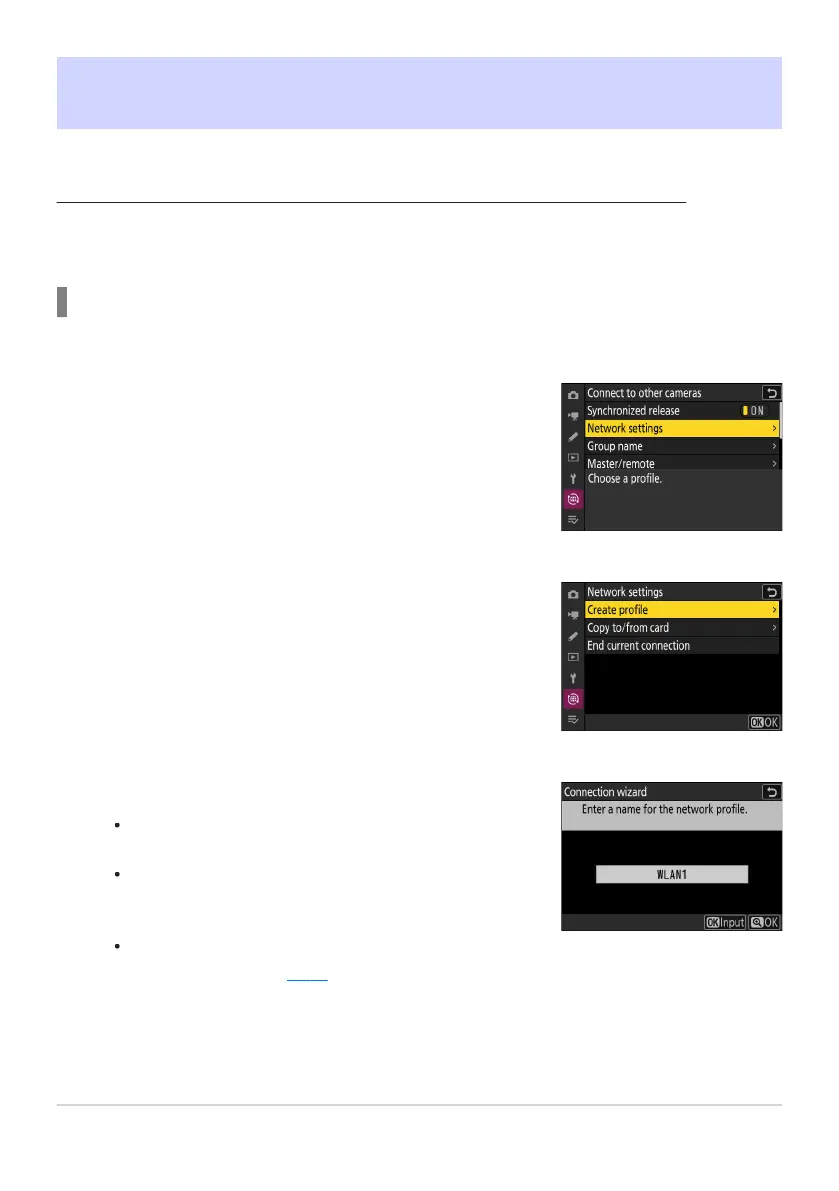
Select [Connect to other cameras] in the network menu,
then highlight [Netw
ork settings] and press 2.
Highlight [Create profile] and press J.
Name the new profile.
To pr
oceed to the next step without changing the default
name, press X.
Whatever name you choose will appear in the network
menu [Connect to other cameras]> [Network settings]
list.
To rename the profile, press J. For information on text
entry, see “Text Entry” (
0 67). Press X to proceed after
entering a name.
Synchronized Release
Configuring and Using Synchronized Release
Follow the steps below t
o create host profiles for synchronized release. Each camera saves the pictures
it takes to its own memory card. Repeat the process to create identical profiles for each camera.
Wireless LAN
To create host profiles when connecting via wireless LAN:
371
Synchronized Release
1
2
3
 Loading...