PCBS AND OTHER ITEMS 10 August, 2001
6-32
6.7 PCBS AND OTHER ITEMS
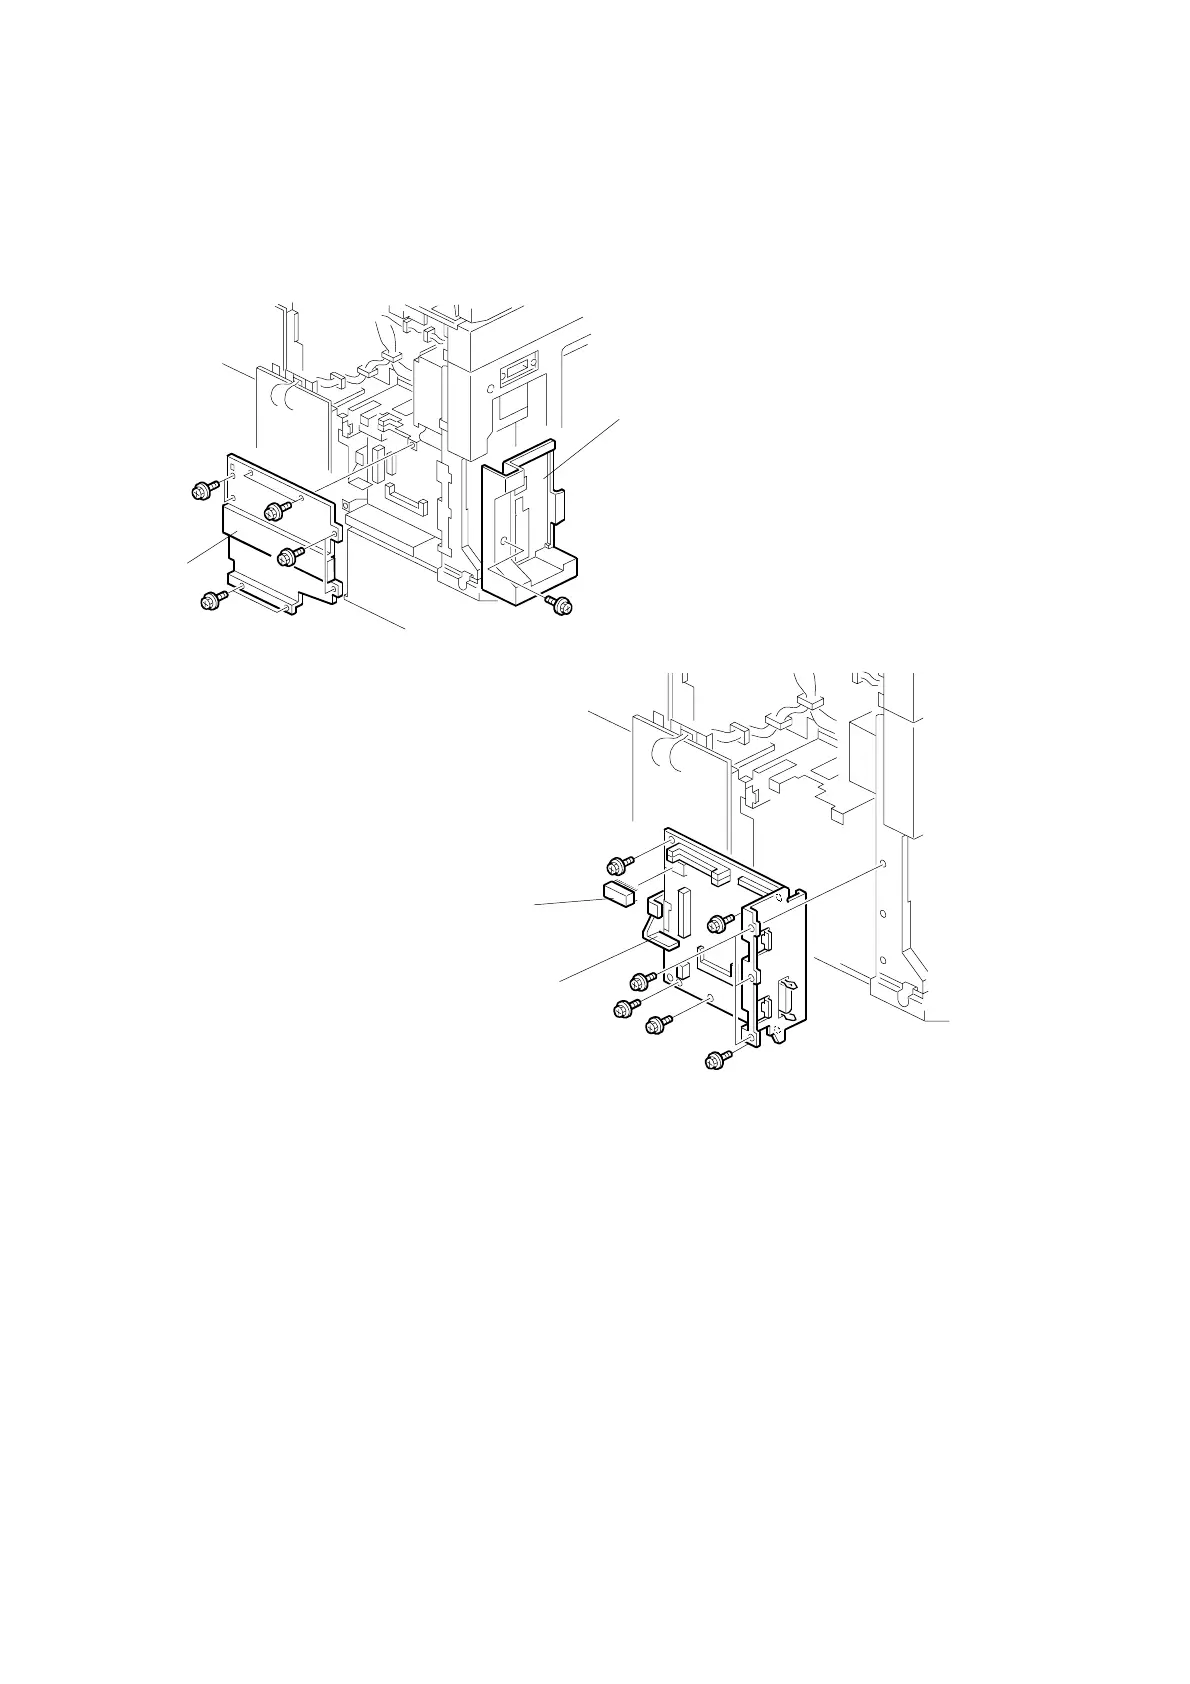
6.7.1 CONTROLLER BOARD
1. Remove the rear cover. (☛ 6.6.3)
2. Remove the optional finisher if it has been installed.
3. Remove the application cover [A] (1 screw).
4. Remove the shield plate [B] (8 screws) or the optional fax unit if it has been
installed.
5. Remove the controller board [C] (2 connectors, 8 screws).
6. Remove the NVRAM [D], and DIMM (printer/scanner, memory, etc) from the
old controller board and put them on the new controller board.
B022R951.WMF
B022R952.WMF
[D]
[C]
[A]
[B]
 Loading...