P
r
o
t
e
c
t
e
d
b
y
c
o
p
y
r
i
g
h
t
.
C
o
p
y
i
n
g
f
o
r
p
r
i
v
a
t
e
o
r
c
o
m
m
e
r
c
i
a
l
p
u
r
p
o
s
e
s
,
i
n
p
a
r
t
o
r
i
n
w
h
o
l
e
,
i
s
n
o
t
p
e
r
m
i
t
t
e
d
u
n
l
e
s
s
a
u
t
h
o
r
i
s
e
d
b
y
V
o
l
k
s
w
a
g
e
n
A
G
.
V
o
l
k
s
w
a
g
e
n
A
G
d
o
e
s
n
o
t
g
u
a
r
a
n
t
e
e
o
r
a
c
c
e
p
t
a
n
y
l
i
a
b
i
l
i
t
y
w
i
t
h
r
e
s
p
e
c
t
t
o
t
h
e
c
o
r
r
e
c
t
n
e
s
s
o
f
i
n
f
o
r
m
a
t
i
o
n
i
n
t
h
i
s
d
o
c
u
m
e
n
t
.
C
o
p
y
r
i
g
h
t
b
y
V
o
l
k
s
w
a
g
e
n
A
G
.
♦ Make sure the dust caps are on the brake fluid bleeder valves.
– Make sure the brake hoses are not twisted.
– Make sure that no brake hose must touch any vehicle com‐
ponents at the maximum steering angle.
– Check brake hoses for porosity and cracks.
– Check brake hoses for chafing.
– Check the brake line connections and fasteners for leaks and
corrosion and for proper seating.
WARNING
Correct any malfunctions (repair procedure).
4.11 Front and Rear Brake Rotors, Checking
Brake Pad Thickness and Condition
⇒ “4.11.1 Front Disc Brake Pads”, page 73 .
⇒ “4.11.2 Rear Disc Brake Pads”, page 74 .
⇒ “4.11.3 Brake Rotors, Checking”, page 74 .
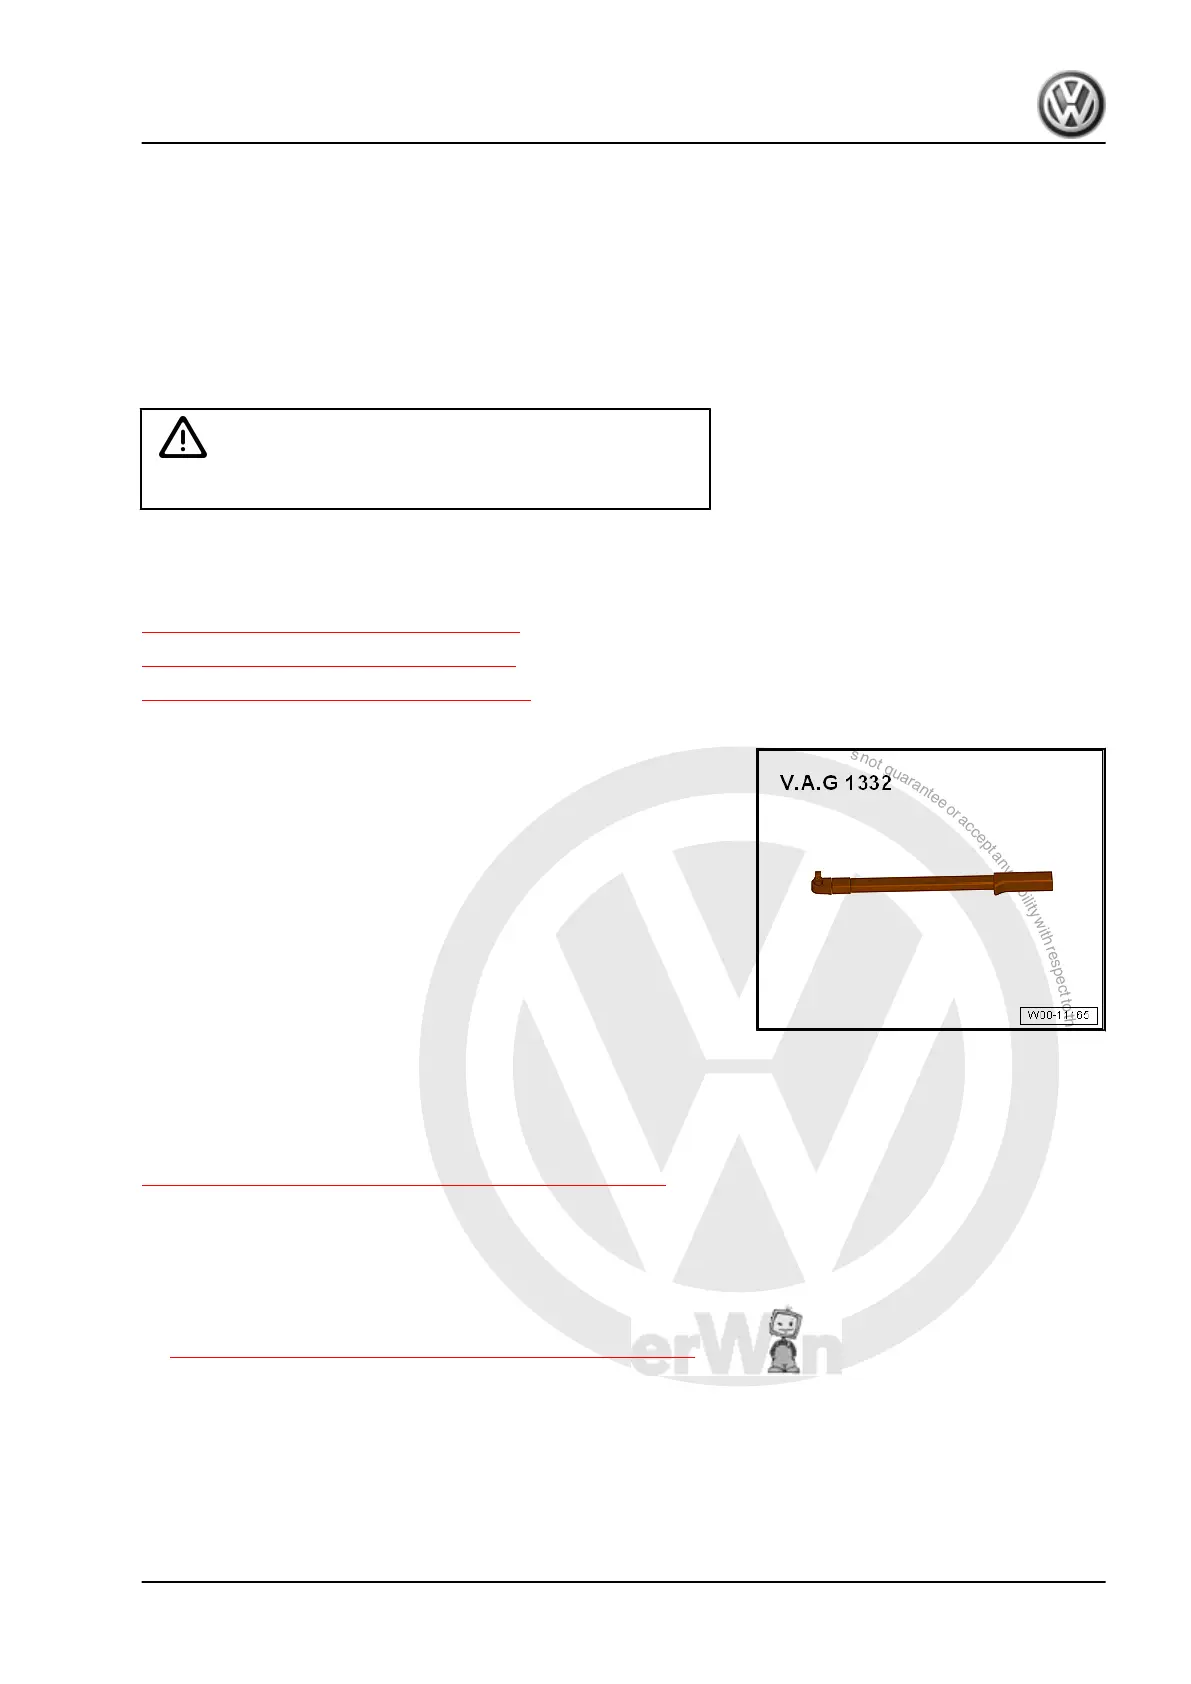
Special tools and workshop equipment required
♦ Torque Wrench 1332 40-200Nm - VAG1332-
♦ Flashlight and mirror
Perform the Following Procedure:
The adapter to loosen/tighten the anti-theft wheel bolts is located
in the vehicle tool kit. Refer to
⇒ “4.51 Wheel Bolts, Tightening to Specification”, page 146 .
4.11.1 Front Disc Brake Pads
– To be better be able to evaluate the remaining pad thickness,
use a mirror and, if necessary, remove the tire on the side
where the break wear indicator is installed.
– Remove the wheel bolt caps if necessary. Refer to
⇒ “4.51 Wheel Bolts, Tightening to Specification”, page 146 .
– Mark the position of wheel in relation to the brake rotor.
– Remove the wheel bolts and then the wheel.
Golf 2013 ➤ , Golf Sportsvan 2015 ➤ , Golf Variant 2014 ➤ , e-Golf 2014 ...
Maintenance - Edition 06.2015
4. Procedure Descriptions 73
 Loading...