MP-20x Telephone Adapter 66 Document #: LTRT-50609
User's Manual
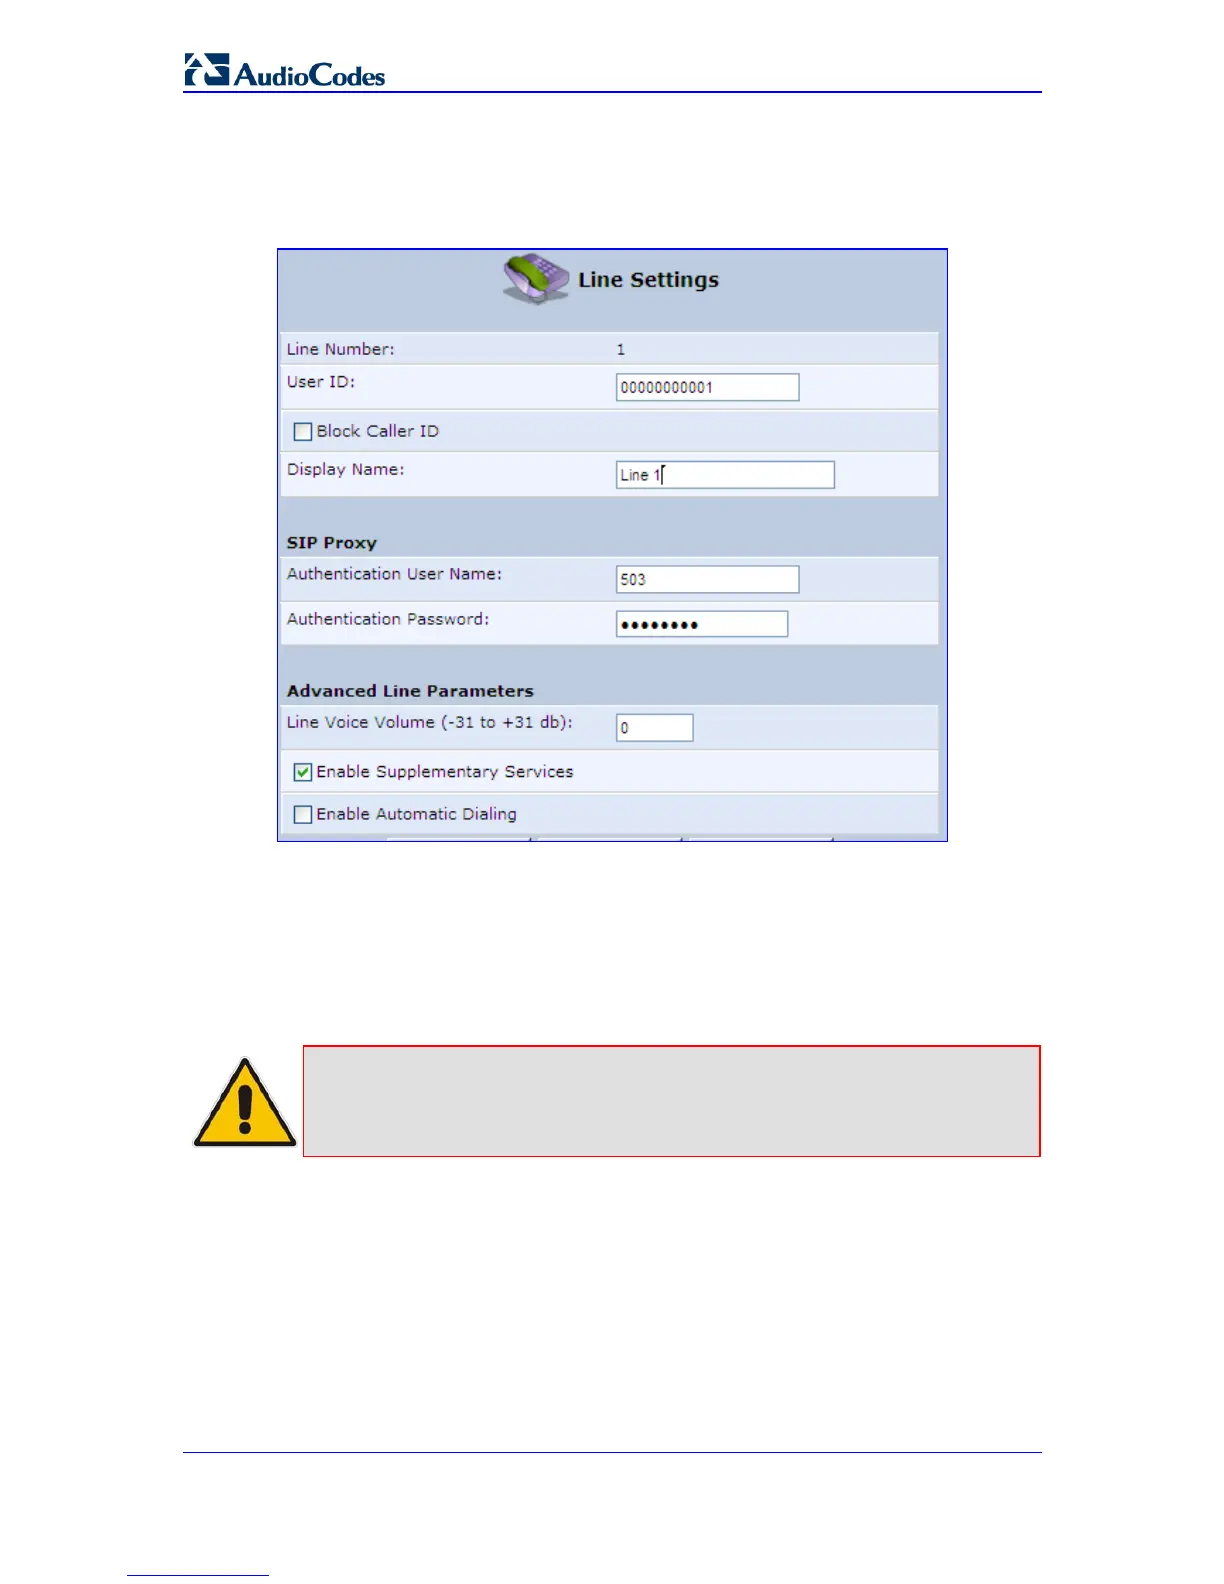
3. Click the Edit icon corresponding to the line that you want to configure (example, line
1); the ‘Line Settings’ screen opens. Use the configuration values provided by your
ISP to configure the parameters in this screen.
Figure 6-2: VoIP - Line Settings - Defining a New Line
4. Click the Signaling Protocol tab and then select the ‘Use SIP Proxy’ check box (refer
to 'Configuring Signaling Protocol Parameters' on page 37).
5. In the field ‘Proxy IP Address or Host Name’, define the ISP’s SIP proxy, provided by
the ISP (refer to 'Configuring Signaling Protocol Parameters' on page 37).
6. Click OK or Apply to complete the VoIP configuration.
Note: Check that MP-20x was successfully registered by clicking System
Monitoring menu > tab Voice over IP; entry ‘SIP Registration’ should indicate
‘Registered’ for the line(s) you configured. Phone 1 and Phone 2 LEDs should
be flashing slowly.
Pick up the phone receiver and listen for the dial tone; you’re now ready to place an
outgoing call.
All your settings are saved in MP-20x's non-volatile memory. From now on, you won’t
need the PC to make VoIP calls.
 Loading...