38
Creating and Editing Embroidery Patterns
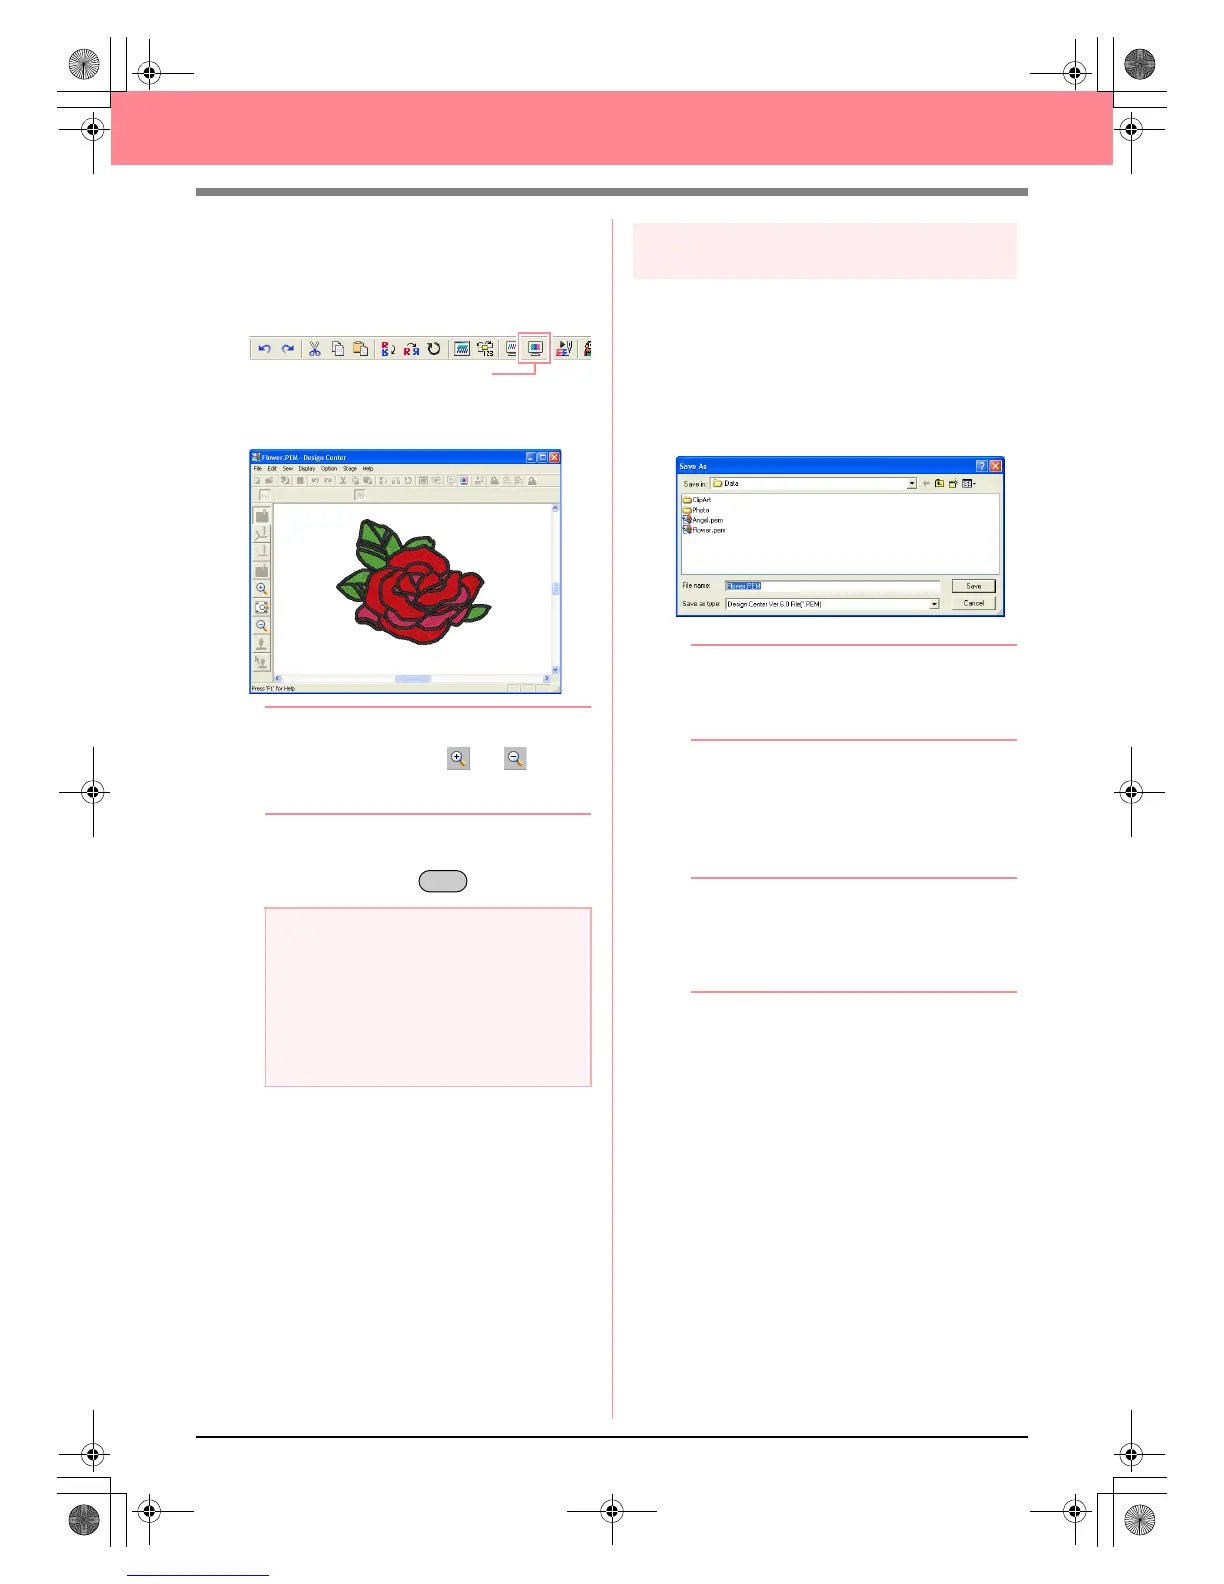
3. To display a realistic preview of the
embroidery pattern, click Display on the menu
bar, and then click Realistic Preview.
An alternate method is to click the Toolbar
button indicated below.
→ A realistic preview of the embroidery pat-
tern appears.
b Memo:
To zoom in (or out), click (or ) on the
Tool Box, and then click the desired area of
the embroidery pattern.
4. To leave the realistic preview display, repeat
step
3., or press the key.
Step 9
Saving the file
Since this embroidery pattern will be used as the
basis of a more complex embroidery picture, we
need to save it.
1. Click File on the menu bar, and then click
Save As.
→ The Save As dialog box appears.
b Memo:
To overwrite the original file in the original
folder, use the menu command
File
–
Save
instead.
2. The default name Flower.pem is displayed.
3. If necessary, change the drive and folder.
4. Click Save to save the file.
b Memo:
.pem files cannot be written to original cards.
Import them into Layout & Editing first. (For
details, refer to “Importing embroidery
patterns from Design Center” on page 128.)
a Note:
• The embroidery pattern cannot be edited
while the realistic preview is displayed.
• The Realistic Preview function cannot
display a clean preview of the pattern if the
monitor is set to 256 colors or less. The
monitor should be set to at least 16-bit
High Color (65536 colors).
Realistic Preview
Esc
PeDesignV6Eng.book Page 38 Thursday, July 8, 2004 11:59 AM
 Loading...