6 Alarms
151
4. To change the FiO2 alarm, press the Control Knob.
5. The top of the slider is selected bright blue. Turn the dial to adjust the alarm
rate for the upper FiO2 percentage limit, from 21% to 100%, up or down.
Note that if you attempt to adjust the upper limit of the alarm below the
currently-selected lower limit, you push the lower limit down.
6. Press the Control Knob to confirm your selection.
7. The bottom of the slider is selected bright blue. Turn the dial to adjust the
alarm for the lower percentage limit. Note that adjusting the lower limit
higher than the currently-selected higher limit moves the higher limit up.
8. Press the Control Knob to confirm the settings.
9. The Alarm Setting screen is re-displayed. You can dial and select another
alarm setting to adjust, or dial and select Accept to accept all the alarm
settings and return to the Main screen.
Setting the Leak Alarm
To set the leak percentage limit:
1. Select the Menu option in the Main screen to view the Main Menu.
2. Select the first item on the Main Menu, Alarm Settings
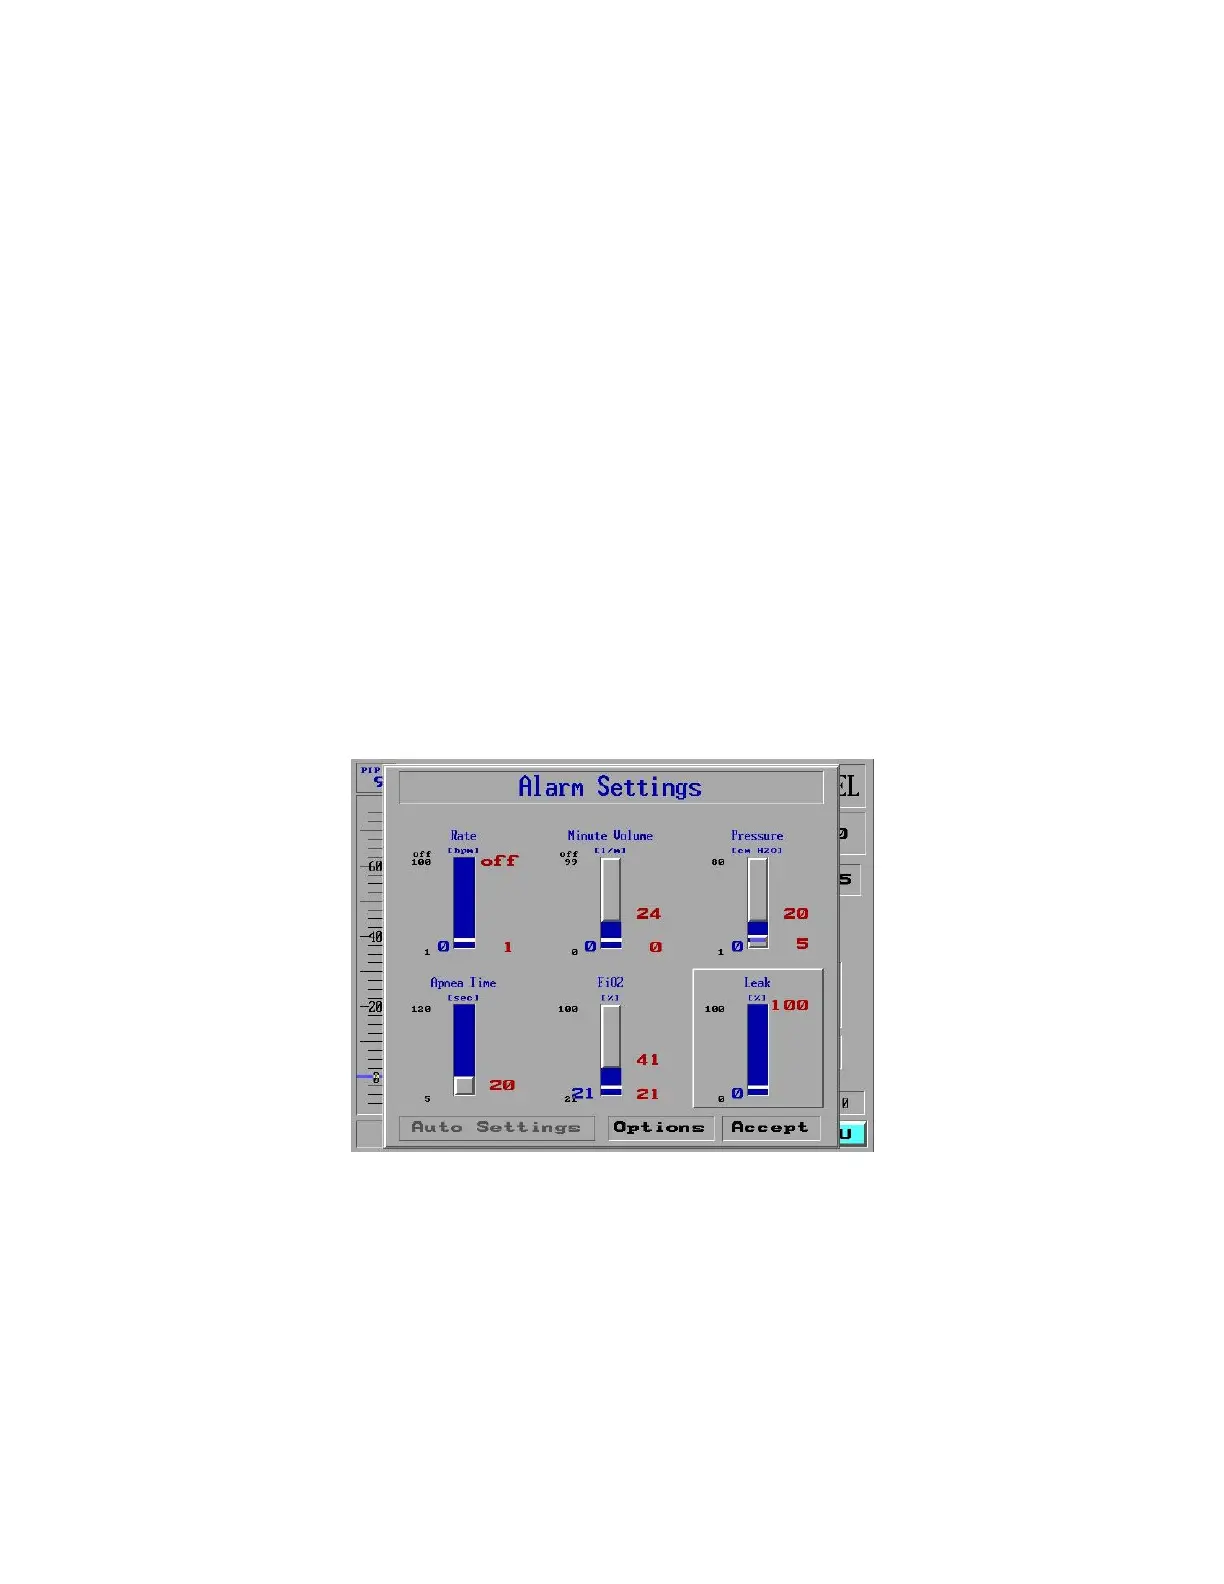
3. In the Alarm Settings screen, dial the Control Knob until Leak is selected in
relief (Figure 139).
Figure 139: The Leak alarm Slider Selected
4. Press the Control Knob to change the alarm setting for the Leak.
5. Adjust the Control Knob to select a percentage between 0 and 100%.
6. Press the Control Knob to confirm the settings.
7. The Alarm Setting screen is re-displayed. You can dial and select another
alarm setting to adjust, or dial and select Accept to accept all the alarm
settings and return to the Main screen.
 Loading...