D
IRECTION FR091521, REVISION 1 VIVID S60N/VIVID S70N BASIC SERVICE MANUAL
3-42 Section 3-6 - Configuration
PRELIMINARY
3-8-3 Select TCP/IP Screen
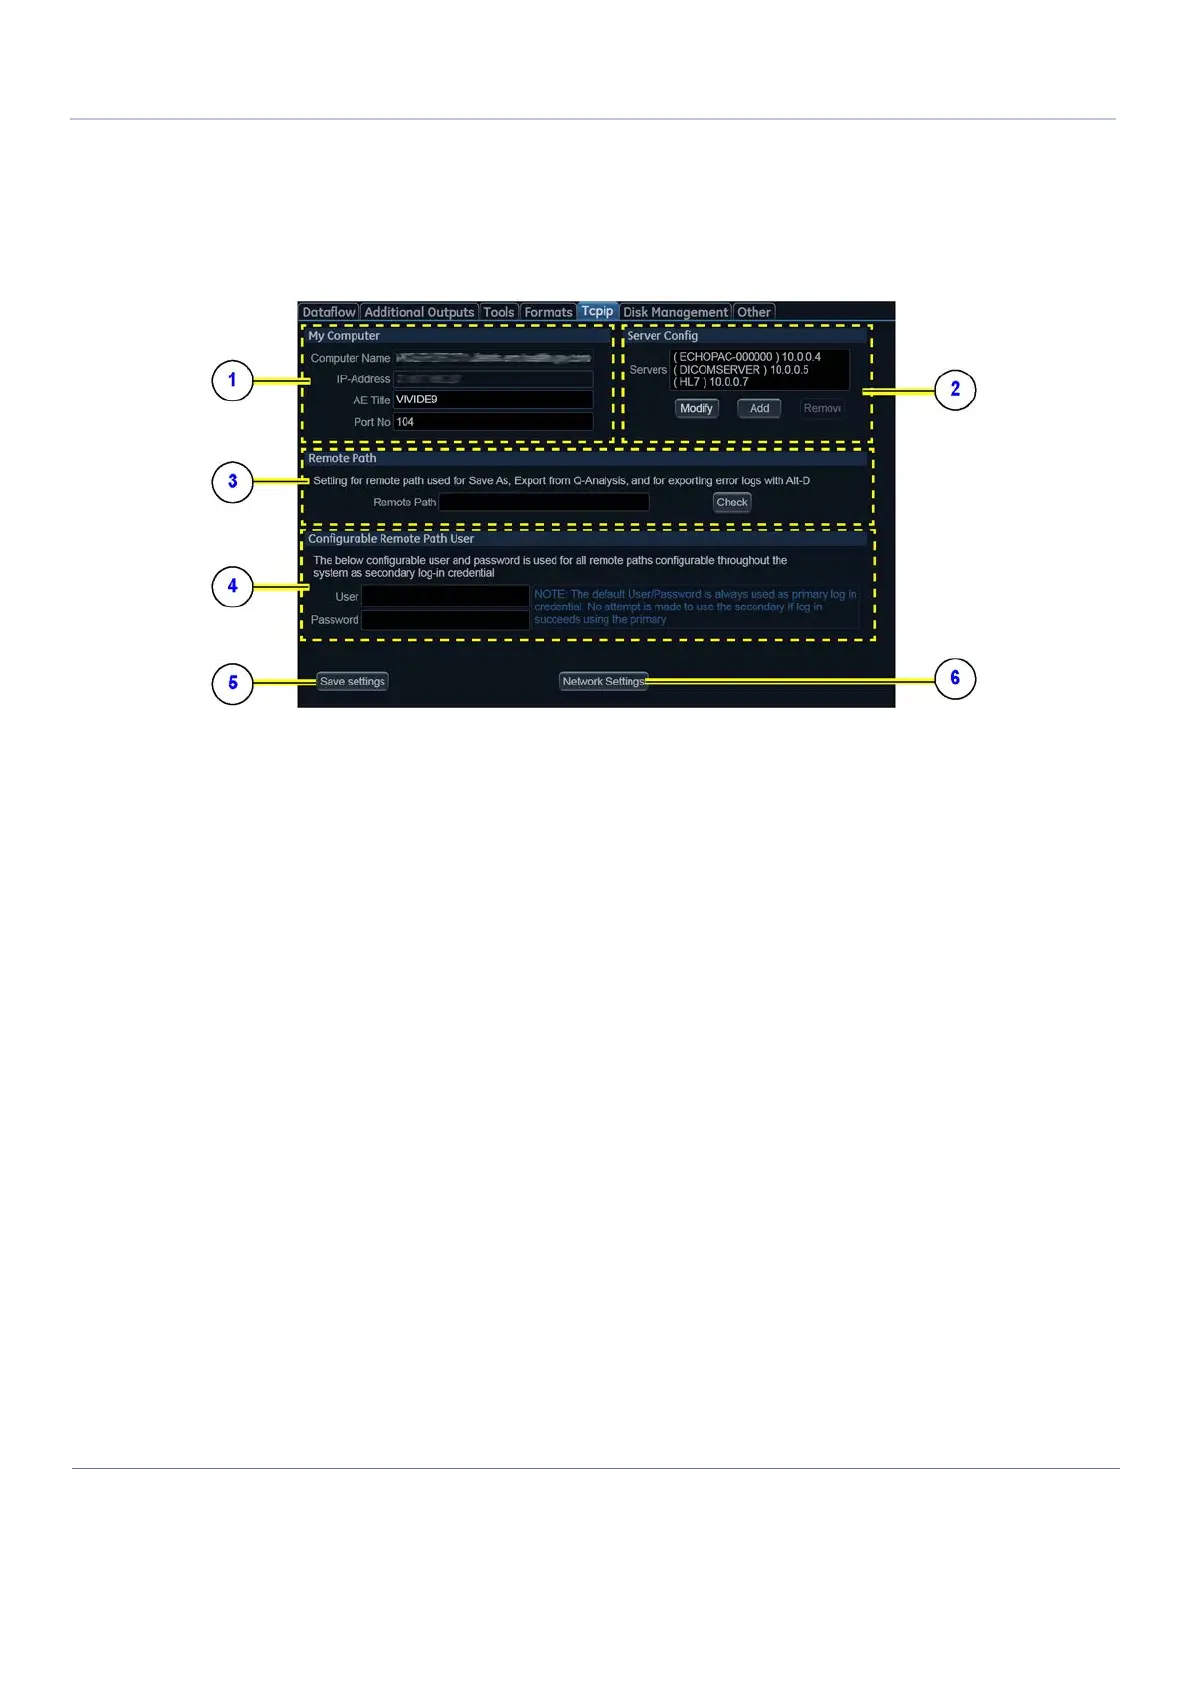
Figure 3-30 TCP/IP Overview Screen for Vivid™ S60/Vivid™ S70
Related information:
• Logging On to the Vivid™ S60/Vivid™ S70 as “ADM” on page 4 - 8
1. Press Config (F2) and log on as adm.
2. If not already selected, select Connectivity from the bottom row of “buttons” on the screen.
3. Select the TCP/IP TAB. (it is named Tcpip).
The resulting screen gives you an overview of many of the network settings for Vivid™ S60/Vivid™ S70.
1. My Computer:
• Computer Name:
For Vivid™ S60/Vivid™ S70, this name is on
the form: VIVIDX-00NNNN, where “00NNNN”
is a number (NNNN is the scanner’s serial
number).
• AE Title:
VIVIDEx (where ‘x’ is the model number)
• Port No:
Default port number: 104
2. Server Config:
• Servers:
List of servers
• Buttons:
Use the buttons to Add, Modify or Remove
servers.
3. Remote Path
Used for Save As, Export from Q-Analysis, and
for exporting Error Logs with Alt-D.
4. Configurable Remote Path User:
Add Secondary Log-in Credential.
5. Save Settings:
Select Save Settings to archive any changes
you have done to the TCP/IP settings.
6. Network Settings:
Use Network Settings if you need to change
Vivid™ S60/Vivid™ S70’s IP settings or turn
DHCP on or off.

 Loading...


