D
IRECTION FR091521, REVISION 1 VIVID S60N/VIVID S70N BASIC SERVICE MANUAL
8-42 Section 8-3 - Control Console Components - Replacement Procedures
PRELIMINARY
8-3-5 Touch Screen Rotaries Board Replacement Procedure
8-3-5-1 Tools
Phillips screwdriver.
8-3-5-2 Time Required
30 min
8-3-5-3 Preparation
Shut down the Vivid™ S60/Vivid™ S70 ultrasound unit, as described in Power Shut Down on page 4 - 7.
8-3-5-4 Touch Screen Rotaries Board Removal Procedure
1) Raise the console to the maximum up position.
Make sure it is aligned in the central position (not pulled to one side or the other).
2) Remove the following Touch Screen covers: service, rear:
3) Remove the Touch Screen:
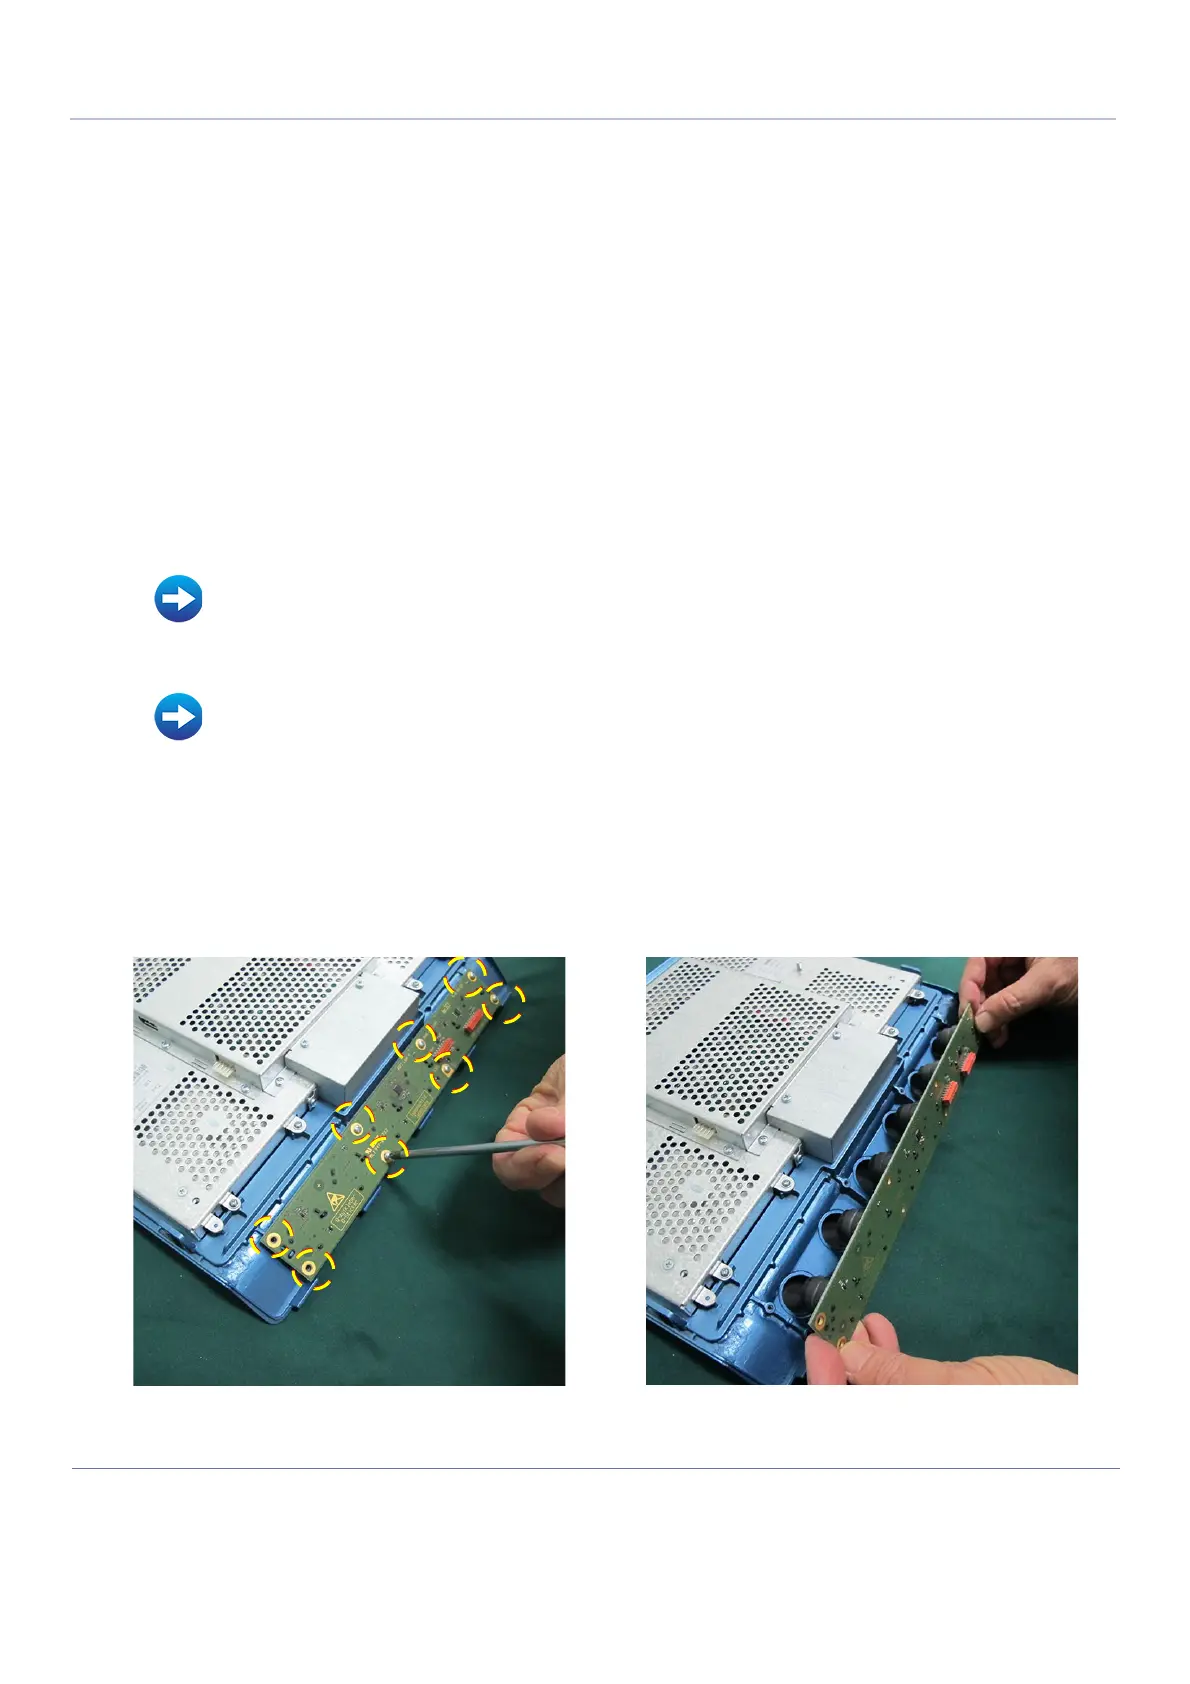
4.) Remove the six rotary knobs from the Rotaries Board - Figure 8-48.
NOTE: After removing the Touch Screen Rotary Knobs, keep them safely, together with the screws, as they
will be required for refitting to the new Touch Screen Rotaries Board.
5.) Carefully lay the Touch Screen face-down on a clean, soft, stable surface.
6.) Remove the 8 securing screws from the Touch Screen Rotaries Board - Figure 8-47.
Refer to Table 9-11 on page 9-10.
• Touch Screen Service Cover Removal Procedure on page 8 - 34
• Touch Screen Rear Cover Removal Procedure on page 8 - 36
• Touch Screen Removal Procedure on page 8 - 38
Figure 8-47 Removing the Touch Screen Rotaries Board

 Loading...


